Homemade Pita Bread Recipe
This Pita Bread is made with just a few simple and inexpensive ingredients. The whole process takes about 2 hours from start to finish, but when done, you’ll have delicious, homemade pita bread that no store-bought version can rival. Use this flatbread to make sandwiches, serve with dips, or to make a delicious Margherita Pizza.
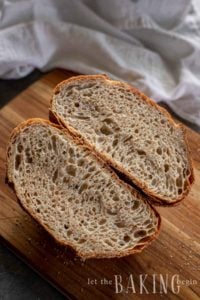
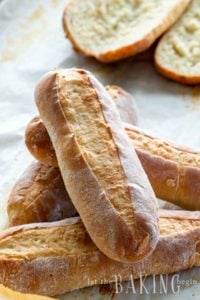
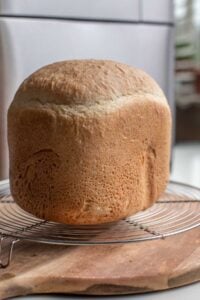
If you love how this pita bread turned out, you’ll also love this Bread Recipe for a Bread Maker and this Basic Brioche Bread Recipe. You’ll be at the top of the homemade bread game!

Homemade Pita Bread
Making bread, in general, can sound intimidating and it may be a challenge but that is not the case with this homemade pita bread.
You might be wondering, is making homemade pita bread worth it? Absolutely! Often times, store-bought pita bread has been sitting in its packaging for way too long and it honestly doesn’t give this bread justice. You will find that it can seem tasteless and almost have a stale texture.
Once you make this homemade pita bread recipe at home, you will see how the flavors and texture are so different (and better!) from a store-bought version.

Tips for Making This Pita Bread Recipe:
If you haven’t made a pita bread recipe before, you may not know how to start the dough or bake it properly without drying it out. Even though this pita bread recipe is pretty straight forward, there are a couple of tips and tricks you need to know to get the best possible result and I’m here to tell you all about it.
- Check your yeast: All of the ingredients needed to make this pita bread recipe are probably already in your pantry. The only one you might need to double-check that you have is your yeast. If so, make sure it’s unexpired before you start!
- Be careful with flour: Don’t be tempted to add too much flour as you’re making the dough. The moisture is needed for that beautiful signature pita pocket that it forms when the hot moisture from the dough has nowhere to escape so it forms a pocket of air on the inside.
- Do not overcook: You don’t need to bake both sides as this typically dries the pita too much. To keep the pita bread fluffy and moist, only bake it on one side for a couple minutes.
- Store it properly: If you don’t plan to eat it right away, go ahead and wrap it in plastic wrap and then freeze until ready to use. When ready to eat, just thaw it out in the microwave or drop onto a hot skillet to get some char marks and to warm it up.
How To Make Pita Bread
For detailed recipe instructions, see the recipe card at the bottom of the post.

- Stir together warm water, sugar, and yeast and let it rise for about 10 minutes.
- Mix together the rest of the pita bread ingredients with the proofed yeast using a hook attachment on your mixer.
- Form the dough into a round ball and add oil to the dough and bowl to prevent sticking.
- Cover the bowl with a clean kitchen towel and keep in a warm place for 1-2 hours.

- Once the dough has doubled in size, place on top of a floured surface and cut into 8 equal pieces.
- Roll each piece into a ball and then flatten into a disc.
- Use a rolling pin to thin out each disc and let them proof for 30 minutes.

- Place the flat pitas on a heated cast-iron skillet in a 500F oven and bake for about 3 minutes on one side only.
- Pull out with tongs once it puffs up.
- Repeat the process until all pieces of pita bread have been baked.

What To Serve With This Homemade Pita Bread?
My favorite way to enjoy this homemade pita bread is to cut them into wedges and serve it with some hummus, Tzatziki Sauce and sliced vegetable crudites. You can also serve it on the side of a Greek Salad or even take this salad and stuff it inside the pita pocket to make a wholesome sandwich.
If you want to enjoy it in its purest form, you’re going to really love it plain or brushed with a mixture of garlic, oil, and parsley (like this Chimichurri Sauce). Believe me!

Try These Other Amazing Bread Recipes:
Homemade Pita Bread Recipe
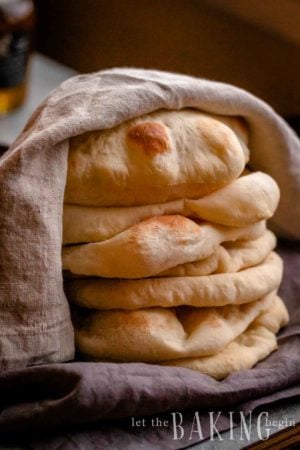
This Pita Bread is simply made with flour, yeast, sugar, salt, olive oil and just a cup of warm water. The whole process takes about 2 hours from start to finish, but when done, you'll have delicious, handmade pita bread that no store-bought version can rival.
Ingredients
- 2.5 cups flour
- 1 tsp dry active yeast
- 1 tsp salt
- 1 Tbsp granulated sugar
- 1 Tbsp olive oil
- 1 cup warm water
Instructions
How to make the dough
-
Check if your yeast is active by stirring half of the warm water with 1 tsp active dry yeast and 1 tbsp sugar. Leave undisturbed for about 10 minutes. If the mixture bubbles and rises slightly, the yeast is good to use. Otherwise, discard and do not start the recipe until new, unexpired yeast is obtained.
-
Knead the dough: Next, in a mixing bowl fitted with a hook attachment, combine 2 1/2 cups of flour, 1 tsp salt, the remaining 1/2 cup warm water and the proofed yeast mixture. Knead on low-medium speed until the dough is smooth, elastic and tacky to the touch, about 10 minutes. If you have no stand mixer, you can knead the dough by hand, for about the same amount of time.
-
Now, oil the bowl and the dough with 1 tbsp of oil, cover with a clean kitchen towel and place in a warm (not above 100F), draft-free place. An oven with the light on is a great place for this. So is the top of the refrigerator. Allow the dough to proof for about 1-2 hours or until doubled in size.
How to shape and bake pita bread
-
Invert the dough onto a floured surface and divide it into 8 equal pieces. Roll each piece into a ball, then flatten into disks. Using a rolling pin, roll each pita dough disk on a floured surface to no more than 1/4 inch of thickness. Flour your surface as needed, but do not use too much.
-
Allow the rolled pitas to proof for about 30 minutes. After 15 minutes into proofing, preheat oven to 500F (or as hot as your oven gets) with a baking stone or a cast-iron skillet in there.
-
Then, quickly open the oven and gently drop one pita dough disk top side down on the baking stone or cast iron and watch it rise into a pocket, about 3 minutes. You don't need to bake both sides as this typically dries the pita out too much. For a more fluffy and moist pita, only bake on it on one side. Then, using tongs, gently remove it from the oven and cover with a tea towel.
-
Repeat with the rest of the dough.
Recipe Notes
Use the pita pocket to make a sandwich, or cut it into wedges and serve with your favorite dip.

Thank you for following me on Instagram, Facebook & Pinterest!
Hashtag your photos #LetTheBakingBeginBlog so I can see your creations and for a chance to be featured!
Marina | Let the Baking Begin


I have made this recipe about 10 times now, and my pitas almost never form a pocket. Any idea what I’m doing wrong? I follow the recipe exactly as written.
I want to pre make them for an appetizer on thanksgiving- if I make them a day or two ahead of time should I still freeze them ? Or is there a better way to store them short term?
Can this be mixed, kneaded, and risen in a breadmachine??
Yep!
Love this simple recipe!! And it’s so yummy!! Always a hit when I make it!!
yes! love reading your feedback, thank you for taking the time ❤️
Hi, I made them but I put them on a pan and parchment paper in the oven. And in 3 min they weren’t rising and still white. So I did for like 6 minutes, but when I took them out they were crunchy. Did I do something wrong? Or how can I make them soft?
Hi Anna,
Sounds like your oven wasn’t hot enough. Try to increase temperature and it should work. The difference in temperature is what makes the pitas rise and open into a pocket.
Hey hey! Super pumped to try out this recipe — can a baking sheet be used if we don’t have a cast iron pan or pizza stone??
Hi Amelia, yes, just preheat it well before adding the pita dough. The baking sheet doesn’t retain the heat as well as the cast iron so there might not be as much of a rise, but the flavor will still be there.
Wow a delicious cooking blog.
Olga.
Thank you so much, Olga!
Great recipe. When I pull the pita out of the oven I throw it in a brown paper shopping bag. It seems to keep them from drying out or getting too hard while you make the others. Sometimes I brush a bit of olive oil on one side and throw some kosher salt in the bag. Shake em up. Do t store them in the bag tho. Plastic bag and freeze. Cheers
Great tip, thank you for sharing Bill!
This dough was really wet and difficult to work. I let it rise for 2 hours. Bland and needs more salt. I’m sorry, maybe I did something wrong.
Hi Christy,
The dough should’ve been soft but not wet. If you do try it again just add a little bit more flour until it comes together into a soft dough. It could be that your flour has less gluten content so it requires more flour than the flour I used.
I love pitha bread.. French bread….
I haven’t been able to find the fresh moist pita bread that we had while visiting Israel. I will try these, thanks!