
Raspberry Scones Recipe with White Chocolate
Raspberry scones that are tender and buttery, with white chocolate and a pink raspberry glaze over the top. I pull a tray out of the oven and half of them are gone before they cool. That red ribbon through the middle is my favorite part, and it comes down to how the berries go in.
If you are a scone person, my blueberry scones are the softest of the bunch, and these strawberry scones come out a little more tart.
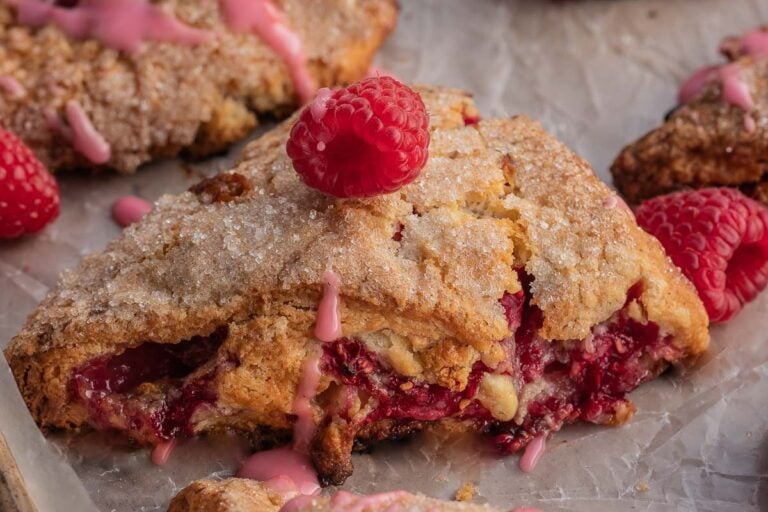
Here’s why you’ll Love these Raspberry Scones
This is the one scone on my site where the fruit gets rolled through the dough instead of stirred into it, and that changes what lands on your plate.
- The tart and the sweet together – the raspberries bake down sharp and the white chocolate melts into soft pockets right beside them. Out of every berry scone I have made, this is the pairing I go back to.
- Fruit in every bite – the berries are rolled up inside the dough, so every triangle has a red ribbon of fruit running through the middle.
- They hold their shape – a scone carrying this much fruit usually spreads into a puddle. These come out of the oven still looking like triangles, with edges you can see.
- The glaze tastes like raspberries – it’s pink from the crushed berries stirred into it, so it adds real fruit flavor on top and not just sugar.
- You can bake two at a time – the shaped triangles go into the freezer raw and bake from frozen, so a bag of them keeps in my freezer for up to 3 months and Saturday breakfast takes no work at all.

Ingredients for Raspberry Scones with White Chocolate
The raspberries and the butter are the two that decide how these turn out. Amounts are in the recipe card at the bottom.
Raspberry Scone Dough
- All-purpose flour: plain all-purpose, not bread flour. More protein means more gluten, and gluten turns a scone tough instead of tender.
- Baking powder: the only lift these get. It works twice, once when it hits the cream and again in the oven heat, so check that yours is still fresh.
- Kosher salt: it sharpens everything else, so the scone tastes like raspberry instead of just sweet. I use Morton, and the amount in the card is measured for it.
- Unsalted butter: cold, straight from the fridge or the freezer. Those cold shreds turn to steam in the oven and push the dough apart into flaky layers.
- Heavy cream: cold and full fat. The fat coats the flour and keeps gluten from forming, so the crumb stays short and tender; half-and-half has less fat and bakes drier.
- Egg: straight from the fridge. Its protein sets in the oven and gives the crumb enough structure to hold all that fruit instead of collapsing around it.
- Lemon zest: the oils in the peel carry the aroma, so a little zest lifts the raspberry. Orange zest is lovely here too.
- Vanilla extract: it rounds off the white chocolate. Use the real thing if you have it.
- Raspberries: frozen ones behave better than fresh in this recipe. They hold their shape while you roll the dough, and they keep the butter cold at the same time.
- White chocolate: it is cocoa butter and sugar with no cocoa solids, so it goes soft and creamy in the oven instead of holding its shape. Chopped melts into bigger pockets than chips, and you can leave it out for a plain raspberry scone.
Sugar Crust
- Melted butter: brushed on top so the sugar has something to stick to, and it helps the tops brown.
- Coarse sugar: sanding or turbinado. The crystals are too big to dissolve at oven temperature, so they stay crunchy, while regular granulated melts into a caramel sheet.
Raspberry Glaze
- Powdered sugar: it has a little cornstarch in it, which is why the glaze sets into a soft shell instead of running off the sides.
- Lemon juice: it thins the glaze and cuts the sweetness. Lime juice works too.
- Raspberries: a few crushed berries make the glaze pink and give it real fruit flavor, so no food coloring goes near it.
How to make Raspberry Scones (step-by-step)
Everything happens in one bowl until the dough hits the counter. Rolling the berries in is the only part worth slowing down for, and the photos walk you through it.
How to Make the Raspberry Scone Dough
The dough wants to stay cold and barely mixed, so work quickly and stop early.
- Heat the oven. Set it to 425°F with a rack in the middle, and line a rimmed baking sheet with parchment.
💡 Why does the oven have to be this hot?
Seize the outside before it can spread. A hot oven sets the crust while the middle is still cold, so the scone holds its triangle. 425°F does it in mine, and if yours bakes cool, go up 15 to 25 degrees. - Whisk the dry ingredients and the butter. Whisk the flour, sugar, baking powder, salt, and lemon zest together, then grate the cold butter straight in and toss until every shred is coated in flour.
💡 Why does the butter have to be cold?
Keep the butter cold right up to the oven. Warm butter melts on the counter instead of in the oven, and a scone made with it spreads flat. If your kitchen is warm, park the bowl in the fridge between steps. - Add the wet ingredients. Make a well in the middle, add the egg, cream, and vanilla, and whisk those together inside the well before you fold the flour in.
- Fold in the white chocolate. Keep folding and pressing with a spatula until the mixture looks chunky and shaggy rather than smooth.
- Bring the dough together. Tip it onto the counter and press it into a ball with your hands. It will look dry and crumbly, and that’s right, so stop as soon as it holds.
💡 It looks too dry. Did I do something wrong?
Stop mixing while the dough still looks dry. A smooth, tidy scone dough has been worked too long and bakes tough. Shaggy and barely holding together is exactly what you want going onto the counter.
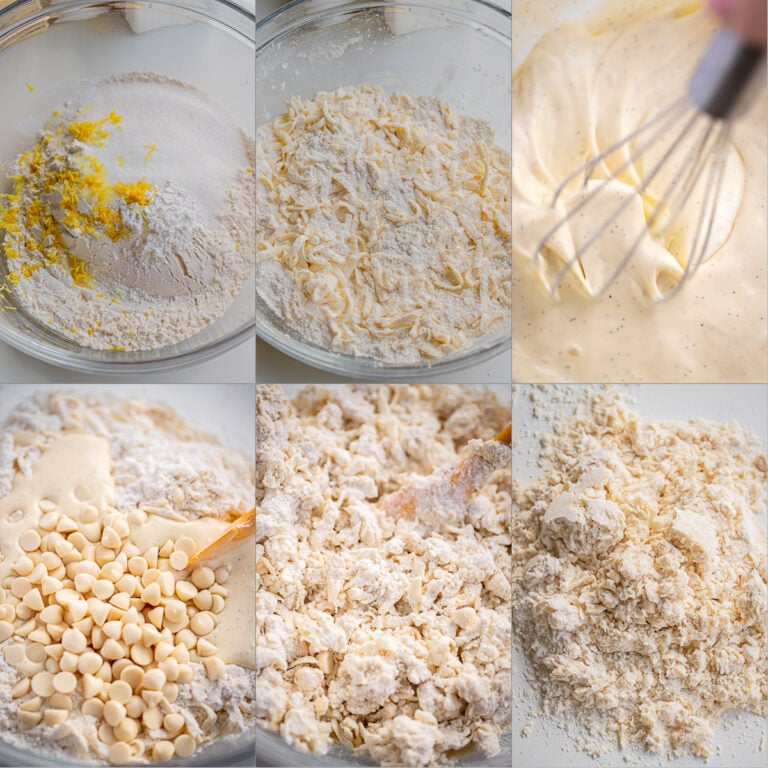
Pro Tips for the Raspberry Scone Dough
- Keep the butter cold right up to the oven. Warm butter melts on the counter instead of in the oven, and a scone made with it spreads flat. If your kitchen is warm, park the bowl in the fridge between steps.
- Stop mixing while the dough still looks dry. A smooth, tidy scone dough has been worked too long and bakes tough. Shaggy and barely holding together is exactly what you want going onto the counter.
How to Shape and Cut the Raspberry Scones
This is where the red ribbon comes from. The berries go on flat dough and get rolled up inside it.
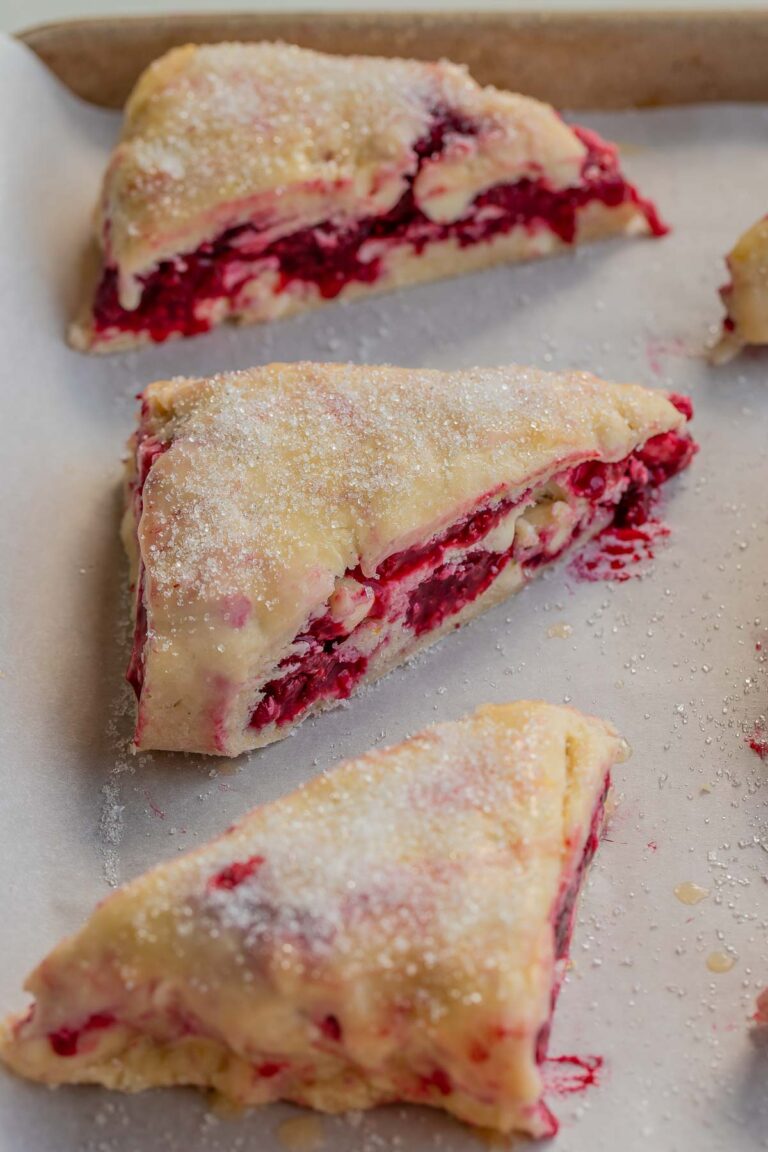
- Roll it out and add the raspberries. Flour the counter well, roll the dough into a rectangle, then scatter the raspberries over it and press them in gently.
💡 Fresh raspberries or frozen?
Use frozen raspberries, not fresh. Fresh berries burst under the rolling pin and streak the whole dough pink. Frozen ones hold their shape and chill the dough while you work, so you get a clean red ribbon. - Shape it into a log. Roll the dough up from the long edge, pressing as you go to close the air pockets without crushing the berries, then pat the top flat so the log is rectangular. A bench scraper helps you lift the dough as you roll.
- Cut the triangles. Cut the log into 4 equal pieces, then cut each piece corner to corner so you end up with 8 triangles.

- Brush and sugar the tops. Brush with melted butter and sprinkle the coarse sugar over. Keep the sugar off the parchment or it burns while the scones bake.
💡 Why is my sugar burning on the pan?
Sprinkle the coarse sugar over the scones only. Any that lands on the parchment burns and smokes long before the scones are done. Brush the strays off the pan before they go in.
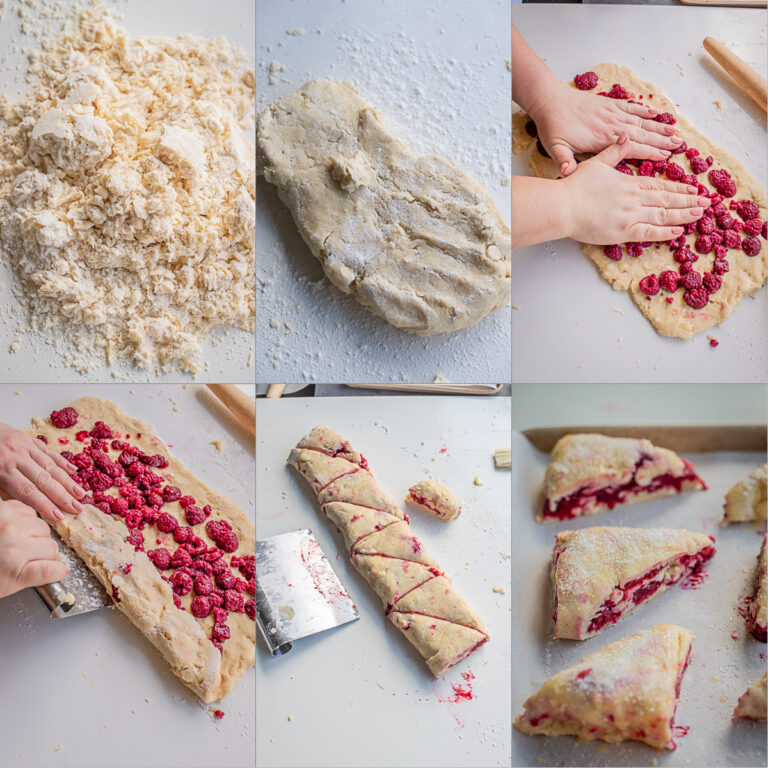
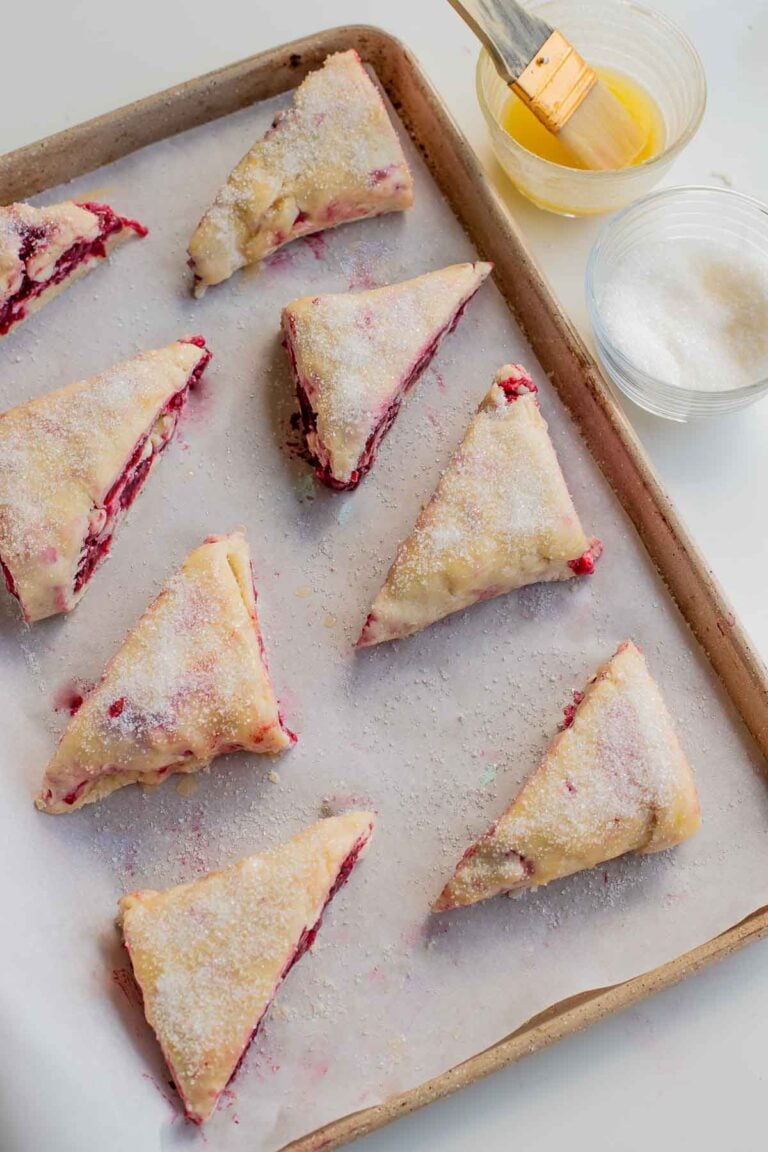
Pro Tips for Shaping the Raspberry Scones
- Use frozen raspberries, not fresh. Fresh berries burst under the rolling pin and streak the whole dough pink. Frozen ones hold their shape and chill the dough while you work, so you get a clean red ribbon.
- Sprinkle the coarse sugar over the scones only. Any that lands on the parchment burns and smokes long before the scones are done. Brush the strays off the pan before they go in.
How to Bake the Raspberry Scones
The freezer step decides the shape, so build it into your timing. Twenty minutes is the minimum and an hour is better.
- Freeze the shaped scones. Put the whole tray in the freezer for at least 20 minutes while the oven heats. An hour is better if you have the time.
💡 Do I really have to freeze them first?
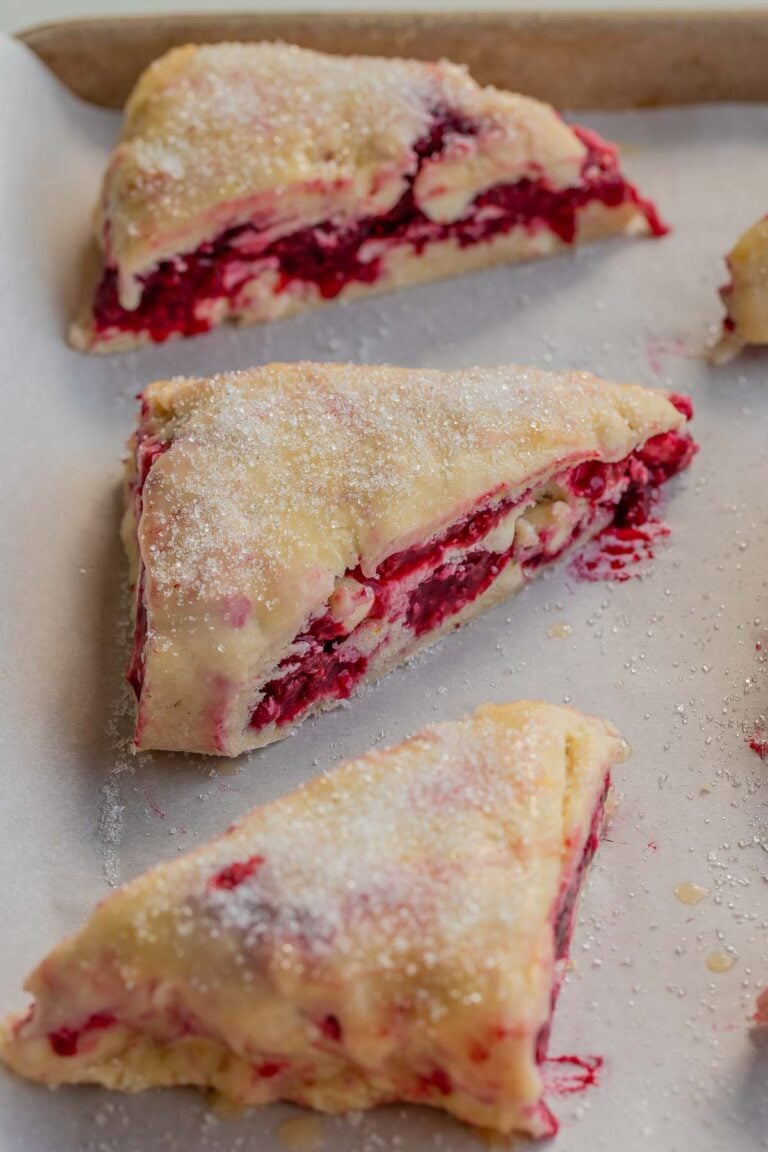
Freeze them so they rise tall, not wide. At least 20 minutes on the tray, and an hour is better. Cold butter melts in the oven instead of before it. - Bake until golden. Bake about 25 minutes, until the tops are lightly golden and the middle reads about 200°F. Cool on the pan.
💡 How do I know they’re baked through?
Go by temperature, not color alone. The tops brown before the middle is set, so a golden scone can still be raw in the center. About 200°F in the middle tells you it’s baked completely.💡 My scone bottoms always scorch. What do I do?
Stack two baking sheets. The second pan under the first slows the heat from below, so the bottoms stay golden instead of scorching.
Pro Tips for Baking the Raspberry Scones
- Freeze them so they rise tall, not wide. At least 20 minutes on the tray, and an hour is better. Cold butter melts in the oven instead of before it.
- Seize the outside before it can spread. A hot oven sets the crust while the middle is still cold, so the scone holds its triangle. 425°F does it in mine, and if yours bakes cool, go up 15 to 25 degrees.
- Go by temperature, not color alone. The tops brown before the middle is set, so a golden scone can still be raw in the center. About 200°F in the middle tells you it’s baked completely.
- Stack two baking sheets. The second pan under the first slows the heat from below, so the bottoms stay golden instead of scorching.
- Don’t double the baking powder when you double the batch. Changing the servings in the card below multiplies every amount straight across, and baking powder is the one that shouldn’t go up the whole way. Keep the first batch worth in full and add only three quarters of it for the second.
How to Make the Raspberry Glaze
Two ingredients and a few berries, stirred in the bowl you have out.
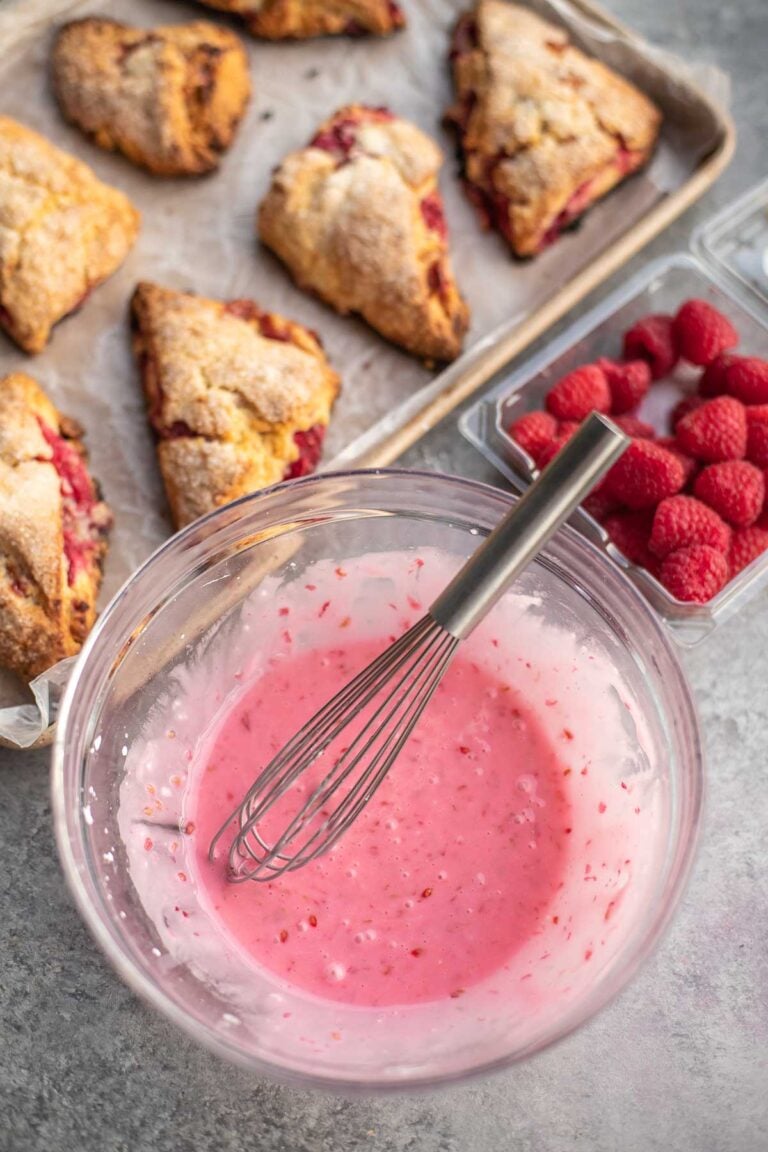
- Crush the berries into the sugar. Stir the powdered sugar, lemon juice, and a few raspberries together, crushing the berries as you go, until the glaze is smooth and pink.
- Drizzle it over the cooled scones. Use a fork and go back and forth. Wait until they are fully cool or the glaze soaks in and disappears.
Ways to serve them
Warm, with coffee, is how these get eaten in my house nine times out of ten. Split one and add a spoon of clotted cream or mascarpone if you want to make more of it, or put a plate of them out for brunch beside a bowl of raspberry tarts and let people pick.

How to Make Raspberry Scones Ahead
Shape and cut the scones, freeze them solid on the tray, then move them to a bag. They bake straight from frozen, no thawing, just give them a few extra minutes. That is how you get fresh scones on a weekday morning without doing anything at 6am.
How to Store Raspberry Scones
Room temperature: in an airtight container for up to 2 days. Glazed scones soften as they sit, so they are best on day one.
Fridge: up to 4 days, though the crumb firms up in the cold. Let them come back to room temperature before you eat one.
Freezer: baked and fully cooled, in a freezer bag for up to 3 months. Thaw them in the fridge overnight.
To reheat: 350°F for 2 to 3 minutes brings back the crisp edges. A microwave works in a pinch, about 30 seconds, but you lose the crunch.
Most of what readers ask about these comes down to the berries and the shape. These are the ones that come up again and again.
Raspberry Scones FAQ
Why did my Scones turn out flat?
The butter got warm before the scones went into the oven. It happens when the dough is handled too long, or when the butter and cream were not properly cold to begin with. Freezing the shaped scones fixes it, at least 20 minutes and an hour if you have it, and that’s why the step is in the recipe rather than optional.
Can I use fresh raspberries instead of frozen?
You can, and a lot of them will burst while you roll the log. If fresh is all you have, chill them in the freezer for about 20 minutes first and handle the dough gently. Do not thaw frozen berries before adding them, or the juice leaks into the dough.
What other fruit works in this recipe?
Blueberries, blackberries, and chopped strawberries all roll up the same way. Dried fruit is the easiest swap of all, since it adds no water to the dough. Stay away from anything very juicy, like fresh peaches.
Can I make Raspberry Scones without White Chocolate?
Yes. Leave it out and you get a plainer, tarter scone carried by the berries and the lemon. Chopped dark chocolate or slivered almonds both work in its place if you want something in there.
Do I have to freeze the scones before baking?
Freezing keeps them tall, so plan on it. Twenty minutes is the minimum and an hour is better. If you’re out of time you can bake them straight away and take about 5 minutes off, and they will taste just as good, they will just be flatter and wider.
More berry bakes to try
- Blueberry Scones – the softest scone on the site, and the one I would start a beginner on.
- Strawberry Scones – made with dried strawberries, so the dough stays dry and easy to handle.
- Raspberry Cheesecake Danish – same berry, flaky pastry, cream cheese under the fruit.
- White Chocolate Raspberry Macarons – the same flavor pairing in a much fancier shell.
- Raspberry Tarts – little shortcrust tarts for when you want something neater on the plate.
Made this recipe?
Please leave a ⭐⭐⭐⭐⭐ star rating and a comment below.
It helps other readers find it, and I love reading every single one.
Raspberry Scones Recipe with White Chocolate

Ingredients
Raspberry Scone Dough
- 2 cups (300 g) all-purpose flour
- 1/3 cup (67 g) granulated sugar
- 2 tsp baking powder
- 1/2 tsp kosher salt Morton
- 4 oz (113 g) unsalted butter, cold Frozen or chilled
- 1 lemon zest from a whole lemon
- 1 (50 g) large egg Refrigerated
- 1/2 cup (120 ml) heavy cream Chilled
- 1 tbsp (15 ml) vanilla extract
- 1 cup (125 g) raspberries Frozen works best
- 1/2 cup (85 g) white chocolate chips Or chopped white chocolate
Sugar Crust
- 2 tbsp (28 g) unsalted butter, melted
- 5 tbsp (63 g) sanding or coarse sugar
Raspberry Glaze
- 1 tbsp (15 ml) lemon juice
- 4 raspberries For color and flavor
- 1/2 cup (60 g) powdered sugar
Instructions
Make the Scones
-
Heat the oven. Preheat to 425°F with a rack in the middle. Line a rimmed 12x18 inch baking sheet with parchment paper.
-
Whisk the dry ingredients. In a large bowl whisk together 2 cups flour, 1/3 cup sugar, 2 tsp baking powder, 1/2 tsp kosher salt and the zest of 1 lemon.
-
Grate in the cold butter. Grate 4 oz frozen or chilled butter into the bowl and toss until every shred is coated in flour. Keep it cold and work quickly.
-
Add the wet ingredients. Make a well in the dry mixture and add 1 egg, 1/2 cup cream and 1 Tbsp vanilla. Whisk them together inside the well, then fold the flour in.
-
Fold in the white chocolate. Add 1/2 cup white chocolate chips and keep folding and pressing with a spatula until the mixture is chunky and shaggy. Do not mix it smooth (Note 2).
-
Bring the dough together. Turn it onto a work surface and press it into a ball with your hands. It will look dry and crumbly, which is correct. Handle it as little as possible.
-
Roll it out and add the berries. Scrape the surface clean, flour it well and roll the dough into a rectangle. Scatter 1 cup raspberries over it and press them in gently. Use frozen berries straight from the freezer (Note 3).
-
Shape it into a log. Roll the dough up from the long edge into a 3 inch wide roulade, pressing gently to close the air pockets without crushing the berries. Pat the top flat so the log is rectangular. A bench scraper helps you lift the dough as you roll.
-
Cut the triangles. Cut the log into 4 equal pieces, then cut each piece diagonally into 2, giving you 8 triangles. Transfer them to the lined baking sheet.
-
Brush and sugar the tops. Brush with 2 Tbsp melted butter and sprinkle 5 Tbsp coarse sugar over. Keep the sugar off the parchment or it burns while the scones bake.
-
Freeze, then bake. Freeze the shaped scones at least 20 minutes, up to an hour is better (Note 5), then bake about 25 minutes, until lightly golden on top and about 200°F in the middle (Notes 6 and 7). Baking without freezing first takes about 20 minutes and the scones spread more. Cool on the pan.
Make the Raspberry Glaze
-
Crush the berries into the sugar. In a medium bowl combine 1/2 cup powdered sugar, 1 Tbsp lemon juice and about 4 raspberries. Crush the berries and stir everything into a smooth pink glaze.
-
Drizzle and let it set. Drizzle the glaze over the cooled scones with a fork. Glaze only once the scones are fully cool or it soaks in and disappears.
Recipe Notes
Before you start: cold butter, frozen raspberries, and the freeze before baking, 20 minutes minimum and an hour if you have it, are the three things that decide how these come out. Photos and technique are in the post above.
- Keep the butter cold. Warm butter melts on the counter instead of in the oven, and a scone made with it spreads flat. If your kitchen is warm, park the bowl in the fridge between steps.
- Stop mixing while it still looks dry. A smooth, tidy scone dough has been worked too long and bakes tough. You want it shaggy and barely holding together when it goes onto the counter.
- Frozen raspberries, not fresh. Fresh berries burst under the rolling pin and streak the dough pink. Frozen ones hold their shape and keep the dough cold. Do not thaw them.
- Sprinkle the coarse sugar over the scones only. Any that lands on the parchment burns and smokes long before the scones are done.
- Freeze the tray before it bakes. Twenty minutes minimum, an hour is better.
- Full heat from the start. 425°F, plus 15 to 25 degrees if your oven bakes cool.
- Go by temperature, not color alone. The tops brown before the middle is set. About 200°F in the middle means baked completely.
- Two sheets, one inside the other. Keeps the bottoms from scorching.
- Glaze only once they are fully cool, or it soaks in and disappears.
- Salt. I use Morton kosher salt, and the amount above is measured for it.
- Scaling. Changing the servings multiplies every amount straight across, and baking powder is the one that should not go up the whole way. Keep the first batch worth in full and add only three quarters of it for each extra batch: doubling 2 tsp gives 3 1/2 tsp, not 4.
I first put this raspberry scone recipe up in 2020, and it’s been one of my favorite things to make on a slow morning ever since. I refreshed it in September 2026 with new step-by-step photos, a doneness temperature, notes on why frozen raspberries beat fresh here, and the freezer trick that keeps them from spreading.
Marina | Let the Baking Begin

















Can you use pastry flour instead of all purpo?
I haven’t tested it with pastry flour so can’t tell you if it will work or not,
Loved the easy recipe. Flavor is amazing!
Would it be any different if i would do in a mixer, and what speed???
You could do it in a mixer, just grate the butter/margarine into the flour instead of cutting it into chunks and try to mix it as little as possible, on low to medium speeds. As soon as it starts coming together, it’s enough mixing.
Thank You for sharing with this recipe….love how they turned out….Perfect for a cup of tea or black coffee =)
Thanks so much for your feedback! I just made another batch today for our trip to the beach and I love how moist they are.
What a pretty glaze! And all natural color I assume – from raspberries!
Yeap, all natural 🙂