
Black Forest Cake (Easy Recipe with Sour Cherries)
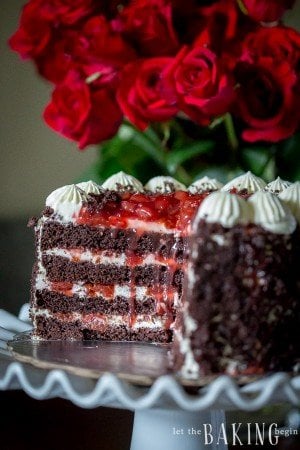
Black Forest Cake is four layers of chocolate cake stacked with sour cherry filling and whipped cream, then coated in chocolate crumbs. My husband, who never bakes, made this one start to finish with barely any help from me, and I photographed every step.
For more chocolate and cherries together, try my Flourless Black Forest Chocolate Cake or this Drunken Cherry Cake.
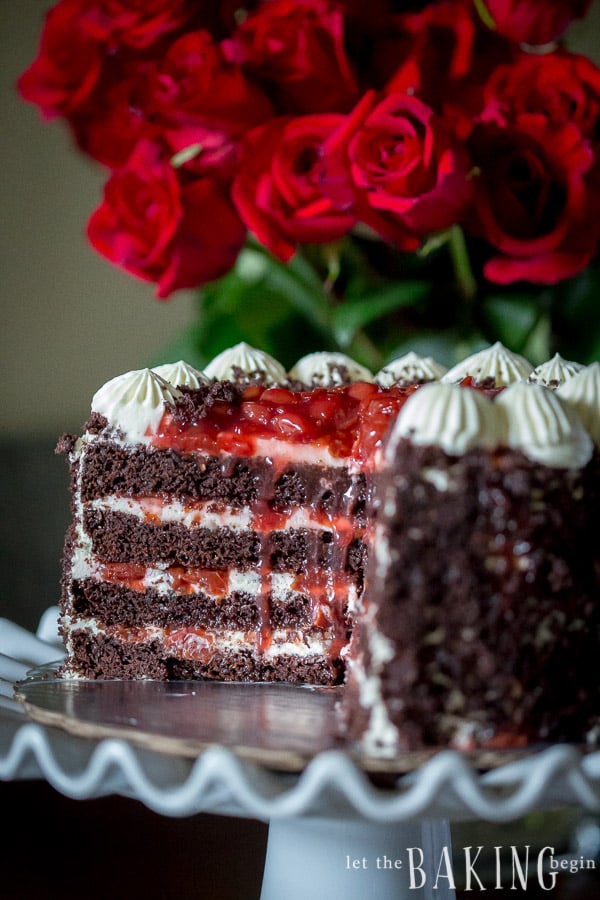
Why you’ll Love this Black Forest Cake
Every slice gets chocolate cake, tart cherries, and cream in the same bite.
- Tart cherries, sweet cream – sour cherries balance the sweet cream and chocolate, so even a big slice never feels too rich.
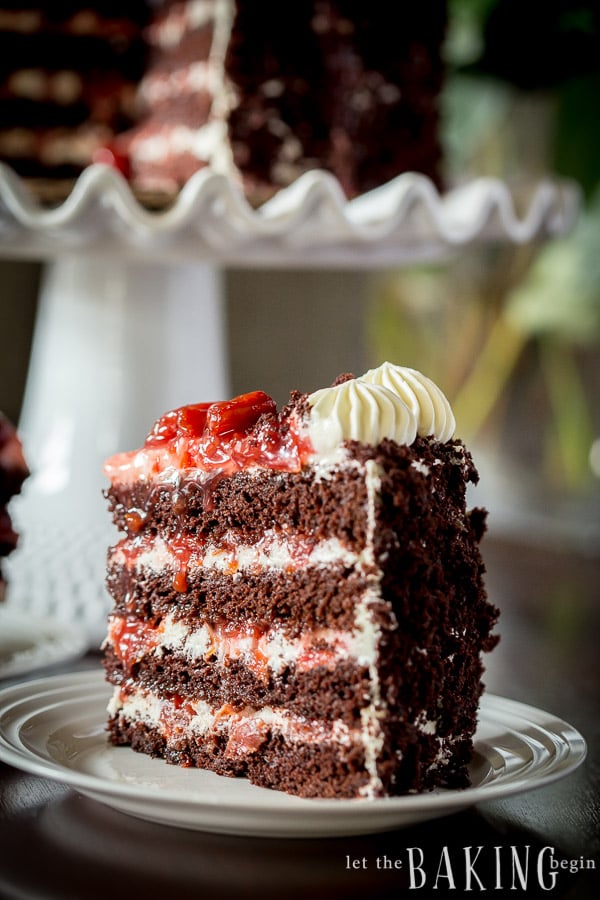
- Soft even when cold – buttermilk and oil keep the chocolate layers soft straight out of the fridge, which is where this cake lives.
- No decorating skills needed – chocolate crumbs pressed onto the sides cover any uneven frosting, and a ring of piped stars finishes the top.
- Best made a day ahead – it needs a night in the fridge before slicing, and it keeps 3 to 4 days after that.
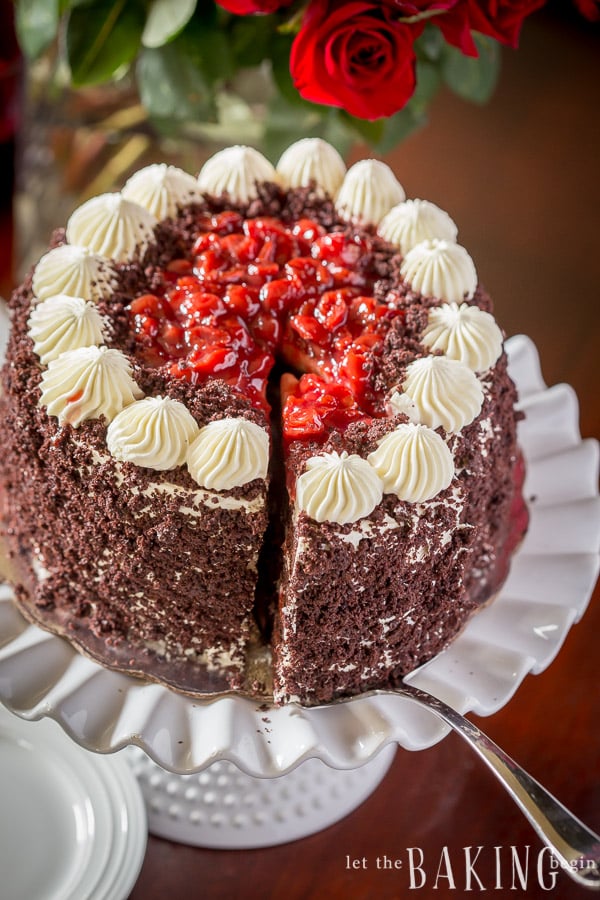
What Is Black Forest Cake?
Black Forest Cake is the English name for the German Schwarzwälder Kirschtorte: chocolate cake layers, sour cherries, and whipped cream, finished with chocolate on the outside. It comes from the Black Forest region of southwest Germany. The area is known for its sour cherries and for kirsch, a clear cherry brandy traditionally brushed on the layers.
Mine keeps the same three parts. The layers are a chocolate buttermilk cake instead of the traditional sponge. The cherries are cooked into a thick filling, and a cherry juice and rum syrup soaks into every layer.
Black Forest Cake Ingredients
Four components, and most of the list is baking staples you already have. The sour cherries are the one thing to shop for with care. Amounts are in the recipe card at the bottom.
Cherry Filling for Black Forest Cake
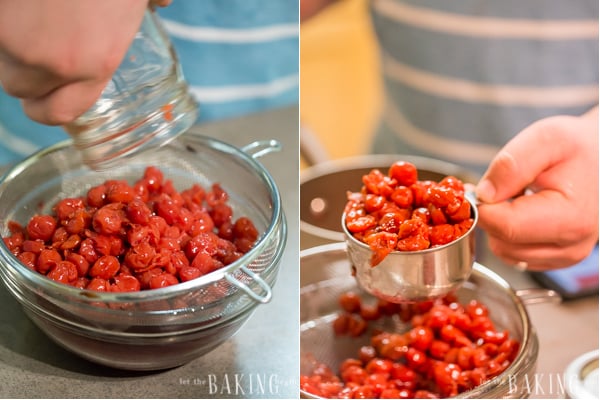
- Sour cherries: jarred pitted sour cherries or my home-canned tart cherries in their own juice. Their tartness keeps a cake this rich from tasting too sweet.
- Cherry juice: the juice from the jar. It goes into both the filling and the soaking syrup, so the chocolate layers taste like cherries too.
- Granulated sugar: it softens the sourness of the cherries without hiding it.
- Cornstarch: it thickens only once the filling reaches a full boil, and it sets firmer as it cools. Cooked too long past the boil, it breaks down and the filling turns runny again.
Chocolate Cake for Black Forest Cake
- All-purpose flour: enough structure to stack four layers high under cream and cherries. I measure 1 cup as 150 g: fluff the flour, scoop, and level.
- Granulated sugar: sugar holds on to moisture, so it keeps the crumb tender as well as sweet.
- Unsweetened cocoa powder: every bit of the chocolate flavor in the layers comes from cocoa, so use one you like the taste of.
- Baking powder and baking soda: soda needs an acid to lift the cake, and the buttermilk and cocoa give it one. Baking powder brings its own acid and gives the rest of the rise.
- Kosher salt: a little makes the chocolate taste deeper. I use Morton, and the amount in the card is measured for it.
- Eggs: they bind the batter and help it rise. Room-temperature eggs mix in more evenly than cold ones.
- Buttermilk: it keeps the crumb moist and gives the baking soda the acid it needs. No buttermilk? Milk soured with a little lemon juice works in a pinch.
- Vegetable oil: oil stays liquid in the fridge, so the cake stays soft even when it is cold. Any neutral oil works, and I have made it with virgin olive oil too.
- Vanilla extract: it rounds out the cocoa.
Chantilly Cream
- Heavy cream: the fat traps the air you whip in, so cream with 36% fat or more holds up under four layers. Keep it cold until you whip it.
- Powdered sugar: it dissolves right away, so the cream stays smooth with no grit. The little bit of cornstarch in it also helps the cream hold its shape.
- Vanilla extract: optional, but it makes the cream taste like more than plain sugar.
Cherry Soaking Syrup
- Cherry juice: more of the juice from the jar, so the syrup tastes like the filling.
- Rum: a splash goes well with chocolate and cherries. To skip the alcohol, use extra cherry juice or a little rum flavoring instead.
How to Make Black Forest Cake, Step by Step
Make the cherry filling first so it cools while the chocolate layers bake. Then whip the cream, stir the syrup, and stack.
How to Make the Cherry Filling for Black Forest Cake
A few minutes on the stove, and it keeps in the fridge for 2 to 3 days if you want to get ahead.
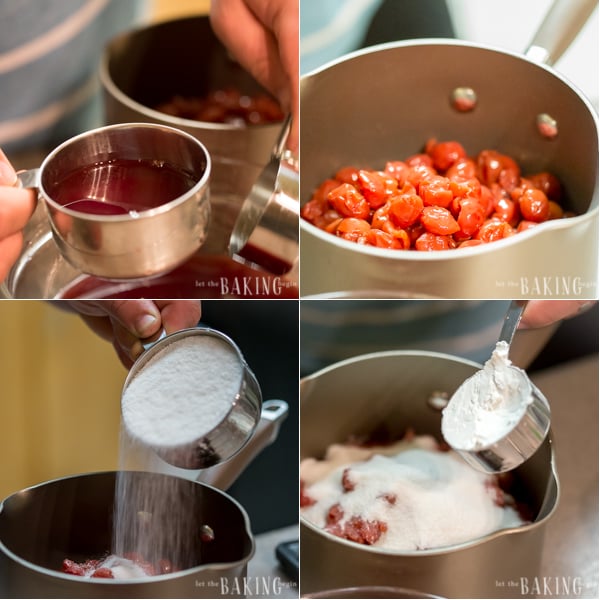
- Drain the sour cherries – pour the jarred sour cherries into a sieve set over a bowl and save all of the juice.
Can I use cherry pie filling instead?
Yes. My homemade cherry pie filling or a can of cherry cake filling works, and you can skip the stove. It tastes sweeter than sour cherries, and you will still need some cherry juice for the soaking syrup. - Combine in a saucepan – put the cherries, sugar, cherry juice, and cornstarch in a 2-quart pot and stir until the cornstarch dissolves.

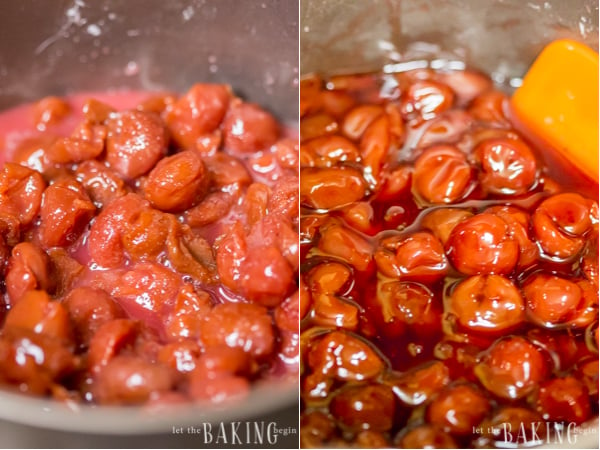
- Boil 2 to 3 minutes – bring it to a boil over medium heat, then cook 2 to 3 minutes more, stirring, until thick and glossy. Don’t cook it longer. Cool completely before using.
My cherry filling is runny. What went wrong?
It either never reached a full boil or it cooked too long after. Cornstarch thickens only at a real boil, and a long boil after that breaks it back down. Bubbles across the whole surface, then 2 to 3 minutes, then off the heat.
How to Make the Chocolate Cake for Black Forest Cake
One bowl and about a minute of mixing. A stand mixer or a plain whisk both work.
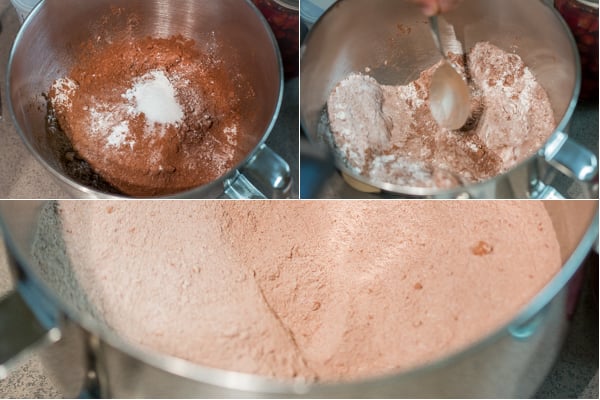
- Whisk the dry mix – sugar, flour, cocoa powder, baking powder, baking soda, and salt. Sift them together if you want the smoothest batter.

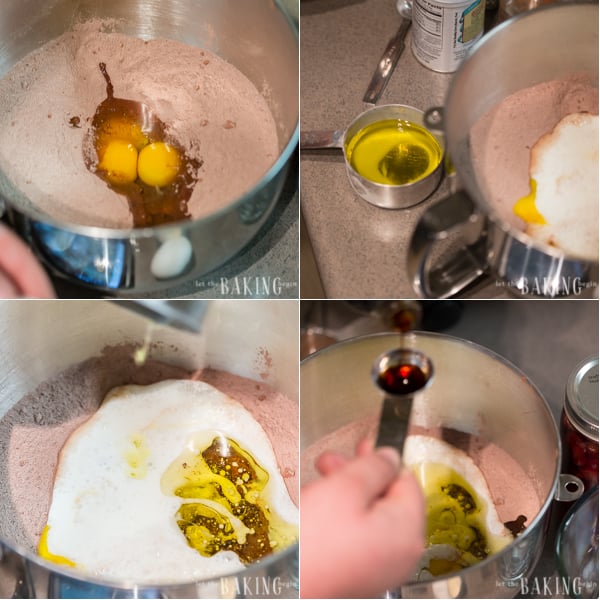
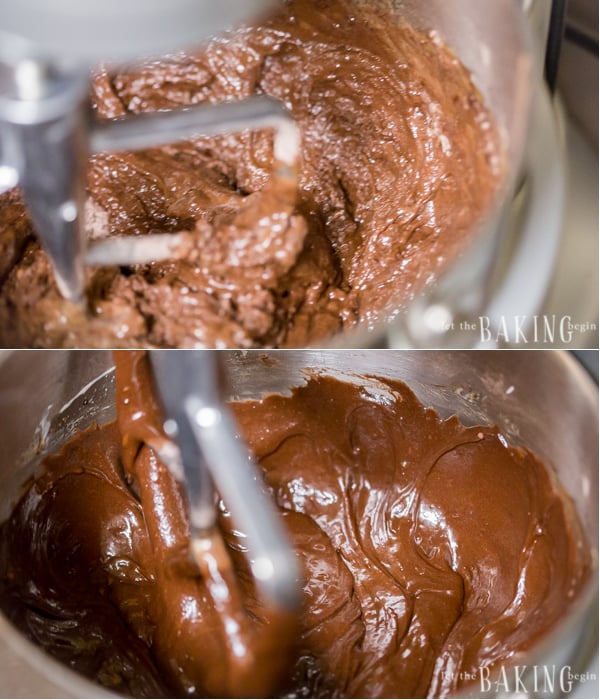
- Pour in the wet – add the eggs, buttermilk, oil, and vanilla straight into the dry mix.
- Mix just 1 minute – beat with a mixer or a whisk, just until combined. Mixing longer makes the layers tough.

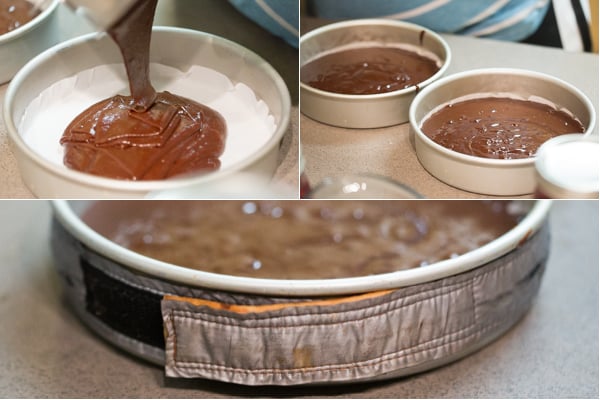
- Bake two chocolate layers – heat the oven to 350°F (175°C) and divide the batter between two parchment-lined 8- or 9-inch round pans. Bake 30 to 35 minutes, until a skewer in the center comes out clean.
Do I need cake strips?
No, but they help. Wet cake strips wrapped around the pans slow down the edges, so the layers bake flatter and there is less to trim.How else can I tell the layers are done?
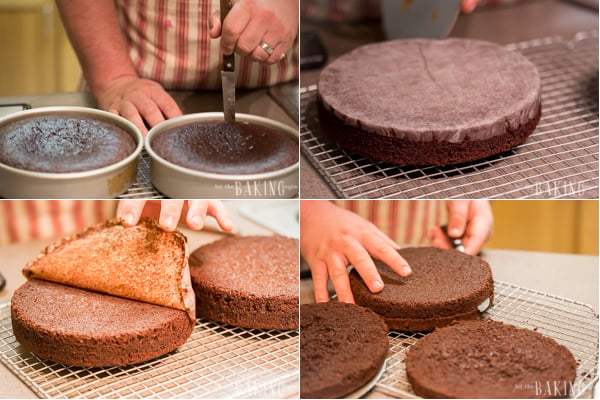
The top springs back when you press it lightly. If you have an instant-read thermometer, the center reads about 200 to 205°F. - Cool, then split – cool the cakes 5 to 10 minutes in the pans, then turn them out onto a rack and peel off the parchment. Cool completely. A slight dip in the middle is normal. Split each cake in half with a serrated knife for four layers.
How do I split a cake layer evenly?
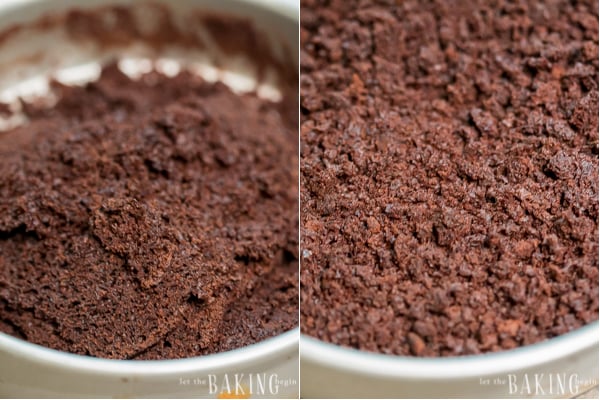
Score a shallow line all the way around the side with a serrated knife first. Then cut along that line, turning the cake as you go, and the two halves come out even. - Make the crumbs – trim a thin slice off the top of each cake and crumble it by hand or pulse it in a food processor. These go on the sides at the end.
How to Make the Chantilly Cream
Chantilly cream is sweetened whipped cream, and in this cake it is both the filling and the frosting.
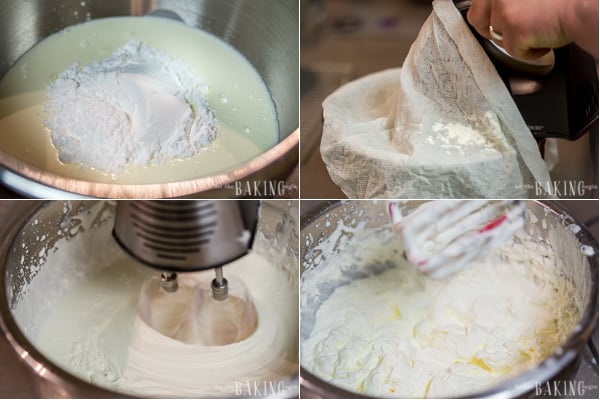
- Whip to stiff peaks – beat the cold heavy cream, powdered sugar, and vanilla on medium-high until the peaks stand straight up. A damp paper towel over the bowl and mixer stops the splatter. Refrigerate up to 30 minutes, until you need it.
How do I know it’s at stiff peaks?
Lift the beaters. The peak stands straight up without flopping over, and the cream holds the lines of the whisk. Stop right there, because a little more and it turns grainy.I overwhipped the cream. Can I fix it?
Usually, yes. Stir a splash of cold liquid heavy cream in by hand and it smooths back out. Don’t put it back on the mixer, or it goes grainy again.
How to Make the Cherry Soaking Syrup
The syrup soaks cherry flavor into the chocolate layers themselves.
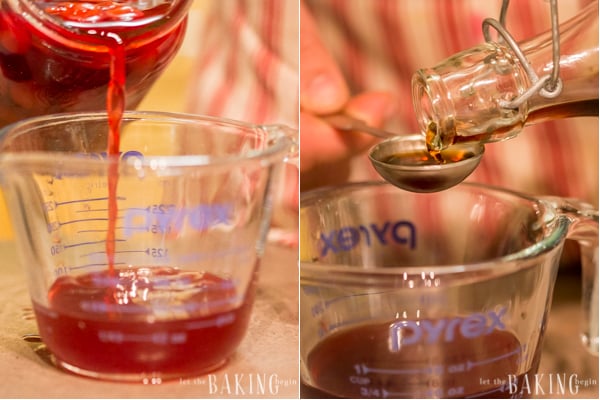
- Stir juice and rum – stir the reserved cherry juice with the rum and set it aside.
Can I make it without alcohol?
Yes. Use more cherry juice in place of the rum, or add a few drops of rum flavoring for the aroma.
How to Assemble Black Forest Cake
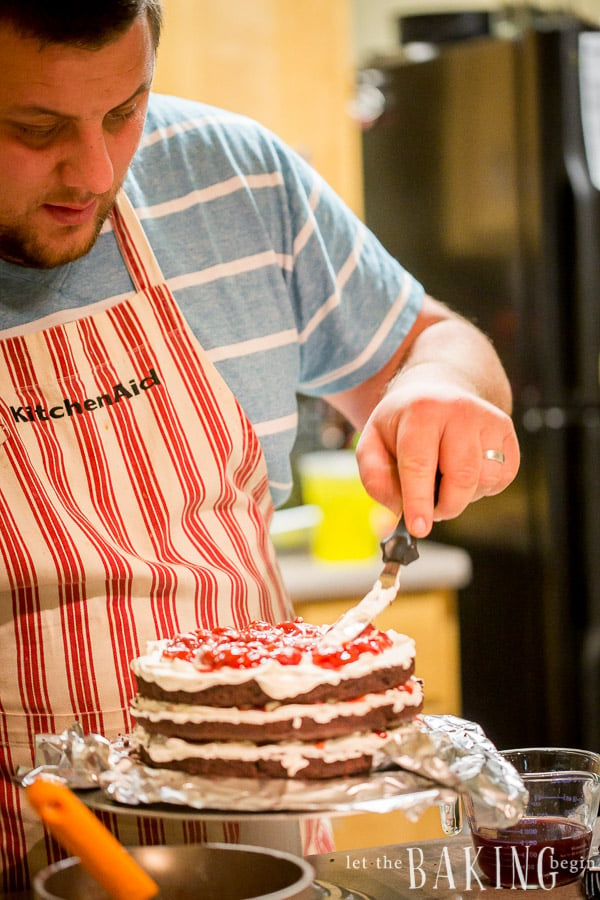
This is the part my husband did on his own, and he had never frosted a cake before. Syrup, cream, and cherries on each layer, then crumbs, stars, and a night in the fridge.
- Set aside cream for piping – put some of the Chantilly cream back in the fridge for the stars on top. The card has the amount.
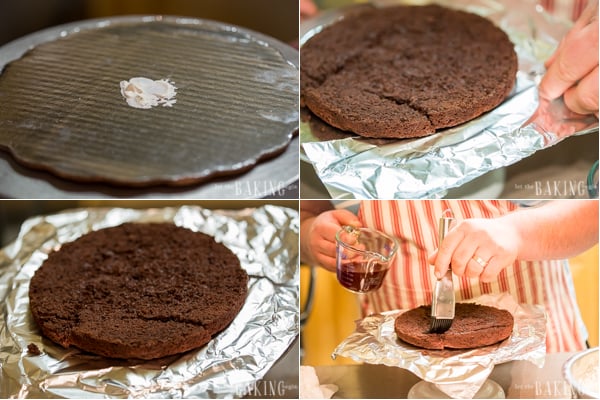
- Anchor the bottom cake layer – put a dab of cream on the platter and set the first layer on it, cut side up. Slide four strips of foil about 1 inch under the edges to keep the platter clean.
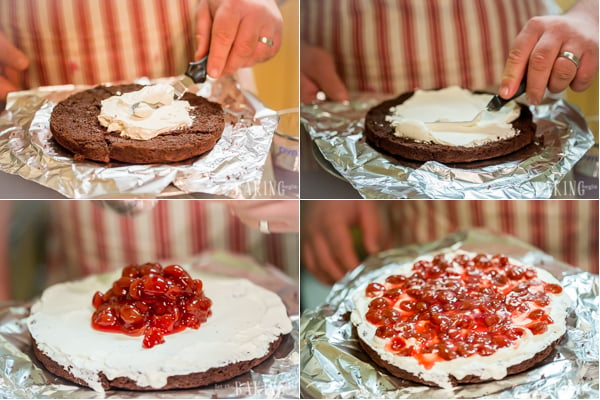
- Brush on the syrup – soak the layer with a quarter of the cherry syrup using a pastry brush, a spoon, or a squeeze bottle. Go lightly, because puddles of syrup turn the cake soggy.
- Cream, then cherries – spread a thick layer of cream over the cake, then spoon cherry filling evenly over the cream.
- Repeat, top layer flipped – repeat the syrup, cream, and cherries on the next two layers, then set the fourth layer on bottom side up.
Why bottom side up?
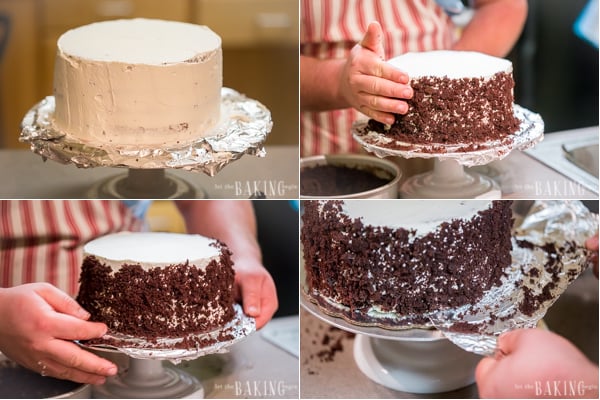
The bottom of a baked layer is flat with sharp edges, so it gives you a level top without any trimming. - Frost and press on crumbs – cover the whole cake with the remaining cream, then press handfuls of chocolate crumbs onto the sides. Pull out the foil strips for a clean platter.
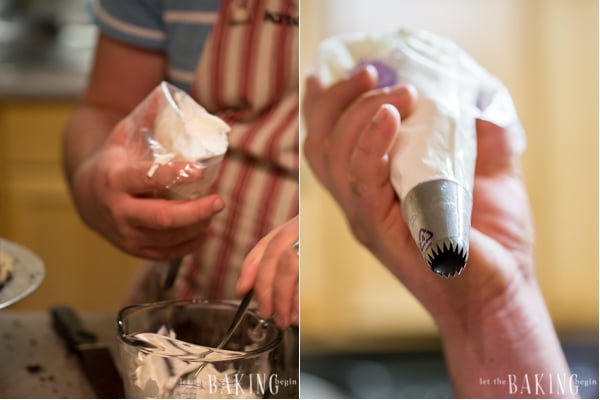
- Fill a star-tip bag – fit a pastry bag with a star tip, fill it with the reserved cream, and twist the top closed.
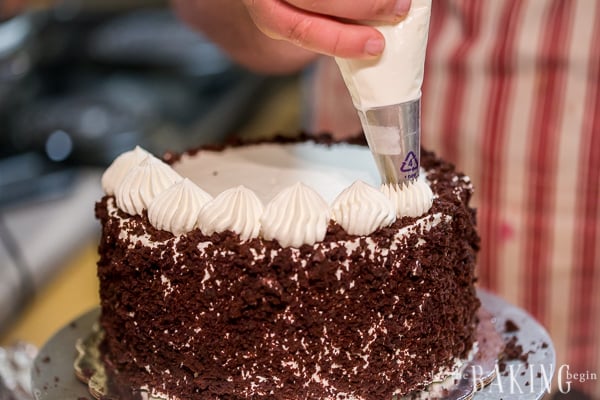
- Pipe a cream border – pipe stars around the top edge, keeping them close together so the cherry topping stays in.
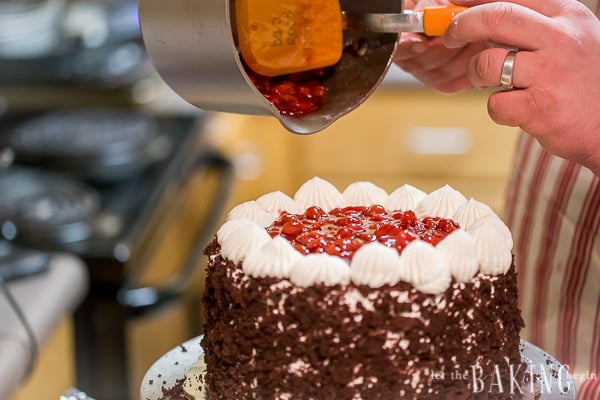
- Top with cherries – spread the rest of the cherry filling inside the piped border.
- Chill the whole cake overnight – refrigerate overnight, or at least 5 to 8 hours, before slicing. Serve it cold.
Why does it need so long in the fridge?
The syrup and the cream settle into the layers, and the cake firms up enough to slice. Cut it the same day and the layers slide apart.How do I cut clean slices?
Use a long, sharp knife dipped in hot water and wiped dry before every cut. A cold cake and a warm, clean blade give you neat layers.
Marina’s Pro Tips for theBest Black Forest Cake

The spots where this cake can go wrong, and how to keep them from happening.
- Stop the cherry filling 2 to 3 minutes after it boils. Cornstarch needs the full boil to thicken, but a long boil breaks it down and the filling turns runny.
- Use cherry pie filling in a pinch. Homemade or canned cherry pie filling works in place of the cooked filling. It tastes sweeter, so save some cherry juice for the syrup.
- Wrap the cake pans in wet cake strips. The edges bake slower, so the chocolate layers come out flatter with less to trim.
- Press the top of the chocolate layers to check them. Done layers spring back when touched lightly, and a thermometer in the center reads about 200 to 205°F if you want to be extra sure.
- Score the cake before you split it. A shallow line cut all the way around the side is your guide, and the halves come out even without a leveling tool.
- Whip the Chantilly cream to stiff peaks, then stop. Overwhipped cream turns grainy. A splash of cold cream stirred in by hand, not on the mixer, smooths it back out.
- Brush the syrup on lightly. A squeeze bottle gives you the most control, and the cake stays moist instead of soggy.
- Swap the rum for cherry juice if you prefer. Rum flavoring gives the same aroma with no alcohol.
- Put the top layer on bottom side up. Its flat bottom gives you a level cake with no trimming.
- Pipe the whipped cream stars close together. Any gap lets the cherry topping run down the sides overnight.
- Chill the cake overnight before slicing. The layers settle and firm up, so every slice holds together.
- Cut the Black Forest Cake with a hot knife. Dip the blade in hot water and wipe it between cuts for clean layers.

How to Serve Black Forest Cake
Serve it cold, straight from the fridge, in tall slices. Fresh cherries on the side and a cup of strong coffee or black tea balance all that cream. It holds its shape on a dessert table for an hour or two, so it works well for birthdays and holidays.

How to Make Black Forest Cake Ahead
Bake the chocolate layers and cook the cherry filling on day one, then wrap the cooled layers and refrigerate both. Assemble on day two and let the cake rest overnight, and it is ready to serve on day three with nothing left to do.
How to Store Black Forest Cake
Fridge: Covered, ideally under a cake dome, for 3 to 4 days. Keep it cold, and don’t leave it out for more than an hour or two, since the frosting is whipped cream.
Freezer: Freeze single slices on a tray until firm, then wrap them well, up to 1 month. Thaw overnight in the fridge. The cream softens a little but stays good.
Cherry filling: Covered in the fridge for 2 to 3 days before you assemble.
The questions people ask most before they bake their first Black Forest Cake.
Black Forest Cake FAQ
Why Is My Whipped Cream Frosting Runny?
Usually the cream wasn’t cold enough, it stopped short of stiff peaks, or it went onto layers or filling that were still warm. Start with cold cream, whip until the peaks stand straight up, and make sure the cake and the cherry filling have cooled completely before you assemble.
What Cherries Are Best for Black Forest Cake?
Sour cherries, also sold as morello or tart cherries. Jarred ones in their own juice are the easiest, and home-canned tart cherries work the same way. Sweet cherries work, but the whole cake tastes much sweeter and loses its tang.
Can I Make Black Forest Cake Without Alcohol?
Yes. Leave out the rum and use more cherry juice in the soaking syrup, or add a few drops of rum flavoring. The cake is still moist and full of cherry flavor.
Can I Use Cherry Pie Filling for Black Forest Cake?
Yes, homemade or canned both work, and they save you the stove step. The cake comes out a little sweeter. Keep some cherry juice from a jar for the soaking syrup, since pie filling has none to spare.
More Chocolate and Cherry Cakes to Try
If chocolate and cherries are your favorite pair, these are the ones to bake next.
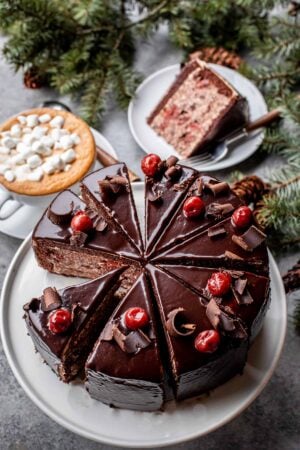
Drunken Cherry Cake
Chocolate cake hollowed out and filled with cherries and cream, then covered in chocolate. A dome instead of layers. →
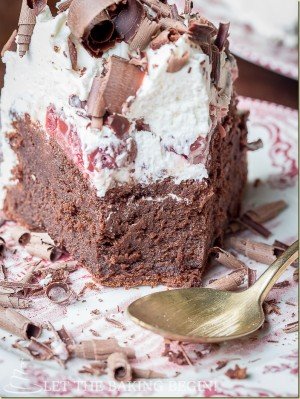
Flourless Black Forest Chocolate Cake
The same chocolate, cherry, and cream trio on a dense, fudgy cake with no flour at all. →
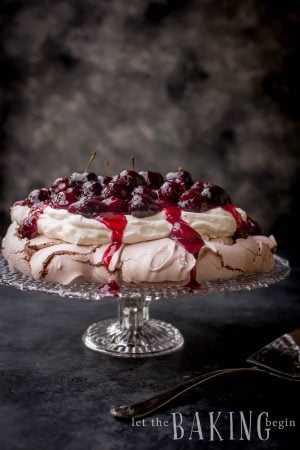
Cherry Chocolate Pavlova
Chocolate meringue with a crisp shell and a soft middle, under whipped cream and cherries. →
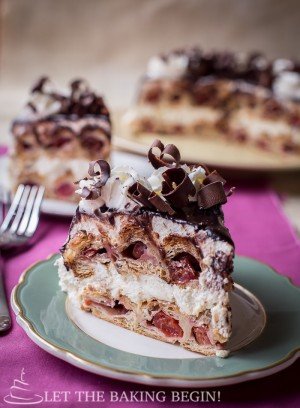
Honeycomb Cherry Cake
Puff pastry tubes filled with cherries and stood upright, so every slice looks like a honeycomb. →
Made this Black Forest Cake?
Please leave a ⭐⭐⭐⭐⭐ star rating and a comment below.
It helps other readers find the recipe, and I read every single one.
Black Forest Cake (Easy Recipe with Sour Cherries)
Ingredients
Cherry Filling for Black Forest Cake
- 3 1/2 cups (540 g) pitted sour cherries drained (Note 1)
- 1/2 cup (120 ml) cherry juice from the jar
- 1 cup (200 g) granulated sugar
- 1/4 cup (32 g) cornstarch
Chocolate Cake for Black Forest Cake
- 2 1/8 cups (319 g) all-purpose flour 2 cups + 2 Tbsp; 1 cup = 150 g (Note 2)
- 2 cups (400 g) granulated sugar
- 3/4 cup (64 g) unsweetened cocoa powder
- 1 1/2 tsp baking powder for doubling, see Note 3
- 3/4 tsp baking soda
- 3/4 tsp kosher salt Morton
- 3 (150 g) large eggs room temperature
- 1 cup (240 ml) buttermilk
- 1/2 cup (120 ml) vegetable oil or virgin olive oil
- 1 Tbsp (15 ml) vanilla extract
Chantilly Cream
- 3 cups (720 ml) heavy cream cold
- 1/3 cup (40 g) powdered sugar
- 1 Tbsp (15 ml) vanilla extract optional
Cherry Soaking Syrup
- 1/4 cup (60 ml) cherry juice from the jar
- 4 Tbsp (60 ml) rum or more cherry juice (Note 4)
Instructions
How to Make the Cherry Filling for Black Forest Cake
-
Drain the cherries. Drain 3 1/2 cups pitted sour cherries over a bowl and save all of the juice.
-
Combine in a saucepan. Put the drained cherries, 1/2 cup cherry juice, 1 cup granulated sugar, and 1/4 cup cornstarch in a 2-quart pot and stir until the cornstarch dissolves.
-
Boil 2 to 3 minutes. Bring to a boil over medium heat, then cook 2 to 3 minutes more, stirring, until thick and glossy. Don't cook it longer (Note 5). Cool completely.
How to Make the Chocolate Cake for Black Forest Cake
-
Whisk the dry mix. In a large bowl, whisk or sift together 2 1/8 cups all-purpose flour, 2 cups granulated sugar, 3/4 cup unsweetened cocoa powder, 1 1/2 tsp baking powder, 3/4 tsp baking soda, and 3/4 tsp kosher salt.
-
Pour in the wet. Add 3 large eggs, 1 cup buttermilk, 1/2 cup vegetable oil, and 1 Tbsp vanilla extract to the dry mix.
-
Mix just 1 minute. Beat with a mixer or a whisk, just until combined. Don't overmix.
-
Bake at 350°F (175°C). Divide the batter between two parchment-lined 8- or 9-inch round pans, with wet cake strips around them if you have them. Bake 30 to 35 minutes, until a skewer in the center comes out clean (Note 6).
-
Cool, then split. Cool 5 to 10 minutes in the pans, run a knife around the edge, and turn out onto a rack. Peel off the parchment and cool completely. Split each cake in half horizontally with a serrated knife for 4 layers.
-
Make the crumbs. Trim a thin slice off the top of each cake and crumble it finely by hand or in a food processor. You need about 1 cup of crumbs for the sides.
How to Make the Chantilly Cream
-
Whip to stiff peaks. Whip 3 cups heavy cream, 1/3 cup powdered sugar, and 1 Tbsp vanilla extract on medium-high until stiff peaks form (Note 7). A damp paper towel over the bowl and mixer stops the splatter. Refrigerate up to 30 minutes, until needed.
How to Make the Cherry Soaking Syrup
-
Stir juice and rum. Stir 1/4 cup cherry juice with 4 Tbsp rum (Note 4) and set aside.
How to Assemble Black Forest Cake
-
Reserve cream for piping. Set aside about 1 1/2 cups of the Chantilly cream in the fridge for the stars on top.
-
Anchor the bottom layer. Put a dab of cream on the platter, set the first layer on it cut side up, and press to stick. Slide 4 strips of foil about 1 inch under the edges.
-
Soak the layer. Brush it with 1/4 of the cherry syrup using a pastry brush, a spoon, or a squeeze bottle. Soak it lightly, or the cake turns soggy.
-
Cream, then cherries. Spread a little more than 1 cup of cream over the layer, then about 3/4 cup of cherry filling over the cream.
-
Repeat, top layer flipped. Repeat the syrup, cream, and cherries on the next 2 layers. Set the 4th layer on top bottom side up.
-
Frost and press on crumbs. Cover the whole cake with the remaining cream. Press handfuls of crumbs onto the sides, then pull out the foil strips.
-
Fill a star-tip bag. Fit a pastry bag with a star tip, fill it with the reserved cream, and twist the top closed.
-
Pipe the border. Pipe stars around the top edge, close together so the cherry topping stays in.
-
Top with cherries. Spread the rest of the cherry filling inside the border.
-
Chill overnight. Refrigerate overnight, or at least 5 to 8 hours, before slicing (Note 8). Serve cold.
Recipe Notes
1. Cherries: Use jarred sour (morello) cherries or home-canned tart cherries in their own juice. About two 20 oz jars give 3 1/2 cups drained. Save the juice for the filling and the syrup. Cherry pie filling works in a pinch: skip the filling steps, and use juice from a jar of cherries for the syrup.
2. Measuring flour: 1 cup = 150 g. Fluff the flour, scoop, and level. Weigh it if you can.
3. Doubling the recipe: Changing the servings multiplies every amount straight across, but the baking powder and baking soda should not go up the whole way. Keep the first batch's amount in full and add three quarters of it for each extra batch. Doubled, 1 1/2 tsp baking powder becomes about 2 5/8 tsp (not 3), and 3/4 tsp baking soda becomes about 1 1/4 tsp plus a pinch (not 1 1/2). Too much and the layers rise more than the pans can hold.
4. No alcohol: Replace the rum with more cherry juice, or add a few drops of rum flavoring.
5. Cherry filling: Cornstarch thickens only at a full boil, and a long boil after that thins it again. Make it up to 2 to 3 days ahead and keep it covered in the fridge.
6. Pans and doneness: Two 8- or 9-inch round pans both work. Done layers spring back when pressed lightly, and the center reads about 200 to 205°F on an instant-read thermometer. A slight dip in the middle is normal.
7. Chantilly cream: Stiff peaks stand straight up without flopping over. If you overwhip it, stir in a splash of cold heavy cream by hand, and don't put it back on the mixer.
8. Chilling and slicing: The overnight rest sets the layers so the slices hold together. Cut with a long knife dipped in hot water and wiped dry between cuts.
9. Storage: Covered in the fridge for 3 to 4 days. Freeze single slices up to 1 month and thaw overnight in the fridge.

Thank you for following me on Instagram, Facebook & Pinterest!
Hashtag your photos #LetTheBakingBeginBlog so I can see your creations and for a chance to be featured!
I first shared this Black Forest Cake in January 2016, with my husband baking it start to finish in the step-by-step photos. In 2026 I broke the steps into short sections, added tips for splitting, soaking, and slicing the layers, and gave the recipe card an alcohol-free syrup option and metric amounts.
Marina | Let the Baking Begin












Hi, can I freeze just the sponge cakes? If so, for how long?
Fantastic blog! i never ever thought i get amazing and tasty recipe guidance from you. After looking this black forest cake my mouth is filled with water complete. i also make this once and will share experience with you. Keep posting such mind blowing article and guide us. Thanks a lot!
Wow! my moth filled with water after reading this blog. It is looking much tempting! How beautifully you explained each point in this blog. Thank you so much for sharing this blog with us.
I love the chocolate recipe you shared…will try it soon…..but I like to always feel the chocolate in my chocolate cake, so i hope if I add chocolate bars to mine won’t spoil the taste of your recipe?….thanks for sharing
Thank you so much Emilia!
I would add chocolate ganache drizzle on top of the whip cream, between the layers of the cake for a more intense chocolate flavor. Adding something to the baked chocolate cake layers might change the texture not in the best way.
so I finally made this cake after eyeing it for about a year. The chocolate layers are very delicious. This cake is more on the sour than sweet. Cream is not sweet. I can taste the rum in the cake and it’s not overpowering bitter. I like that the cherries are not soaked in the rum. I will add a little more rum next time and a little more sugar to the cream as personal preference. Its a good cake. Thanks for a delicious recipe.
Thank you Tatyana for your review!
I’ve just put my cake into the oven … I really don’t think it will turn out because the batter was so thick i had difficulty spreading it inside the cake tins. The only thing I had to do which was different from the instructions was I used 1 cup of milk mixed with 1 tbsp of vinegar instead of buttermilk. Please let me know if this will make a difference. Thanks so much.
You must have messed up somewhere on the measurements of the dry ingredients because the cake batter should be very pourable. Not sure where though.
I know some people use milk and vinegar instead of buttermilk, but I haven’t done that myself so can not speak as to how well it will work.
I made the cake again, and presto!!! it worked out perfectly. It’s an amazing cake. Thanks so much for your response.
There you go, so happy to hear everything worked for you!
Would there be an easy alternative to using the alcohol?
Unfortunately, no. But you can omit it if you can not use it.
I made this it was awesome!!!. My whole family enjoyed after taking it. Thanks for this amazing recipe………
thank you for sharing this easy to follow recipe of my favorite cake. My son was so excited to try this today and he made the whole cake all by himself. The only place where we had trouble (it was my doing) was the icing. I just could not the consistency right, the icing was not stiff enough. I used heavy whipped cream and confectioners sugar , exact measurements as your recipe. Don’t know where I went wrong. Any tips/advice would be great. thanks!
tried to put 5 stars but the screen didnt pick it up
***** !
Thanks for sharing your feedback Chitra! I wonder if you overwhipped the heavy cream or if the heavy whipping cream where you live is less than 30% fat content. If you do use heavy cream with at least 30% fat content it usually whips up with no problem.
It was the star dessert at Thanksgiving! Thanks!
For months I’ve been craving black forest cake, and was really disappointed when the local grocery store’s idea of a black forest cake was chocolate cake with some whipped cream and cherries. Too dense, dry, NOT a black forest cake.
When I came across your recipe, it looked and sounded the part, so I gave it a try for Thanksgiving. I’d added a seasoned rum and soaked a little more than recommended. The tartness of the cherries was balanced with the sugar for a bright flavor, and the buttermilk in the batter gave it its distinctive black forest cake recipe.
I’d highly recommend.
I was saving this cake recipe since you posted it to make it for my daughters birthday and glad I did. It was a hit! So moist and just all the flavors together were perfect. Compliments from everyone who took a bite! Thank you for a wonderful recipe!
That’s great Lilya, thanks for your feedback!
I’m really looking forward to making this but I have a few questions. For the cherry filling, 1/2 cup of cherry juice is listed in the ingredients but it isn’t in the instructions. Is this just added into the pot with everything at the beginning? Also, is the cherry juice used in the soaking syrup the juice from the canned cherries or is it something different?
That’s a great question. Canned cherries are usually sold in light syrup, so when you drain the cherries the cherry syrup/juice that’s drained out is what we use in both the soaking and the cherry filling. And yes you mix all ingredients, including the juice, together and then cook it to make the cherry filling.
Let me know how it all goes Ameilia!
P.S. I clarified in the directions about the cherry juice.
I made this for my sister’s birthday and used Trader Joe’s dark morello cherries and it turned out great! Everyone loved it, thanks for a great recipe!
That’s great Amelia, thank you for your feedback! Trader Joe’s has the prefect cherries for this cake!
Oh, this is really impressive. I want to try it ASAP! If I don’t have homemade sour cherries, what is the best substitution?
Thanks Olga!
They sell sour pitted cherries at the Russian store or at Trader Joes, check those two 🙂
I made this cake last night, soooooo good. Thank you so much for posting this recipe. Love it.
Wow, wow, wow Vadim did awesome job .
That’s amazing! I have to show this to my husband, he doesn’t bake and does very limited cooking. I want to see his reaction too. 🙂 Tell your husband he did an excellent job!
I love everything about this post I don’t know where to start! First off, that is how my dad got into baking cakes. He accepted a bet that men can do everything better than women even baking. I know so arrogant! Anyway, that was in Russian in the 70s, so nothing was easy but he got and/or made all the necessary equipment including piping tips, studied pro baking books and became the most amazing baker ever! People raved about his cakes and his incredibly creative decorating abilities. Your husband just went and did it and that is so COOL! The cake looks gorgeous and I wish I could have a bite! Tell him we are all impressed. 🙂
Thank you for sharing this with us Marina! Congratulations to your husband on a major accomplishment!! This is huge achievement!!!! You are one wise wife to support your husband and take pictures of the process told him that – deep down inside you wanted him to succeed and you didn’t leave the kitchen, but offered your expertise. He is also a good and smart husband for listening and accepting your tips and advice from a wife. Amazing and *sweet* story which resulted success!!!! Thank you!!!!!! 🙂
Oh thank you Tanichka! No need to discourage him from doing what I enjoy, right? lol
Exactly Marina. I’ve once read that the couples that have same hobbies, will have a stronger relationship and better marriage! We would like to see more of your collaborative creations in the kitchen! Keep up your amazing work!!!!!
Wow. He did great. Gona try this version because I don’t like the bitter taste of cherries soaked in alcohol in other black forest cake versions. This seems like a good idea to add alcohol to layers instead. Thanks
The recipe includes a very minimal amount of alcohol and soaking syrup, so it has just a hint of alcohol aroma/flavor. You can adjust the amount of alcohol in syrup by either replacing some of the cherry juice with alcohol, or the other way around. Also, when you choose alcohol for baking, make sure it’s something that tastes good. I have bought rum or brandy (I don’t remember exactly) before that I hated the flavor of and ended up tossing it because it gave off very “woodsy” flavor to the cakes I put it in.