Dad’s Extra Crunchy Naturally Fermented Pickles
Extra Crunchy Naturally Fermented Pickles – it’s amazing how such a simple thing can make such a difference in crunch!

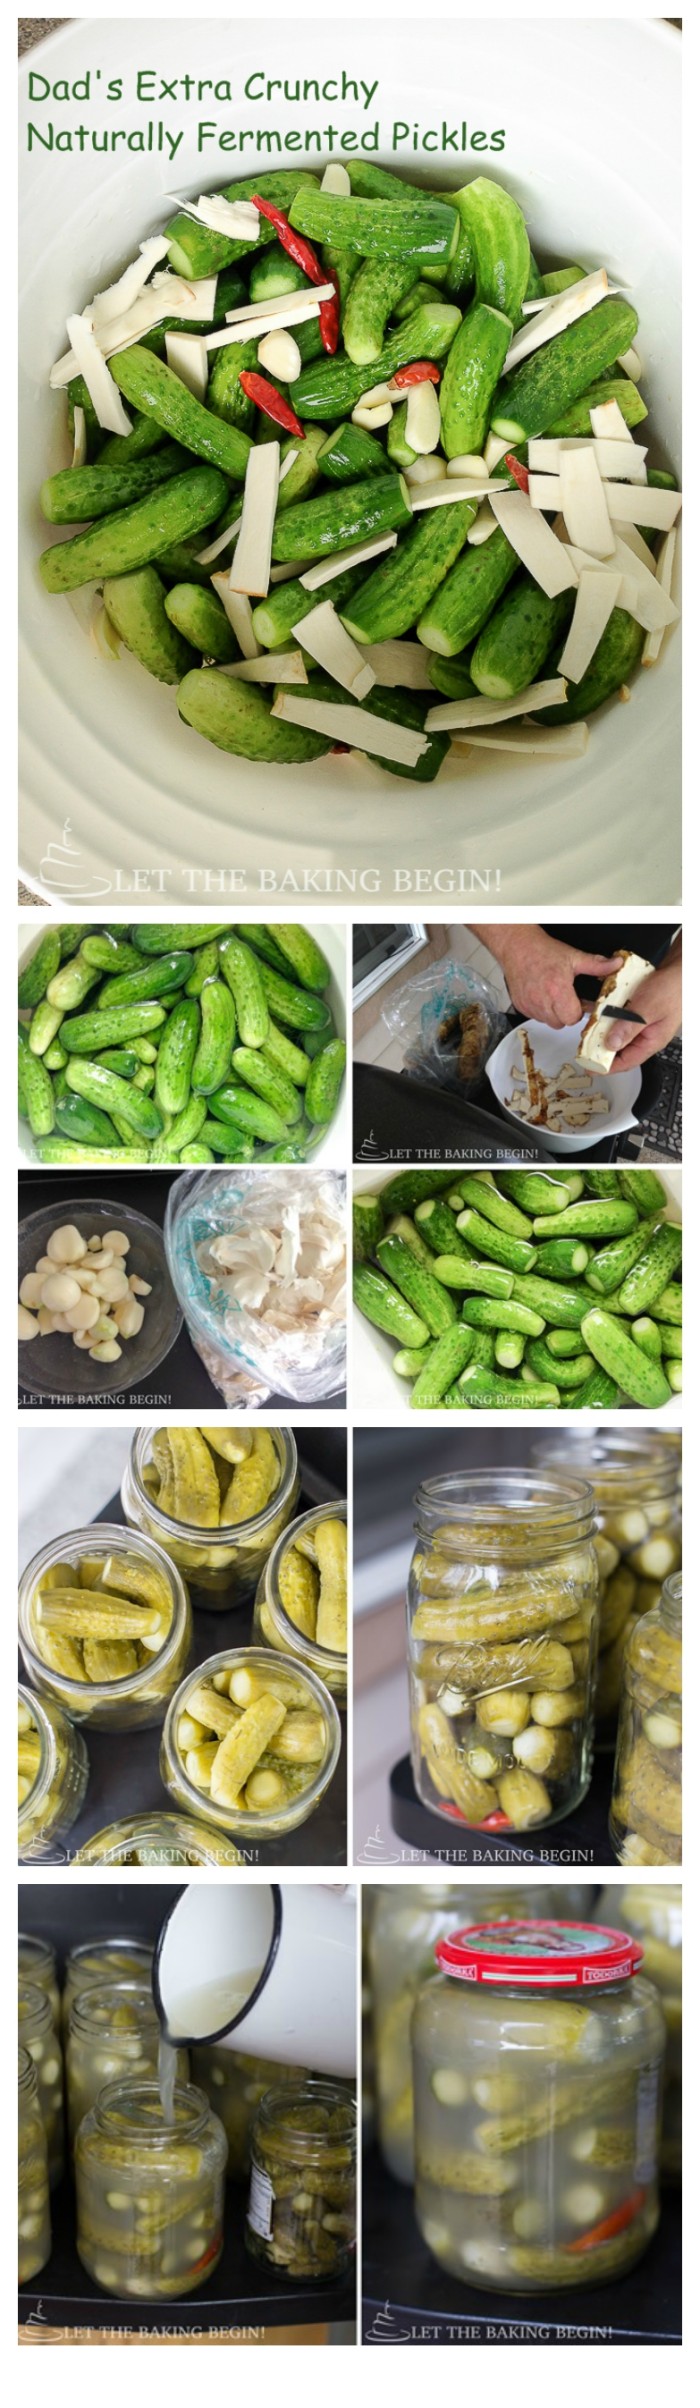
Pickle season is here! Time to make some extra crunchy, naturally fermented pickles! Every year my dad makes enough for his family, our family and my sister’s family, so when I need a jar or two I just pick some from their house. Aren’t my parents wonderful? Well, this year I decided to document the process and share with you guys, because no other pickle beats my dad’s pickles! Super crunchy with a kick of heat they’re a perfect accompaniment to your mashed potatoes or as a simple snack. I know I am weird.
Dad’s Extra Crunchy Naturally Fermented Pickles
Ingredients for the Fermented Pickles:
- pickling cucumbers, 3-4 inch in length
- dry chili pods
- garlic cloves, peeled, crushed or cut in pieces
- dill stalks, (blooming dill)
- horseradish root, peeled, sliced in thin slices (you can use a vegetable peeler to make the slices
- peppercorns
Brine:
- Kosher/Pickling Salt
- Water – 2 Tbsp kosher or pickling salt for every 1 Qt water
Also:
- Jars, sterilized
- Lids, sterilized
How to make Pickles:
Wash the cucumbers, cover with cold iced water and leave for 30-60 minutes. Measure how much water is being added, to know how many quarts you need for the brine later. While the cucumbers are in icy water, peel and crush the garlic, peel and slice into thin slices the horseradish root. Wash the dill stalks. If you wish, you can trim the ends of the cucumbers. {leaving the cucumbers in icy water is the secret to maximizing the crunch. Just think about it this way – your pickles will be as crunchy in the end, as you make them before adding the brine. So put them in iced water as soon as you get them from the market to minimize the water loss and preserve crunchiness}

You can allow the cucumbers to ferment in a bucket, or do this in individual jars. If doing it in the jars, split the amount of garlic, horseradish root, chili peppers, peppercorns and dill between jars instead of putting everything in the bucket.
To ferment in a bucket:
Thoroughly clean the bucket with hot water.
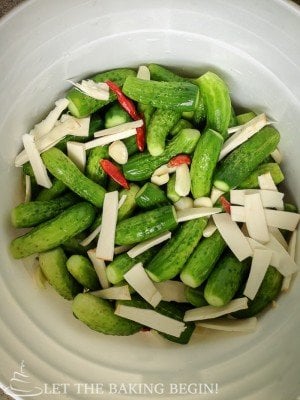
Put half the chili peppers, horseradish root, garlic, peppercorns and dill to the bottom of a thoroughly cleaned bucket. Remove cucumbers from the iced water and add on top. Add the remaining half of chilies, horseradish root, garlic, peppercorns and dill to the top.

In a large pot boil the water for the brine. Add 2 tablespoons kosher or pickling salt for every quart (example: 5 quarts of water would need 10 tablespoons salt) water. Pour the brine into the bucket with cucumbers and dill. Place a clean flat plate on top. Put some kind of heavy object on top to weight it down submerging everything under the brine. Cover with a clean kitchen towel and leave in a dark place at room temperature for about 1 –2 weeks. It will take more or less time, depending on how warm your house is. You will want to start trying them around 1 week from the time you made them, to check if they’ve fermented enough. The water will turn cloudy and the pickles should taste sour and well fermented.

If not planning to eat the pickles within couple weeks of making them, make sure to sterilize the jars and lids before you fill them.
To sterilize the jars:
Put jars and lids through the washing cycle in the dish washer or wash thoroughly by hand. Put jars into the oven and turn it to 350F. Leave jars in the oven for 30 minutes. Put lids into a pot with water and boil for 15 minutes. Allow jars to cool before adding the cucumbers.
Fill jars with the pickles evenly distributing garlic, chili peppers and the horseradish root among the jars. Discard the dill. Putting chili peppers in the jars will make them very spicy over time. If you do not want them spicy, do not put them in the jars. Leave 1 inch head space in the jars, we need the space for the brine to cover the pickles.

Bring the remaining brine to a boil and simmer for 1-2 minutes. Now fill the jars with the boiling hot brine. (if you plan to eat the pickles within couple weeks, stop with this step, put the lids and tighten them. Keep the jars refrigerated. If you want the pickles for long storage, continue with the instructions)
Let the pickles sit with the brine for 10 minutes, then drain the brine back into the pot and bring to boil again. {Pouring the hot brine over cold pickles once makes the brine just warm and it’s not enough to kill the enzyme activity. If you don’t pour the hot brine twice the enzymes will continue fermenting the cucumbers even after you seal the jar and thus making them too sour}
Pour the brine over the pickles again covering by about 1/2-1 inches. Close with lid and allow to cool. 
Store in a dark place until ready to eat. Refrigerate the jar with pickles when ready eat, for best flavor and crunch.
View this post on Instagram
Try these Cucumber Recipes:
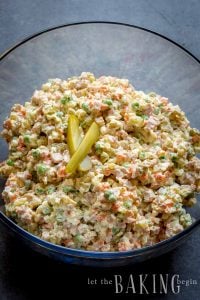
- Creamy Cucumber Dill Salad – Cucumbers and dill in a creamy dressing.
- Cucumber Salad – Crunchy cucumbers with garlic and seasoning. The perfect salad!
- Cucumber Tuna Bites – A delicious tuna and cucumber appetizer.
Dad’s Extra Crunchy Naturally Fermented Pickles
Recipe for the best homemade fermented pickles. Extra crunchy pickles made with a simple pickling brine.
Ingredients
- 25 lbs pickling cucumbers 3-4 inch in length
- 10 dry chili pods
- 10-15 garlic cloves peeled, crushed or cut in pieces
- 4-6 dill stalks (blooming dill)
- 1 lbs horseradish root peeled, sliced in thin slices
- 20 peppercorns
- 10 grape leaves *optional
Brine:
- Kosher/Pickling Salt + Water – 2 Tbsp salt for every 1 Qt water
Also:
- Jars and lids sterilized
- .
Instructions
-
Wash the cucumbers, cover with cold iced water and leave for 30 minutes. Measure how much water is being added, to know how many quarts you need for the brine later. While the cucumbers are in icy water, peel and crush the garlic, peel and slice into thin slices the horseradish root. Wash the dill stalks. If you wish, you can trim the ends of the cucumbers. {leaving the cucumbers in icy water is the secret to maximizing the crunch. Just think about it this way – your pickles will be as crunchy in the end, as you make them before adding the brine.}
-
You can allow the cucumbers to ferment in a bucket, or do this in individual jars.
To ferment in the jars,
-
split the amount of garlic, horseradish root, chili peppers, peppercorns and dill between jars instead of putting everything in the bucket.
To ferment in a bucket:
-
Put half the chili peppers, horseradish root, garlic, peppercorns and dill to the bottom of a thoroughly cleaned bucket. Remove cucumbers from the iced water and add on top. Add the remaining half of chilies, horseradish root, garlic, peppercorns and dill to the top.
-
In a large pot boil the water for the brine. Add 2 tablespoons kosher or pickling salt for every quart (example: 5 quarts of water would need 10 tablespoons salt) water. Pour the brine into the bucket with cucumbers and dill. Place a clean flat plate on top. Put some kind of heavy object on top to weight it down submerging everything under the brine. Cover with a clean kitchen towel and leave in a dark place at room temperature for about 1 –2 weeks. It will take more or less time, depending on how warm your house is. You will want to start trying them around 1 week from the time you made them, to check if they’ve fermented enough. The water will turn cloudy and the pickles should taste sour and well fermented.
-
If not planning to eat the pickles within couple weeks of making them, make sure to sterilize the jars and lids before you fill them.
To sterilize the jars:
-
Put jars and lids through the washing cycle in the dish washer or wash thoroughly by hand. Put jars into the oven and turn it to 350F. Leave jars in the oven for 30 minutes. Put lids into a pot with water and boil for 15 minutes.
Fill jars with the pickles evenly distributing garlic, chili peppers and the horseradish root among the jars. Discard the dill. Putting chili peppers in the jars will make them very spicy over time. If you do not want them spicy, do not put them in the jars. Leave 1 inch head space in the jars, we need the space for the brine to cover the pickles.
-
Bring the remaining brine to a boil and simmer for 1-2 minutes. Now fill the jars with the boiling hot brine. (if you plan to eat the pickles within couple weeks, stop with this step, put the lids and tighten them. Keep the jars refrigerated. If you want the pickles for long storage, continue with the instructions)
-
Let the pickles sit with the brine for 10 minutes, then drain the brine back into the pot and bring to boil again. {Pouring the hot brine over cold pickles once makes the brine just warm and it’s not enough to kill the enzyme activity. If you don’t pour the hot brine twice the enzymes will continue fermenting the cucumbers even after you seal the jar and thus making them too sour}
-
Pour the brine over the pickles again covering by about 1/2-1 inches. Close with lid and allow to cool.
-
Store in a dark place until ready to eat. Refrigerate the jar with pickles when ready eat, for best flavor and crunch

Thank you for following me on Instagram, Facebook & Pinterest!
Hashtag your photos #LetTheBakingBeginBlog so I can see your creations and for a chance to be featured!
Marina | Let the Baking Begin


Ive used this recipe several times. The final product is delicious!
I make mine differently for long term storage. I pack the cucumbers into sterlized jars(I boil the jars in water in a pot), pour salt water over them, sterilize the lid and cover tightly. The lid will close and the cucumbers will ferment in the closed jar. Some people invert the jars and stand them on the lid for 2 days before putting away for long storage. I have some of these pickles from last year and they are not too sour at all. This method saves time in having to pour the hot brine twice over the pickles for the long storage.
Do you mean that you pour the hot brine over fresh cucumbers and seal it, and the brining happens inside the sealed jar? If so, how long does it take for the cucumbers to be fermented? I’d love to hear more about this.
Yes, brining happens in the sealed jars. I do not know how long. I believe it is the same as in an open jar on the counter – several days or until the cucumbers inside the jars become the golden color. These sealed jars will last a year. I store them in the basement on shelves.
Hi! I love your recipe right up to the point where you boil the brine and “seal” your jars. It’s not a frequent occurrence but this could potentially lead to botulism which is deadly. Here’s why. When you boil the brine you kill the lactic acid from the lactobacillus which is what causes things to pickle. Botulism cannot survive in a lactic acidosis environment. In order to have pickles safe from botulism you either need active lactobacillus or water bath can using the correct ratio of vinegar to water. To keep naturally fermented pickles in storage you can either keep them in an unheated basement or fridge when they have reached the sourness you like. This will significantly slow down the ferment but not stop it. Lastly you will benefit from the probiotics in your fermented pickles. Please don’t take chances. Botulism is not food poisoning. It’s a deadly toxin which requires an antitoxin that is kept in storage in San Francisco. I know that sounds crazy but I went to 8 eight hour classes to become a Master Food Preserver through my local extension office.
Hi Carolyne,
Botulism is no joke, I totally do not want that in any of my foods. I do want to explain why I think there’s no chance for botulism to survive in the brine.
While the pickles are being fermented the brine which was started out as just salty becomes very acidic, with a relatively low Ph. So while we do not have any vinegar here, we do have the naturally formed acid, which is the byproduct of fermentation. It is generally known that botulism can not survive a Ph below 4.6, which the brine is.
When we boil the brine, we kill off any lactobacillus that could be in the brine itself and also to kill any of the lactic acid forming bacteria, which in turn will stop the fermentation process from continuing. When we pour the hot brine over the pickles the first time, only some of the lactobacillus that is left on the pickles is killed, since the cool cucumbers cool the brine quickly. That is why leave the pickles with the first hot brine for a couple minutes, to allow the pickles to warm through, so that when we drain the brine, bring it to a boil and pour it over the second time it will kill off what is remained of it. Again, generally you want the temp of 85C to be maintained for 5+ minutes in order to kill off botulism causing organisms.
Boiling the brine is done to kill off the lactobacillus and stop the fermentation, but the acidity of the brine which is not diminished by boiling is there to prevent it from allowing the botulism to form past the point of sealing the jars. Does that makes sense? If there’s any errors in my understanding, please help me out and tell me if I missed something.
Thank you for the conversation Carolyne!
Hi Marina,
Thanks for sharing your recipe. I’ve done lacto-fermented pickles several times. They’re delicious , but they don’t turn out too crunchy. That’s why I’m excited to try your recipe.
I do have a question about adding hot brine to the ice water-chilled cucumbers. Doesn’t adding the hot brine defeat the purpose of chilling the cucumbers? I would think letting the brine cool to at least room temperature before would produce a crunchier pickle. I’m interested to hear your thoughts on this.
Thanks again.
Hi Lorenzo,
If you’re looking for the scientific explanation of how or why this works, I am not the best person to ask lol. I can tell you they’re crunchy, but can not tell you which step exactly in the process does that. I do think that starting out with a crunchy cucumber is what makes it crunchy. I do like your theory of cooling the brine for better crunch, but at the same time wonder if the hot brine kills off enough unnecessary bacteria to make the whole fermentation process work. Obviously, the cold cucumbers will cool the brine immediately as it is poured over them, but I do think there’s still enough heat in there to kill off some bacteria that shouldn’t be there.
Just my thoughts on the matter 🙂
I love that you make these in such large batches! i’ve been looking for a recipe that takes care of multiple jars at once, as my family eats them so quickly that I need to do more than one at a time for sure! Thank you for sharing! I’ll report back with how they turned out!
This batch is actually half or 1/3 of what I usually can for the year ahead lol. This year I ran out around March or April. Can not wait until we can can more for the upcoming year.
You included the link to Bubbies, are you affiliated with them? Just read the story behind the company and now I am going to be on a hunt in my local grocery stores. I don’t think I have seen them anywhere I shop. Gottta get my pickle fix somewhere (you know, with mine being gone for almost 5-6 months now) and Bubbies pickles seem like something that would do it.
Hello, I’ve come across your website and I am so excited to try this recipe. Thanks for sharing. My only question is – if we pour the hot water 3x over these crunchy cucumbers, isn’t ot going to make it limp and not as crunchy? Could you please explain a bit? Thanks in advance!
You would think, right? But somehow it does not! I don’t know how to explain to you on the chemical level, but I can tell you that this is the recipe we have been using in our family for ages and the cucumbers are always crunchy. The only time they would not turn out crunchy is if you start with limp cucumbers. But if your cucumbers are crunchy (while fresh) to start with, then your pickles will be crunchy as well.
Very good recipe! Did them couple months ago, and yesterday opened them. So delicious and crunchy! Our family loves this recipe! Thank you so much!
Thank You for this recipe. I have been looking for a recipe for horseradish dill pickles. How do the jars seal? Do they seal as the hot brine cools?
Yes, the jars seal as the hot brine cools off. Hope you try this recipe and you love it as much as we do 🙂
Would I use that same brine from bucket to fill jars?
Yes, it’s the same brine that it was fermenting in 🙂
Hi Marina,
This recipe was first I have ever tried to make myself!!! Today I’m canning those crunchy and delicious pickles!!!! I can’t believe my own eyes;) that all is thankfully to yours family good recipe and instructions!!!
This has me smiling from ear to ear! thank you so much for taking the time to comment and let me know of your success!! Thank you for using my recipe Natik!
So there is no actually canning process? How do they keep for a long time? I’m used to pickling and canning. I do notice tho, that the boiling of the filled jars makes my pickles not as crunchy as I’d like. I look forward to trying your recipe when I have enough cukes in my garden! Thanks!
Depends on what you mean by “canning”. When you pour the hot boiling liquid over the cucumbers (twice) it kills the active bacteria that made the cucumbers ferment. As long as you use clean sterilized jars/lids and pour the boiling liquid over the cucumbers twice they should last you until winter for sure and thus make your pickles canned 🙂
Finally, a recipe I’ve been waiting for!!! Thank you sooooo much! Will try this at home!
Let me know how it all goes Zhenya! I have been eating these like crazy this summer, dad keeps making them for different parties and each time makes some for us too and they’re just so good!
I think you made a mistake for 4 quarts of water its 8 table spoons of salt
Yeap, you are right! At first I wrote 2.5 tbsp that’s why the directions had 4 to 10 quarts, but then I re measured and changed it to 2 tbsp and forgot to change that in the instructions. Thanks for catching that!
Thanks for sharing your family recipe Marina! We use a similar one but without the horseradish root and chili peppers, but now I’m intimidated to make a batch following your recipe, since the end of summer it the time to do it
Thank you so much for sharing your family’s secret recipe! Pickling process always sounds very intimidating and hard; your step by step process is very well recorded and I feel that if I follow your steps, I’ll be successful. Thank you!
I was intimidated myself until I saw how easy it is!
love this recipe! I make it a little different. I should try it this way too! 🙂
Thank you! How do you make it Valya?
Absolutely gorgeous photos. I wish I could bite into one of those extra-crunchy pickles!! Thank you for sharing your family recipe!
Thanks Julie! Would you be surprised if I told you that only the last two sets of pictures were taken with the camera? The rest were taken with an iPhone 😀
That’s awesome!! lol