Homemade Flaky Pie Crust Recipe
Are you looking for the perfect buttery, flaky pie crust recipe? Look no further. Learn all there’s to know about an all-butter homemade pie crust to get a perfectly flaky and delicious pie crust on your first try. I include step-by-step photos and a detailed pie dough recipe with simple ingredients.
Pie crust dough might sound intimidating, but that is only until you understand the basics behind how the dough works. Once you understand, you’ll be able to navigate through the recipe confidently, knowing what to expect from each step in the process.
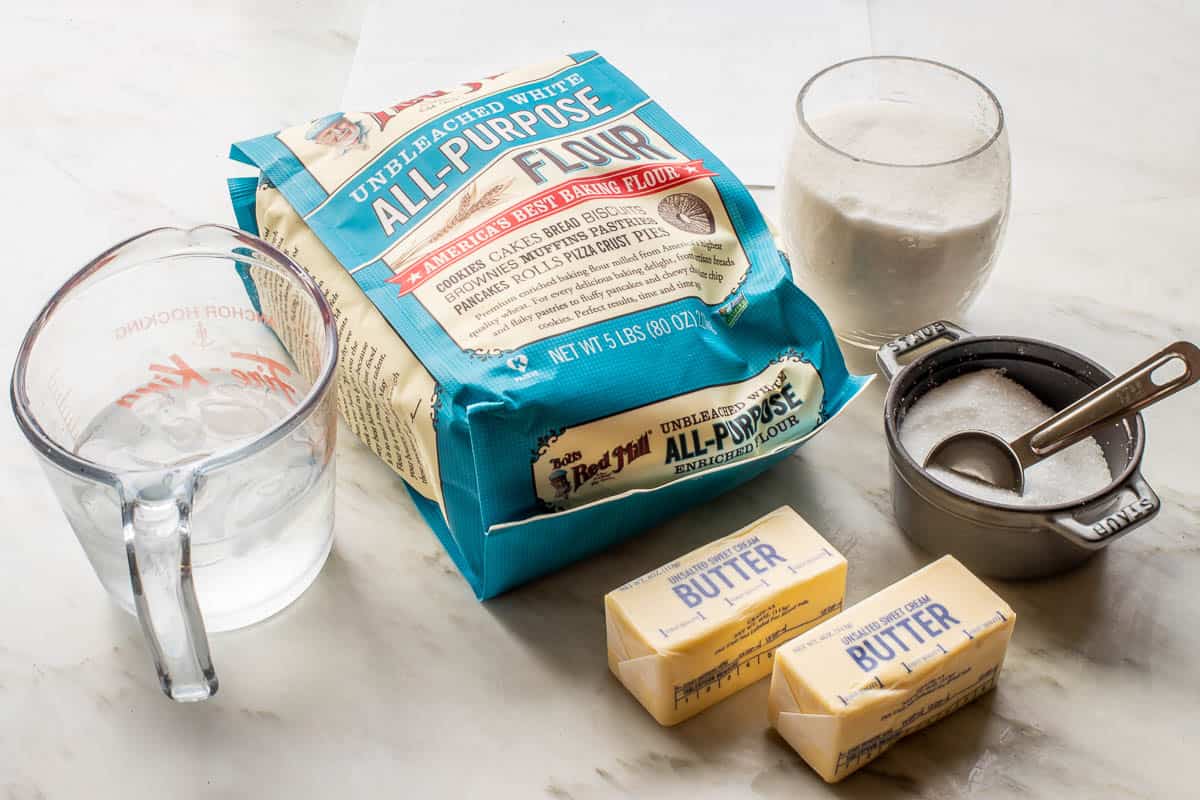
Only 5 pantry staple ingredients are flour, butter, water, salt, and sugar. It is all in the technique, and there are several key steps to the perfectly tender and flaky crust. I’m here to tell you all about it.
So what is pie crust like?
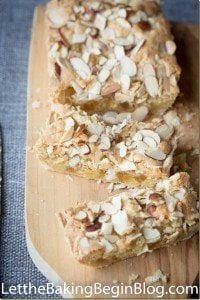
A pie crust is a pastry dough used for pies, quiches, hand pies, and other delicious recipes. From savory (quiche, anyone?) to sweet, it’s a universal vessel for a delicious, flaky, buttery pastry with unlimited possibilities for fillings.
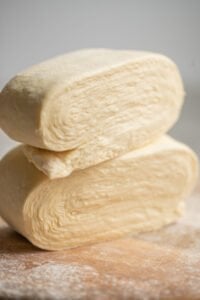
Texture-vise is something between a shortbread and a puff pastry. Mix too much butter into the flour, and you’ll get a shortbread textured dough. Increase the butter to the flour ratio, and you end up with a quick puff pastry dough. The pie crust-making technique is similar to the quick puff pastry. The only real difference is pastry dough has less butter.
You want to have big chunks of butter throughout the dough, which will create a flaky pie crust.
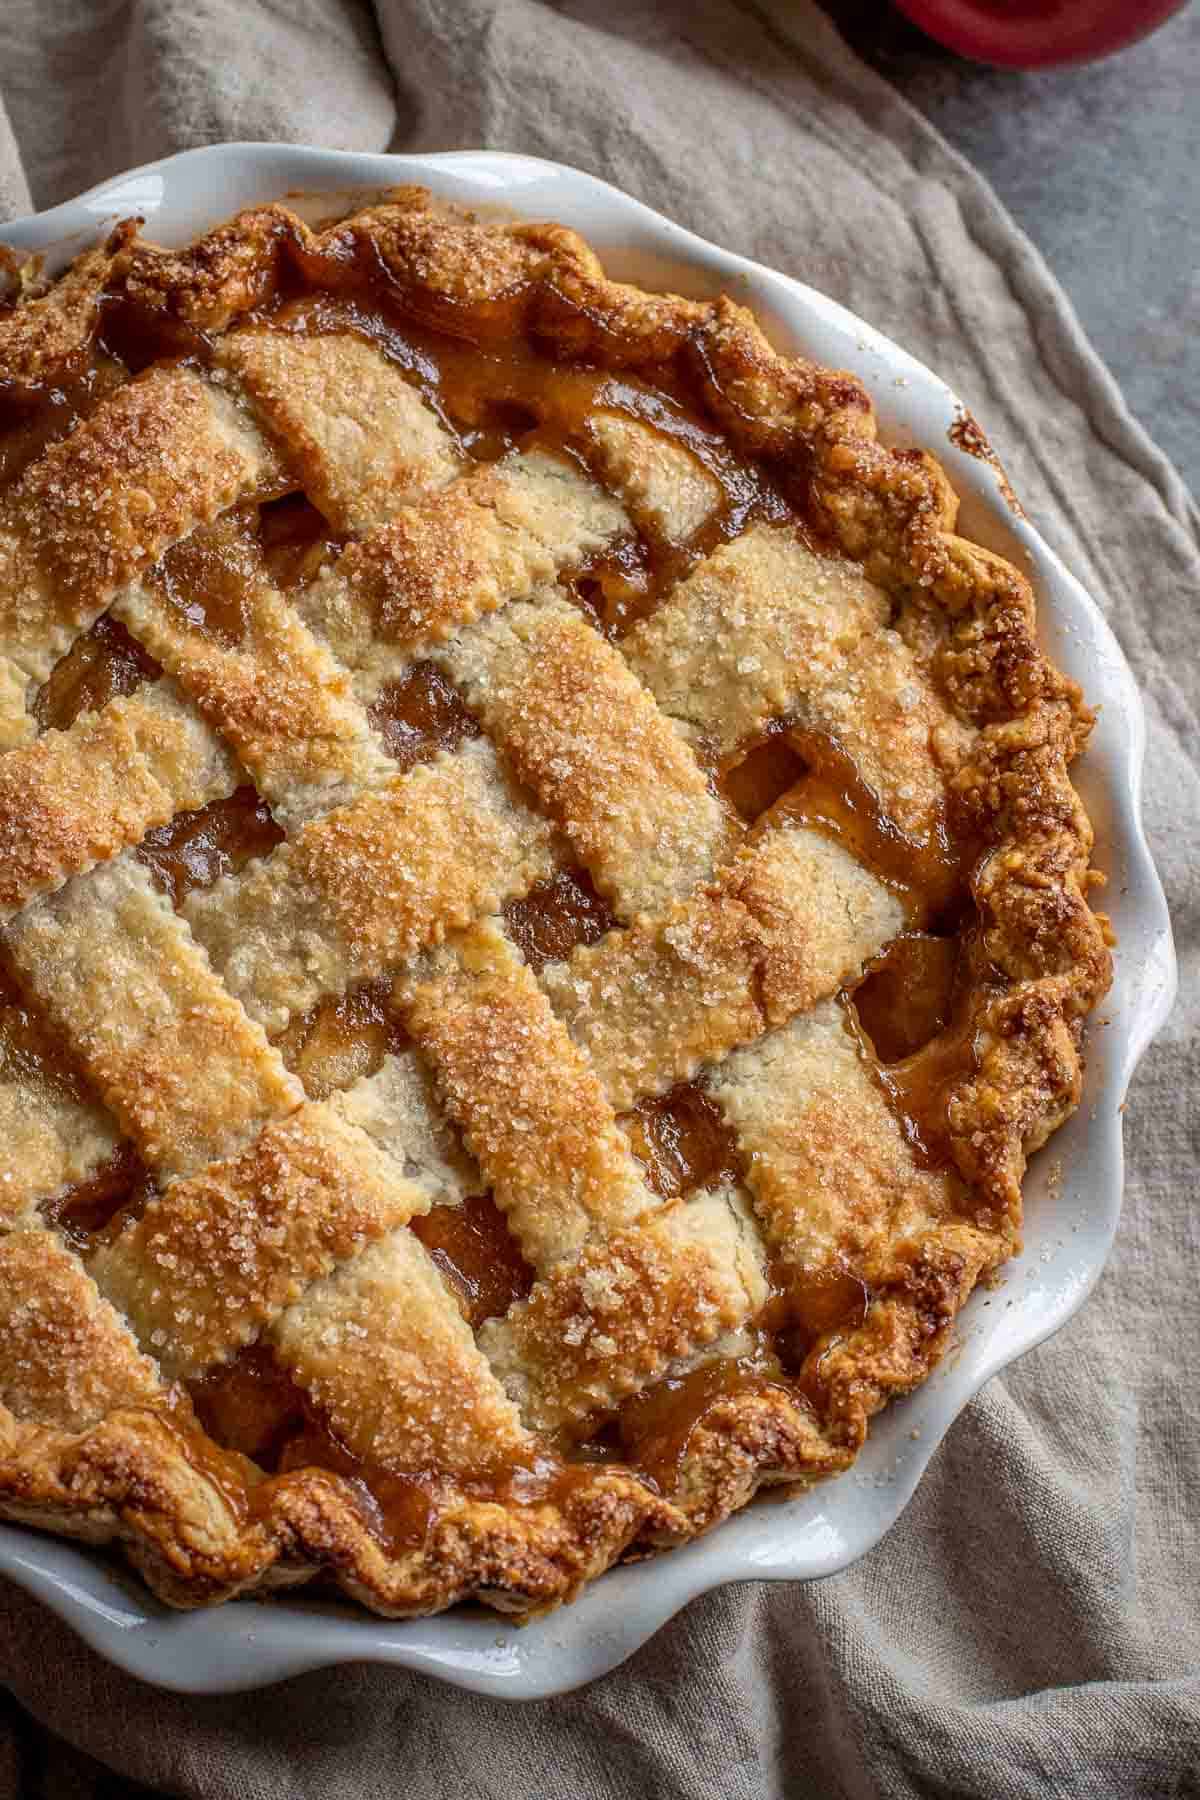
What are we looking for in a perfect pie crust?
The perfect pie crust will be:
-
- Light, flaky, tender
-
- Golden in color, not pale and bland
-
- Sturdy enough to hold the filling and not “droop” when a slice is picked up
Imperfect pie crust can be:
-
- Gummy or dense
-
- Pale in color or too dark
-
- Sugar cookie-like instead of flaky
-
- Greasy
-
- Hard to cut through with a fork
I’ll navigate you to ensure none of those happen to your pie crust.
Pro tips for success with the best Pie Crust:
Before I tell you how to make this easy pie crust, you’ll need to keep several things in mind as you go:
| Cold butter – is key to the best pie crust. If you keep your butter in the fridge, place it in the freezer for 10-15 minutes to chill it further. We need the butter to stay as cold as possible throughout the process because cold butter isn’t as likely to melt into the flour. Why does it matter? It has to do with how the flaky layers in the pie crust are created. As the pie bakes, the butter pieces melt and create steam; the steam creates pockets, separating the layers into a flaky pie crust — the larger the butter pieces, the flakier the pie pastry. For intricate details, though, you’ll want to work the butter into the flour a bit more. That will help to keep the details sharp and visible as the dough bakes. |
| Ice water will help keep the rest of the ingredients cold and also contribute to the crust’s flakiness. |
| Do not overwork the dough – this will make the crust tough. Do not knead the dough. Use tossing and pressing motion throughout the process, without bending or kneading the dough. |
| Chill the dough – this keeps the butter cold while the water hydrates the flour and the gluten relaxes. Chilled dough will be easier to roll out and prevent the butter from melting into the flour as you roll it out. it from getting warm as you roll it out. |
How to Make the Perfect Pie Crust
Find a recipe card with detailed recipe and ingredient amounts at the bottom of the post.
Ingredients for pie crust:
- Flour – use all-purpose or pastry flour. Pastry flour is milled more finely and has less gluten, making for a more tender crust. If all-purpose flour is all you have, go ahead and use all-purpose flour.
- Butter – use unsalted, cold butter for the best flaky crust.
- Ice water hydrates the flour and binds all ingredients into a dough. Iced water will help to keep the dough cold.
- Sugar – granulated sugar will help with browning the crust and improving the flavor balance.
- Salt – seasons the dough and enhances the flavor.
How to make the flaky pie dough:
- Measure out all of your ingredients. Scale is the best tool for consistently perfect pie crust. If you do not have a scale, use measuring cups/spoons. Remember, if your flour isn’t properly fluffed up before you spoon it into the cup, you’ll have too much flour and a crumbly crust. I always weigh my flour, and most of the time, the amount of flour comes to 2 1/4 cups, but sometimes it’s 2 1/2 cups. Keep this in mind.
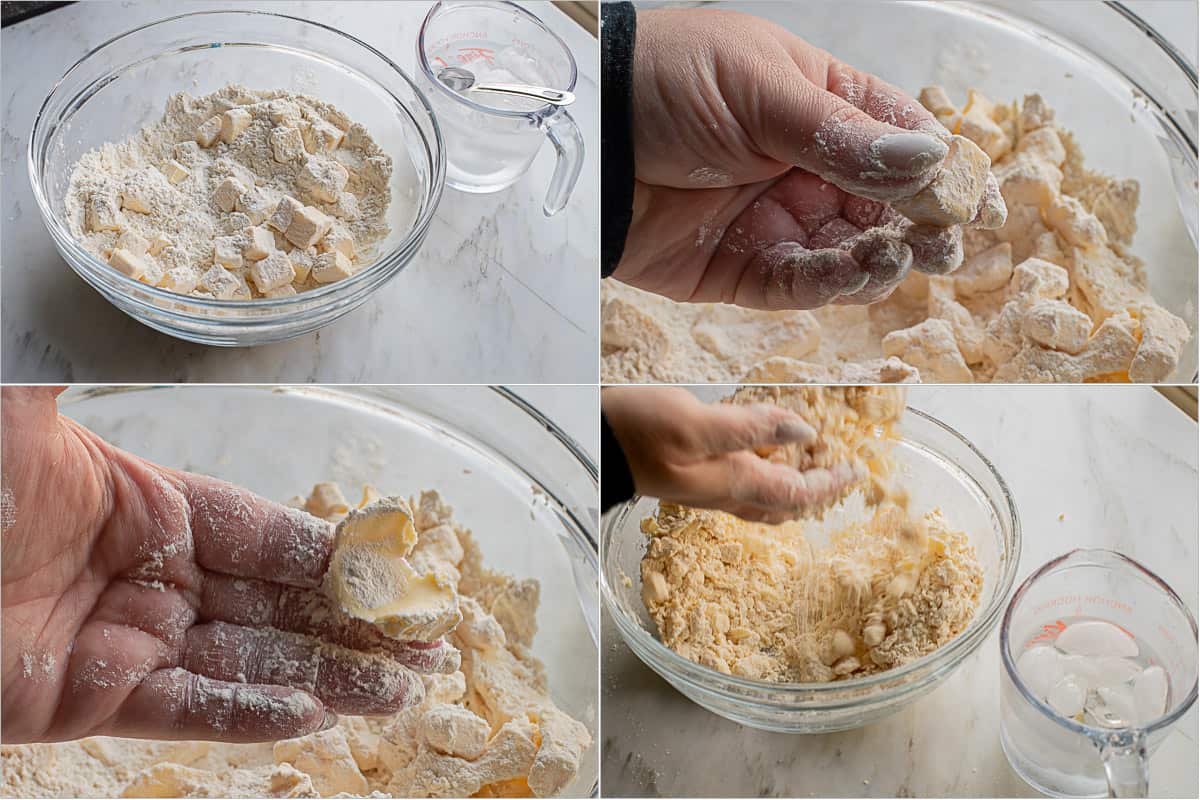
- Add all ingredients except for water to a large bowl. Gently toss together to coat the butter in the flour. Now, press each butter piece between the palms of the thumb and the index finger to flatten them. Then, continue tossing and gently rubbing the butter with flour.

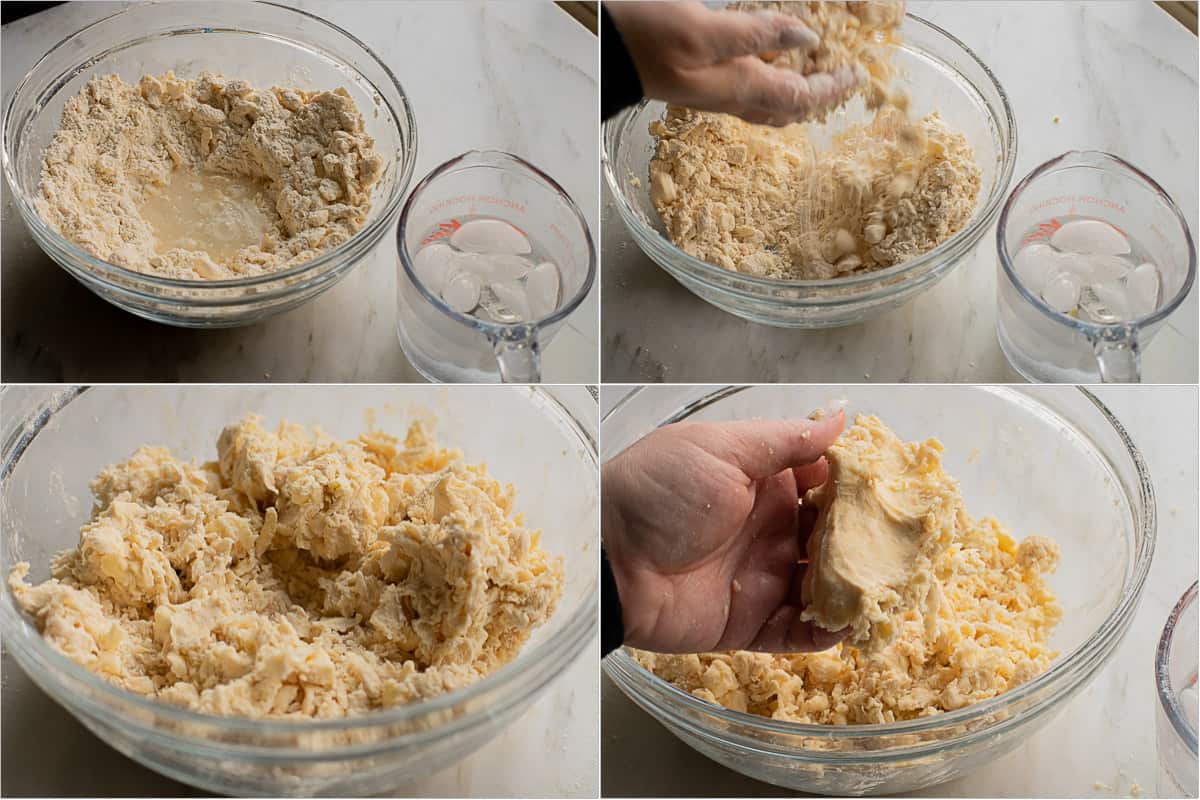
- Add cold water: Make a small well in the center of the flour/butter mixture and add 5-6 tablespoons of ice water. Now, with the fingers of your hands, go on both sides of the mixture and toss the flour/butter mixture with water to moisten everything well.
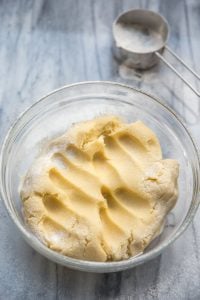
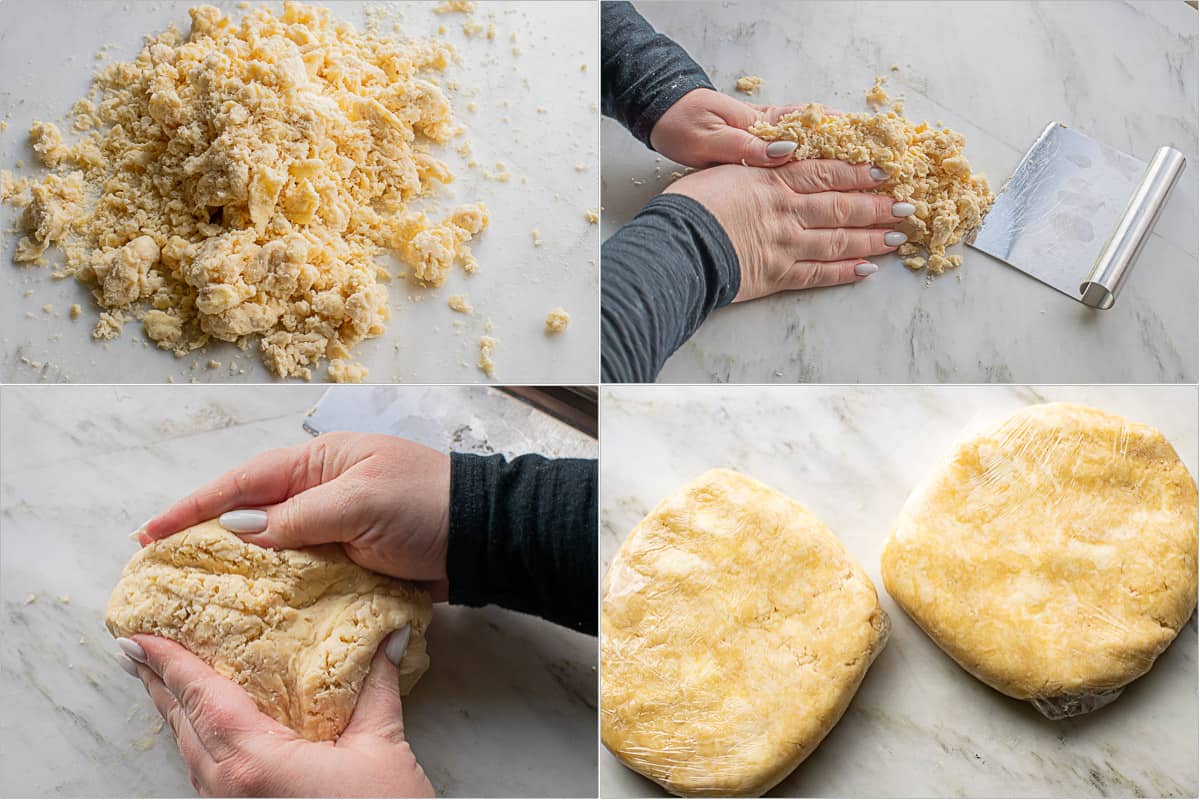
Press the mixture together – if it clumps into a dough, don’t add any more water. If it does not, add more, 1 tablespoon at a time, tossing well to combine until it clumps, as shown below. Do not knead the dough. Any kneading will trigger gluten formation. Gluten formation = tough pie crust. - Turn the bowl over onto a clean working surface and press the dough together, forming a dough. You might need to sprinkle more water if the dough does not come together. Or, you can just wet the tips of your fingers and try to bind the dough together.
Do not bend or knead the dough; the crust will be tough.
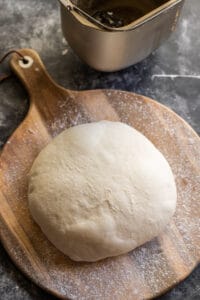
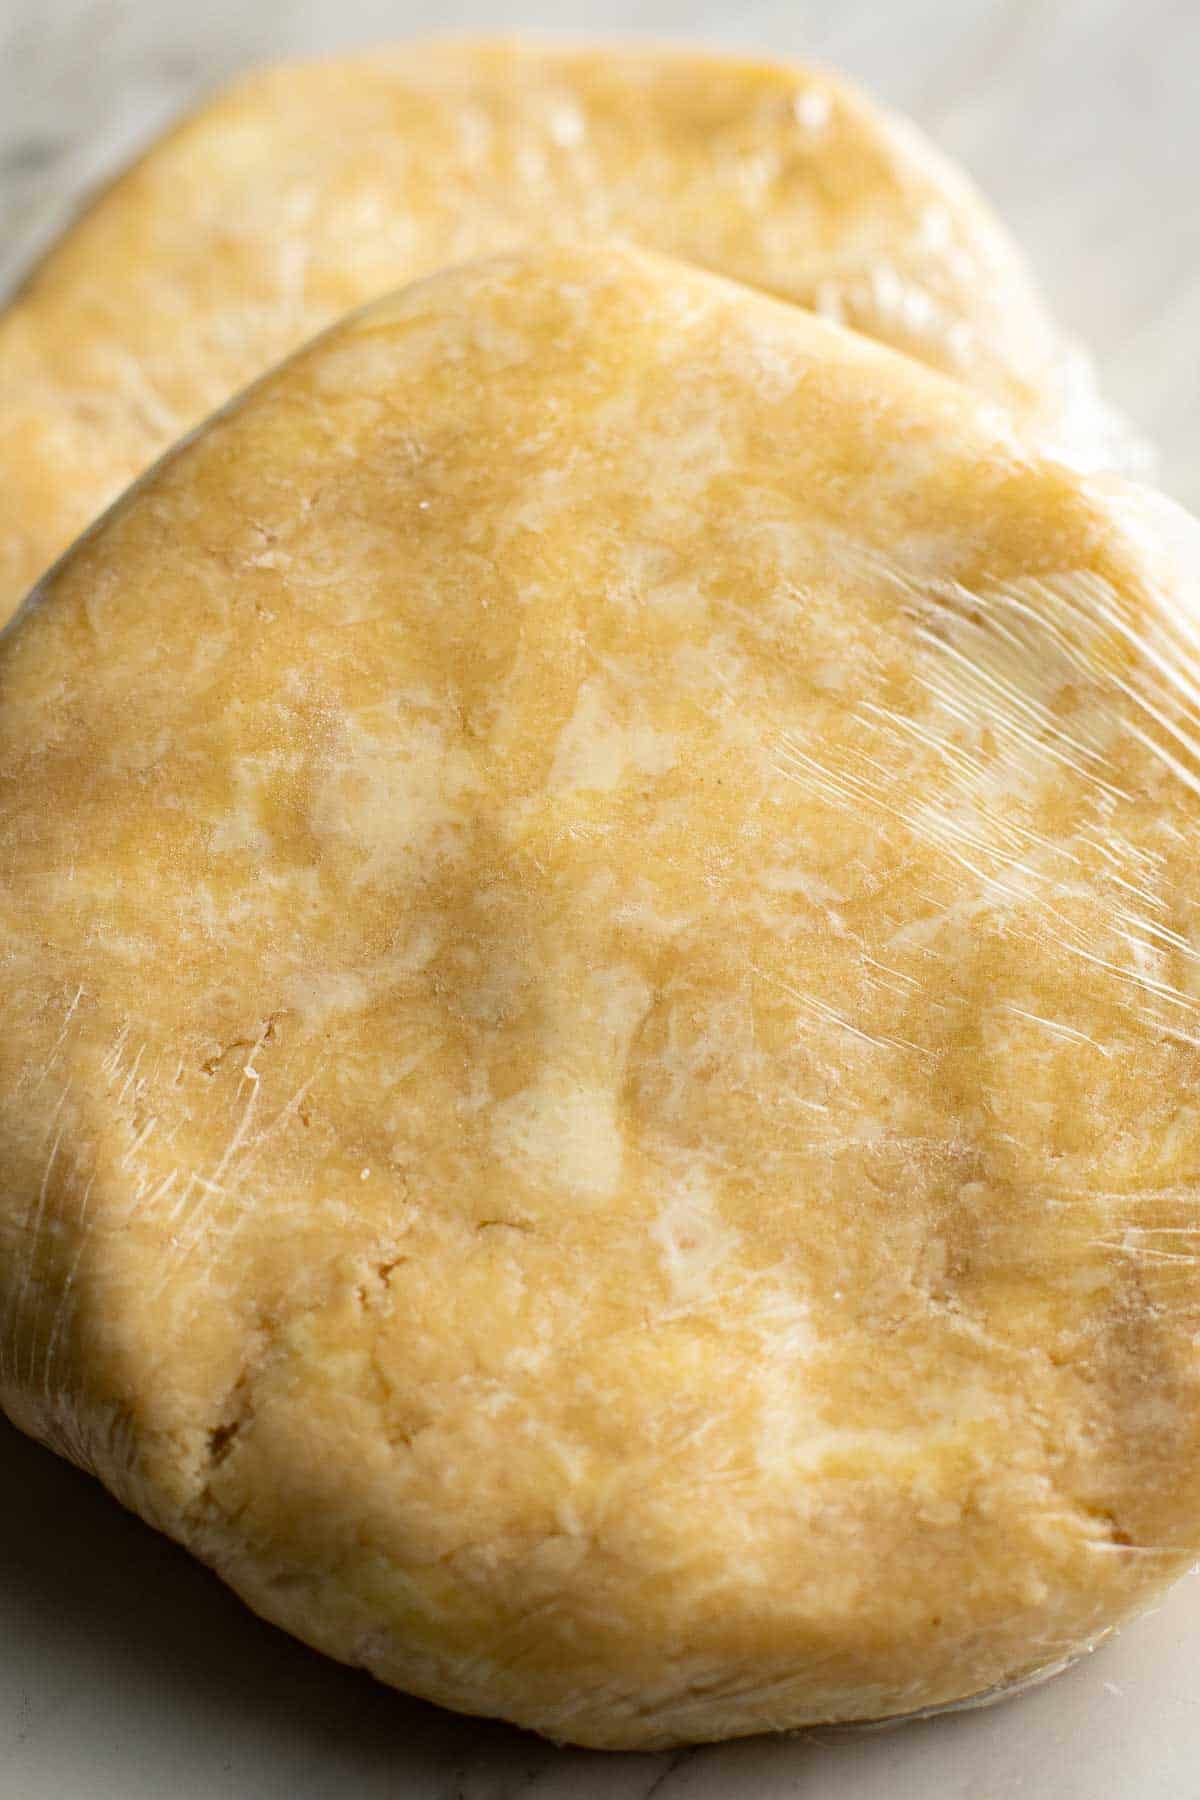
Divide the dough into 2 and shape into disks. Cover with plastic wrap and refrigerate for 2 hours or up to 3 days. This will chill the butter and relax the gluten in the dough, making it easy to roll out.
Can Pie dough be frozen?
Yes! This pie dough can be made and frozen up to 3 months in advance. Transfer from the freezer to the fridge and leave overnight to thaw.
How to roll out the pie crust
- Work with one pie dough disk at a time. Keeping the other disk in the fridge will prevent it from getting warm as you work on the first one.
- Dust the surface, the rolling pin, and your hands with some flour. Do not add a lot of flour, but don’t skimp and make the pie crust stick to the table.
- Place the dough ball on the floured surface and move it around to flour the bottom. Flip it upside down, roll it in the flour again, then start rolling. If the dough is stiff at first, do a couple of presses on the dough with the rolling pin.
Rotate the dough and repeat. Then, roll the dough into an even circle by gently rolling, rotating the dough, and rolling again to keep the circle even. Lift the pie pastry as needed to check that it isn’t sticking to the surface – if it is, add a bit more flour. Use a bench scraper if needed to help reposition it.
Tip: If you prefer perfectly round edges before transferring to the pie plate, use a large 12″ lid to cut out a 12″ circle. This is the perfect size for a 9-inch pie dish. Add the scraps to the other half of the dough.

How to Transfer the pie dough to the pie plate
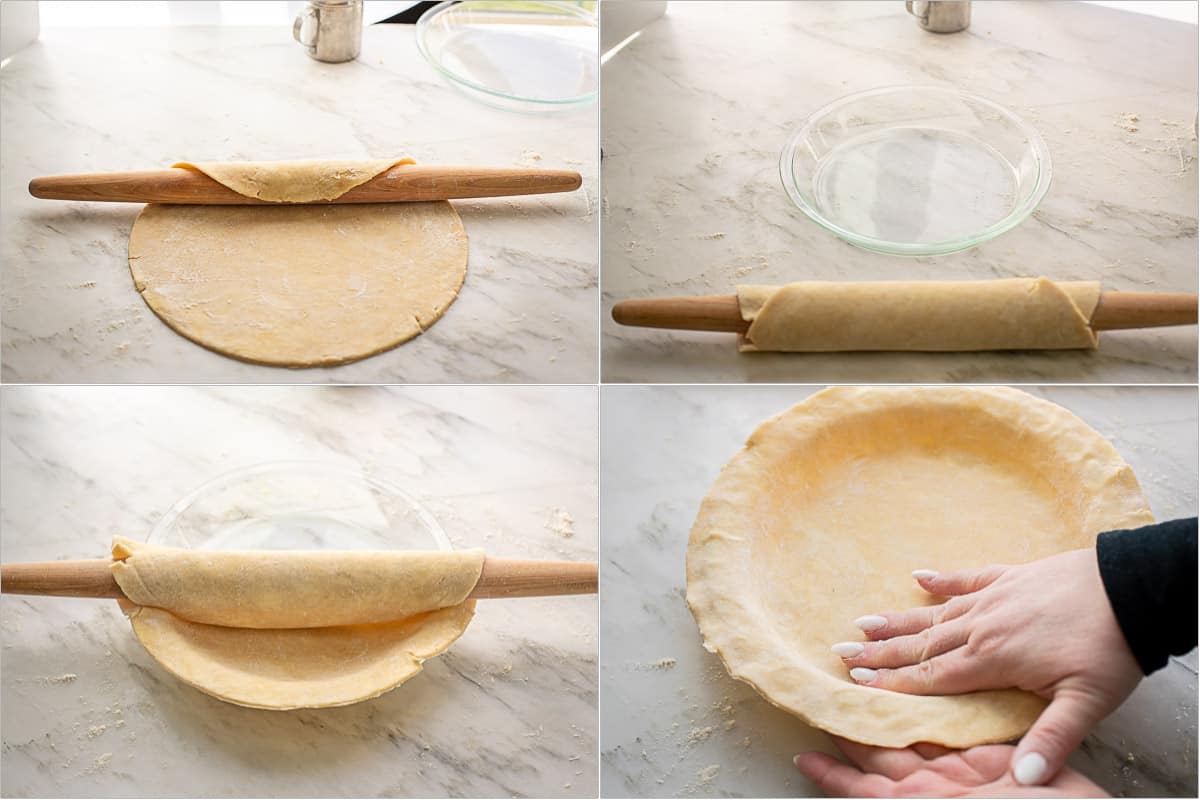
- Set the rolling pin at the far end of the pie crust and wrap the dough around. Now, gently roll the dough onto the rolling pin.
- Next, set the pie plate behind the rolling pin. Lift the rolling pin with the dough and carefully unroll the pie crust into the pie dish, centering it.
- Gently press the crust into the plate, especially around the inside corners and against the edges of the pie dish.
- If you didn’t trim the pie dough with the lid described above, use kitchen shears to cut the dough around the plate, leaving about 1 inch of overhang. Add the scraps to the other dough or use them for something else.
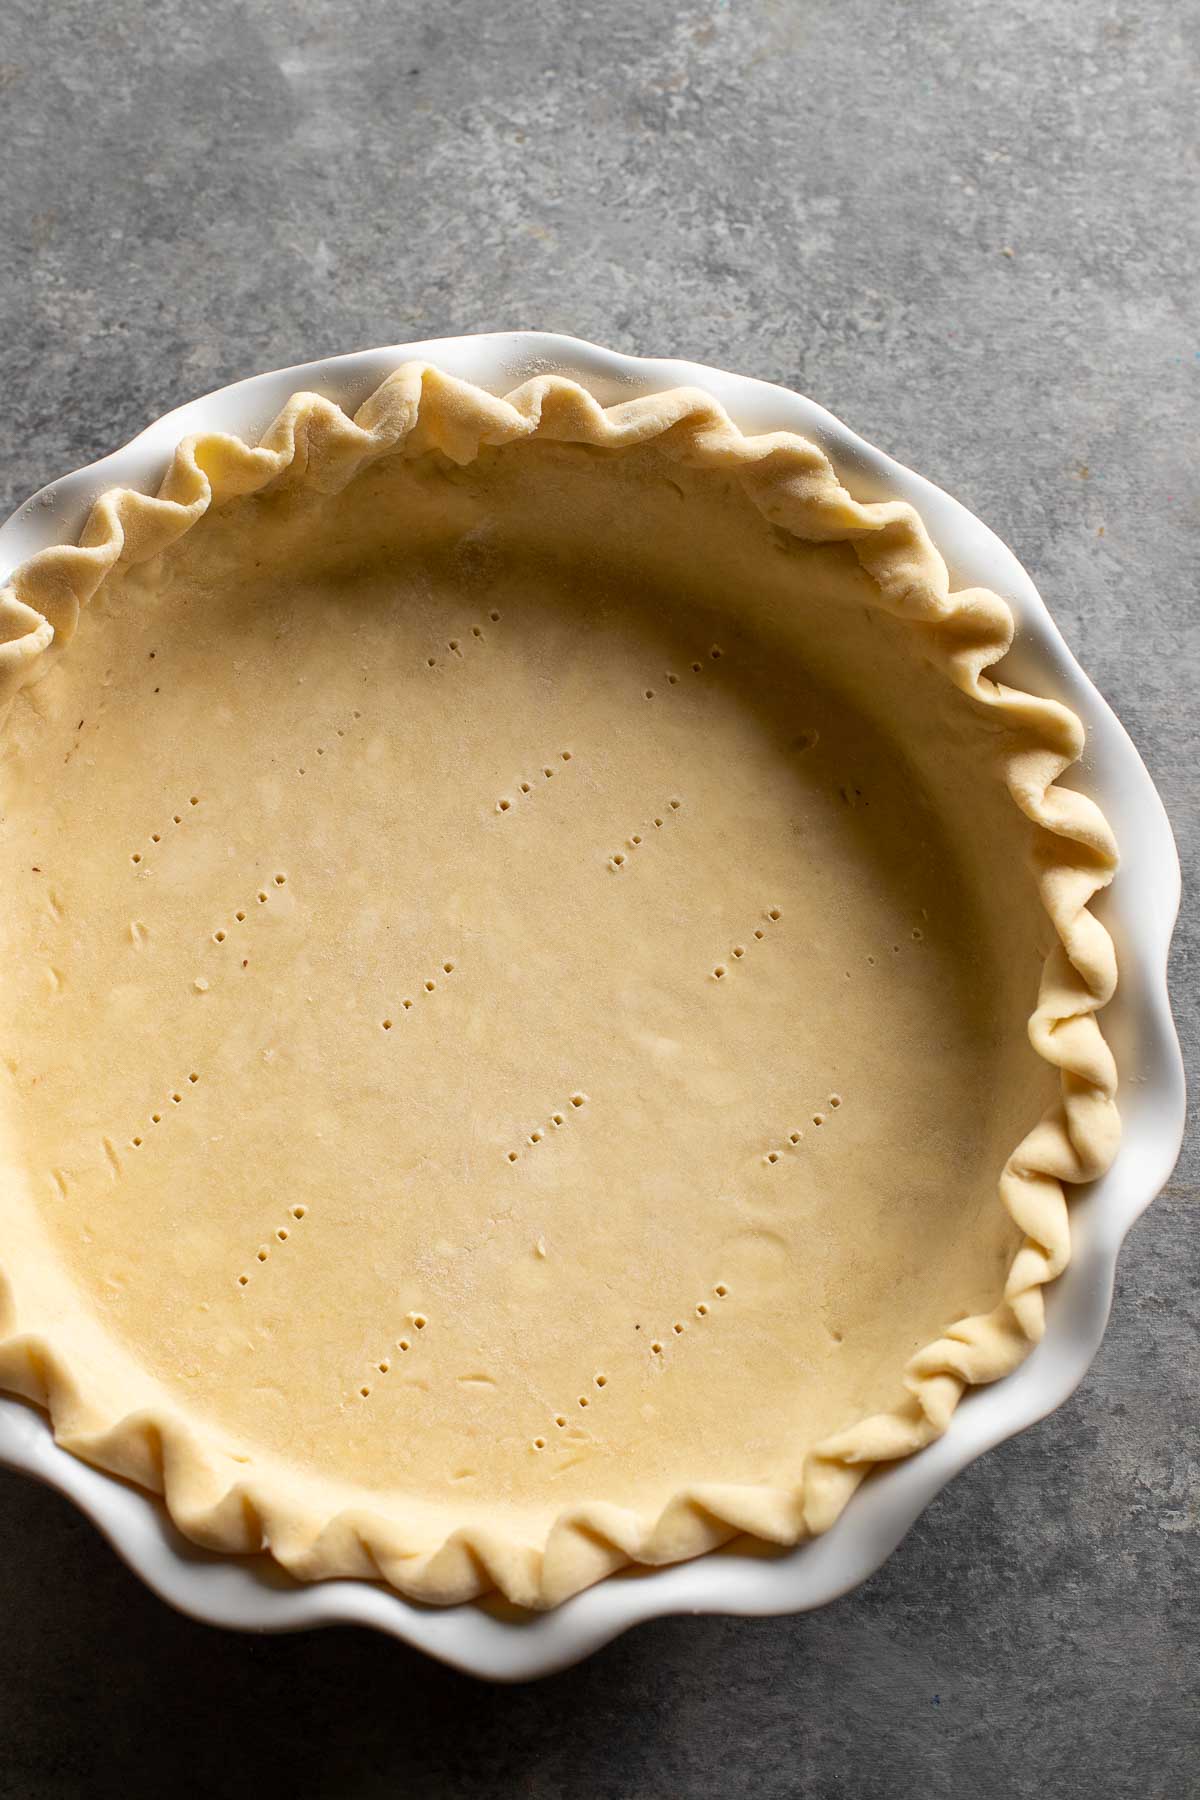
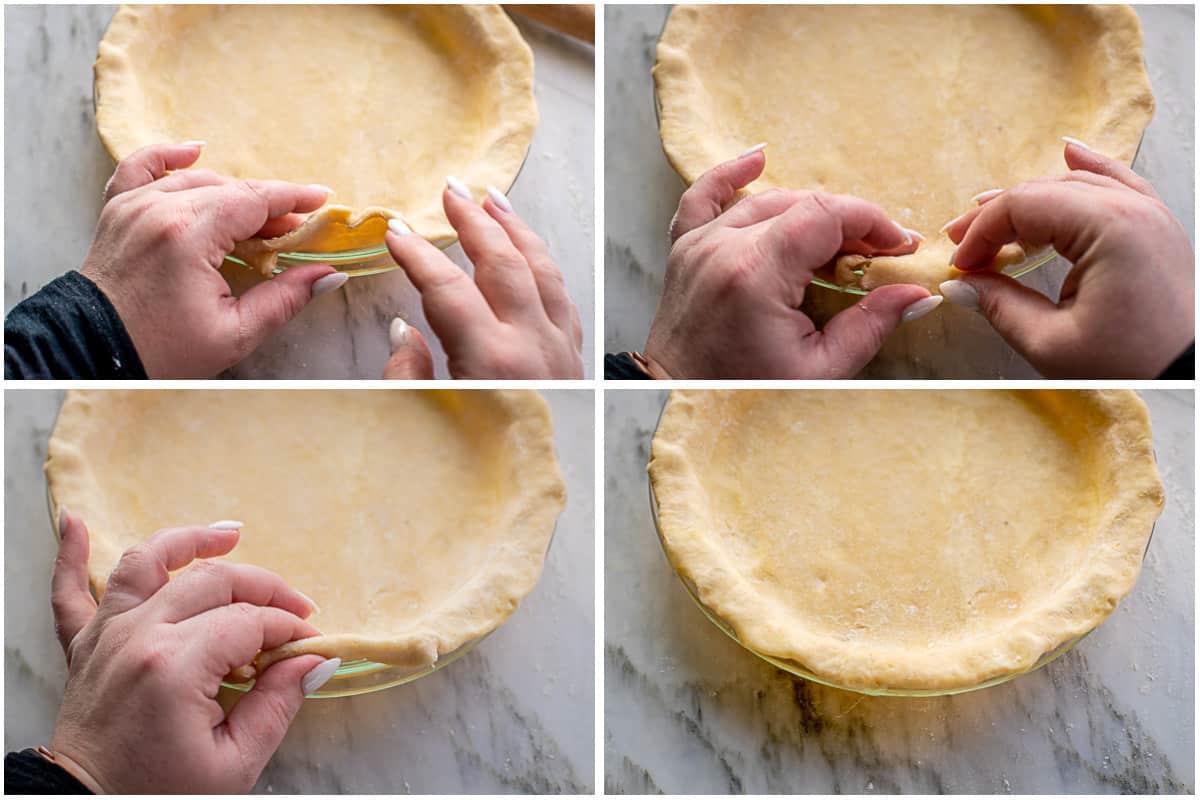
- Fold the edges of the pie crust under for a neater edge and press it down into the pie plate’s edge. This will keep the pie dough from sliding down as the pie bakes.
- Refrigerate for 20-30 minutes while you make the filling before baking.
How to Flute the Pie Crust:
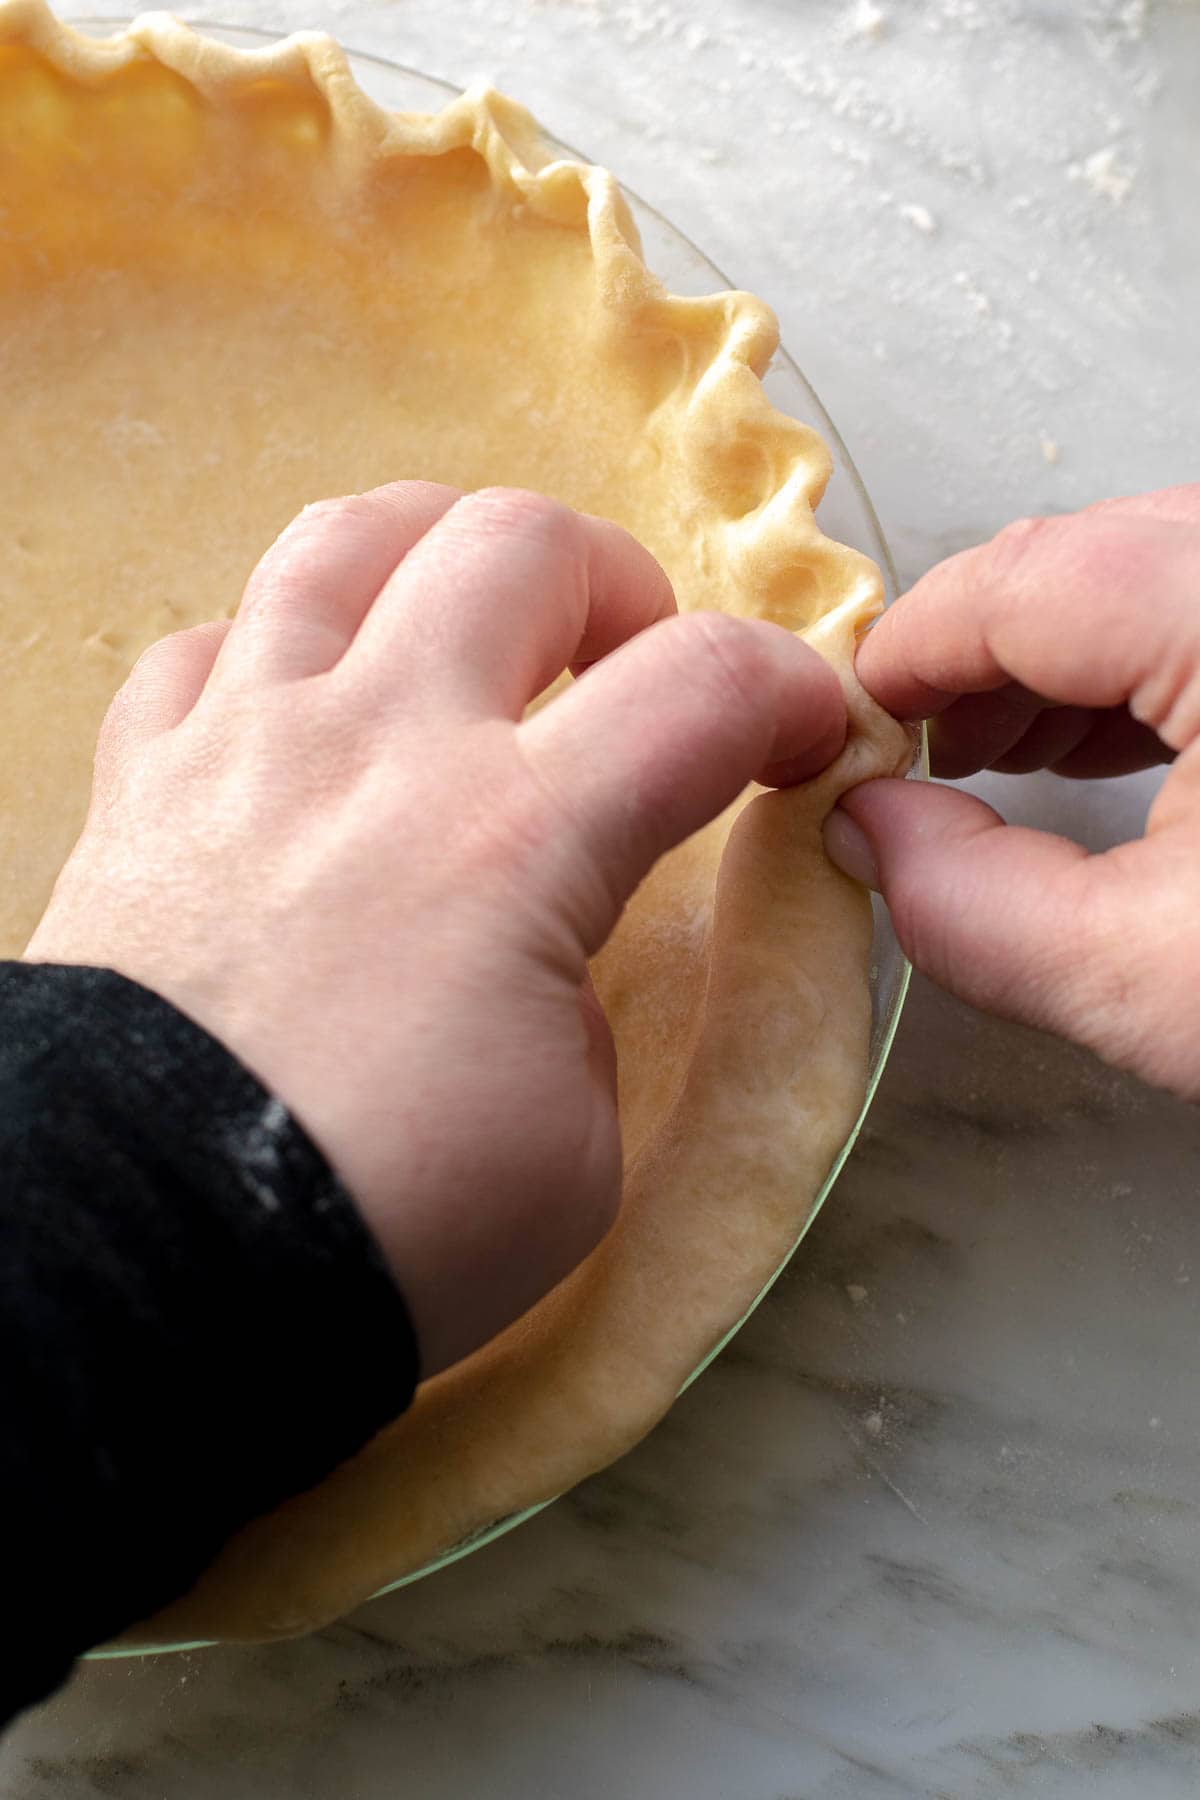
- To create a classic scalloped look on the edges of the pie crust, use the thumb and the pointer finger on your dominant hand to form a V-shape. Then, use the tip of the index finger on your other hand to press the edge of the dough between the V-shaped fingers. This technique is called fluting and will give your apple pie a beautiful finish.
- As you create the fluted edge, you’re applying pressure of one finger between the two others and pressing the dough down into the edge of the plate simultaneously. This will ensure that the dough doesn’t slide down as it bakes.
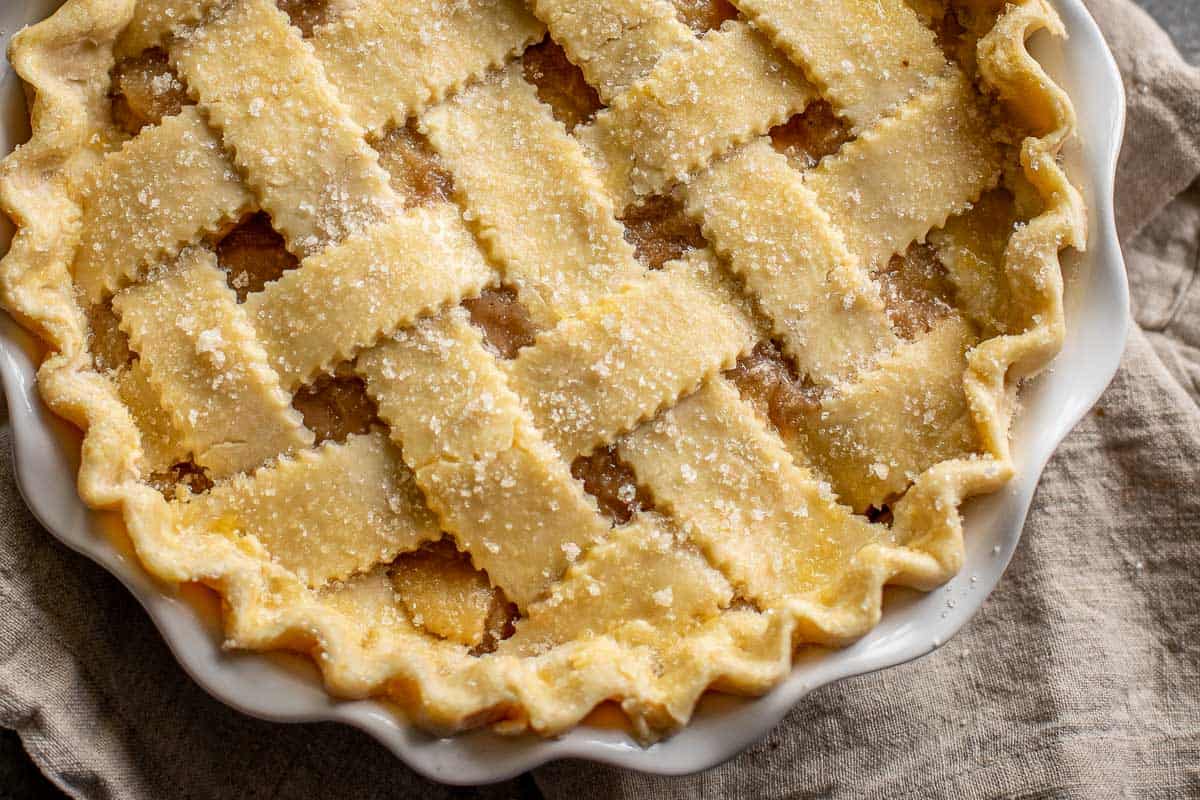
- If using a second disk to create a lattice or cover the filling, flute after placing the top crust and gently press the edges of the top and bottom crust together, tucking the pressed edge underneath or over.
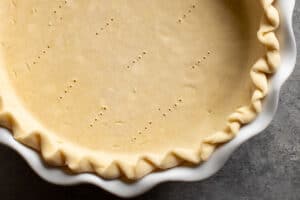
Did you know that fluting isn’t just for looks? Fluting helps to make the edge thinner by extending the surface area of the edge with waves, helping to cook it evenly.
FAQ
My pie dough is crumbly.
Crumbly dough means you need to add a bit of ice water. Add one tablespoon of ice water at a time until a handful of pressed dough becomes a lump.
Can I double this recipe to make more than 2 pie crusts?
It’s best to make 2 separate batches. Making a large batch will cause you to overwork the dough and create a tough crust.
Homemade Pie Crust Recipe
This is a pie dough recipe for a homemade, all-butter pie crust that is made with flour, butter, water, salt, and sugar. Learn everything you'll need to make the perfect pie crust on the first try.
Ingredients
- 2 1/4 – 2 1/2 cups all-purpose flour fluff the flour, then spoon into the cup to measure
- 1/2 teaspoon kosher salt
- 1 tablespoon granulated sugar omit if making a savory pie
- 1/2 lb unsalted butter COLD, cut into 1/2 inch cubes (1/2 lb = 2 sticks butter)
- 1/2 cup water ice cold
Instructions
General Pie Crust tips
-
COLD ingredients: Keep all ingredients very cold, especially the butter and the water. This will prevent the butter from melting into the flour while making the pie dough.
-
Keep the butter in large pieces as you make the crust for a flaky crust. For a mealy crust, work the butter a little more into the flour.
-
Handle the pie dough as little as possible. Working it too much will make a tough pie crust because of all the gluten that will form.
-
Measure the ingredients correctly: The best way to measure the ingredients is to weigh them. If you do not have a scale, use a 240 g (check to make sure your cup isn't a 250-gram cup) cup to fluff the flour first, then gently spoon the flour into the cup, overfilling it. Level off with a butter knife
If you have a heavy hand, go with 2 1/4 cups instead of 2 1/2 cups of flour.
-
Do not skip the chilling time after making the crust. it's needed to chill the butter and relax the gluten.
How to make the flaky pie crust
-
Add dry ingredients: In a large bowl combine 2 1/4 cups flour, 1/2 teaspoon salt, and 1 tablespoon sugar. Whisk or toss with hands to combine.
-
Sprinkle the cold cubed butter over the flour and toss with your hands to coat the butter in flour. Flatten each piece of butter quickly with the palms of your index and thumb. Do not keep the butter in your hands for too long.
With your fingers continue to toss everything together to break some of the butter pieces into smaller pieces.
You can also take a couple handfuls of dough and rub them between the palms of your hands (in a sliding motion) to create smaller pieces of butter.
You want to have a good mix of big chunks, half walnut size and smaller pea sized pieces.
-
TIP: For flakier crust, you'll want more large chunks of butter. On the other hand, if you're planning to make some intricate designs with the pie crust, you'll want more of the smaller pieces of butter.
-
Add water: make a well in the middle of the flour/butter mixture and add all but 2 tablespoons of ice water. Use your fingers to toss the flour and water together quickly and continue doing so until everything is evenly moistened.
Do not knead; this will lead to a tough crust.
Press a handful of dough in your hand, and if it clumps together, do not add any more water. If the dough is still crumbly, add 1 tablespoon of water at a time and toss the dough together until it's evenly incorporated after each addition before checking if it clumps, and/or adding more water.
-
Do not overwork the dough; the pie crust will come out tough and heavy. Use only tossing and pressing together motions to mix everything, not kneading or bending of the dough.
-
Bring the pie crust dough together: turn over the dough onto a clean working surface and press with both hands into a mount. Keep pressing and smooshing it together until a dough comes together. If the dough stays crumbly, add just a bit more water, or wet your fingertips and moisten the dryer areas.
If a small area of the dough stays dry and doesn't want to clump up, instead of adding water to the whole dough, sprinkle a tiny amount of water just on that dry patch and then press it back into the rest of the dough.
-
Divide and refrigerate: Cut the dough into 2 equal pieces and form a 6-inch round disk with each. Wrap the pie crust disks with plasticc.
-
Refrigerate for at least 1-2 hours or up to 2 days. The flour will be hydrated by the liquid; the gluten will relax and create a dough that is easy to roll out.
How to roll out the pie pastry dough
-
Work with 1 pie crust at a time. Keep the other one in the fridge.
Remove it from the fridge and leave at room temperature for 10 minutes to make it easier to roll out, or go around the disk with your hands to make it more malleable.
If left out for too long, the dough will stick much more when rolling it out. In that case, pop it back in the fridge for 10-15 minutes and then resume.
-
Flour it: dust a clean working surface lightly with flour. Set the dough disk in the center and move it around a bit to coat the bottom of the dough with flour. Now flip the disk and repeat by moving the dough in the flour to cover the bottom again.
-
Roll the pie dough: Now place the rolling pin in the middle of the dough and press gently as you roll it back and forth, rotating the dough to keep the shape round and the bottom from sticking.
Add more flour if needed, but don't add too much.
If the edges break or crumble, use your fingers to smooth them back into an evenly rounded circle.
If your pie dish is 9 inches round, you'll want to roll your dough to about 12 inches. If you have a 12-inch skillet lid, it's perfect for measuring and cutting a perfect circle before transferring to the pie plate. If not it's okay.
Roll it to be slightly larger than the pie dish. You'll want about 1 inch of overhang when the pie dough is placed inside the plate, so keep that in mind.
How to transfer the dough to a pie plate
-
Set the rolling pin at the far end of the pie crust. Wrap the end of the pie crust around the rolling pin and gently roll it towards yourself. Now, place the pie plate behind the rolling pin with the rolled dough.
Gently lift the rolling pin with the dough and unroll the dough directly over the plate, centering the dough over the pie dish.
-
Press the dough into the plate by pressing with your fingers, especially into the corners of the dish.
-
Fold the overhang of the pie crust under itself creating a neat edge. Press it into the edge of the pie dish (this is one of the tricks to keep the crust from shrinking down the side as it bakes).
How to Flute the Edge of a Pie Crust (optional)
-
Form a v shape with the thumb and index finger of one hand and use the side of the tip of the index finger of the other hand.
Press the dough with your index finger towards the inside of V-shaped fingers. Press the dough not only towards both sets of fingers, but also down into the pie plate. This will prevent it from sliding down as the pie bakes.
Go around the edge of the pie plate and repeat the pattern to create a beautiful fluted edge.
Refrigerate
-
Refrigerate the pie (covered, if for more than 20-30 min) while you make the filling and preheat the oven.
Recipe Notes
Tips for baking:
To prevent a soggy bottom crust, preheat the oven with the pizza stone. Then, bake it directly on the pizza stone. The direct heat from the stone will create a beautifully crispy/flaky bottom crust.
Marina | Let the Baking Begin