Quick Chebureki Recipe – Чебуреки
Chebureki is a delicious fried turnover filled with a juicy ground meat filling. This super quick and easy recipe for crispy, meat-filled Chebureki uses pre-made dough to speed up the process, and you’ll love the simplicity of this recipe.
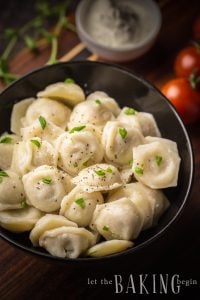
Want to try some delicious Slavic dishes? You’ll love these chicken meatballs (kotleti), my Pelmeni, and this incredible unstuffed cabbage roll casserole.
 is one of my favorite foods ever. This version can be made in 15 minutes or less thanks to a smart recipe hack! #recipehack #chebureki #cheburekirecipe")
What Makes a Proper Cheburek
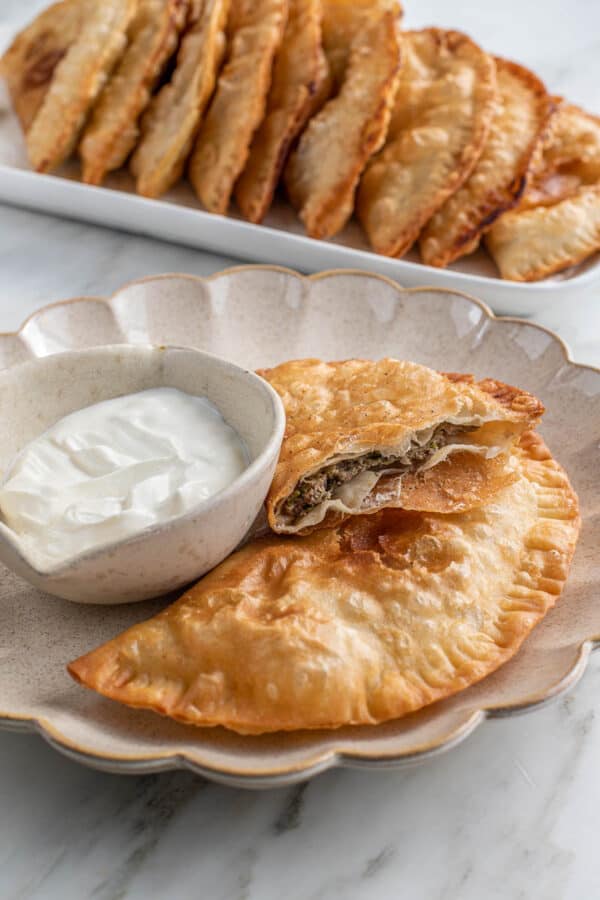
The outside of the proper cheburek (Чебурек) should be perfectly crispy, almost flaky, while the filling is nice and juicy, filled with lots of onions. These Chebureki (plural of Cheburek) are authentic to Crimean Tatar cuisine but popular in many post-Soviet countries, Central Asia, and beyond.
Authentic Cheburek (pronounced che-boo-rek) is made with a simple, unleavened dough of flour, water, and a little fat. The raw dough is then rolled into a large thin circle and filled with a thin layer of filling made with ground lamb, lots of ground onions, and seasonings. The filling must be kept thin enough to cook quickly at the same time as the outer shell.
The circle is then folded in half to form a moon shape, and the edges are sealed by pressing them together with a fork. Chebureki is fried in oil until golden crispy and served hot as is or with a dipping of sour cream.
How to Make the Chebureki Recipe Extra Fast
My recipe for Chebureki is adapted from the authentic version of how our family enjoys it best.
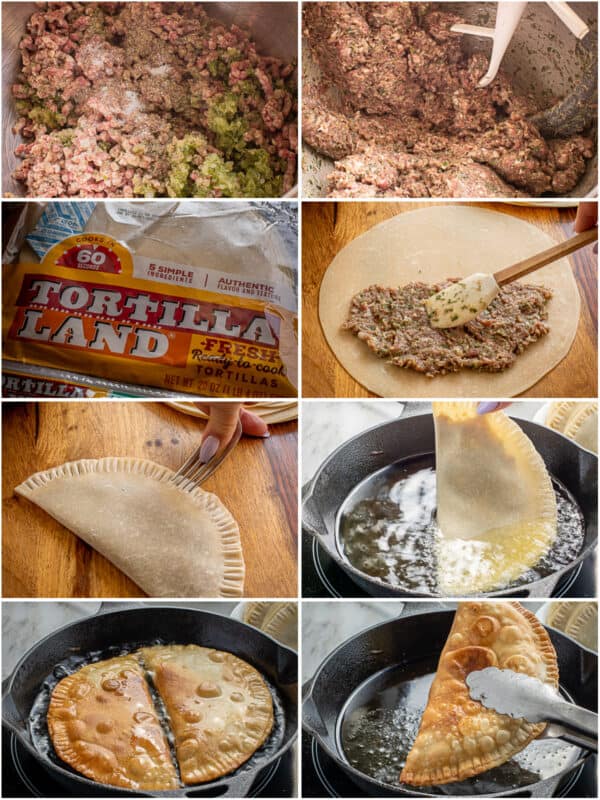
We use beef instead of lamb in the filling and the pre-made raw tortilla dough to make this Chebureki recipe quick and easy.
You might be wondering why you would use Mexican wheat flour tortilla dough to make the Russian chebureki recipe. It just so happens that both chebureki dough and the flour tortilla dough are made with the same exact dough ingredients (flour, water, and a little bit of fat).
This minor detail is not noticeable in the final taste test, especially given the convenience of quickly getting this delicious Chebureki on the table.
How to Make This Meat Pie
- Mix ground meat, ground or grated onions, salt, pepper, and water together to make the most delicious meat pie filling.
- Place the filling in the center of the uncooked tortilla, spread it around, and leave the outer inch unfilled. Then, fold in half, creating a half-moon shape. Seal the edges by pressing with a fork firmly.
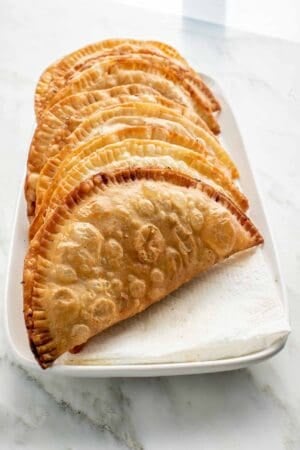
- Fry the meat pie until golden-colored, then enjoy.
Make sure to serve these Chebureki meat pies with this cucumber, yogurt and garlic sauce (Tzatziki Sauce) – it’s amazing! If not, sour cream or full-fat Greek yogurt will also make the perfect dipping companion.
Can I use meat other than beef?
You can use any other meat you prefer – chicken, turkey, and pork are great options.
Good oil for frying?
Any oil that has a high smoke point is good for frying. This includes vegetable, light olive, avocado, and peanut oil.
Try these other Main Course recipes:
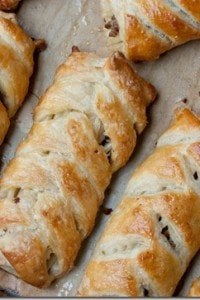
- Meat Hand-Pies – Puff pastry with meat filling.
- Savory Crepes – Crepes filled with beef & mushroom filling.
- Salmon Cakes – Salmon patties.
Chebureki – Чебуреки
Chebureki is a delicious fried turnover that is filled with a juicy ground meat filling. This super quick and easy recipe for crispy, meat-filled Chebureki uses pre-made dough to speed up the process, and you'll love the simplicity of this recipe.
Ingredients
- 12 raw/uncooked wheat flour tortillas (8" – 9" round)
Meat Center:
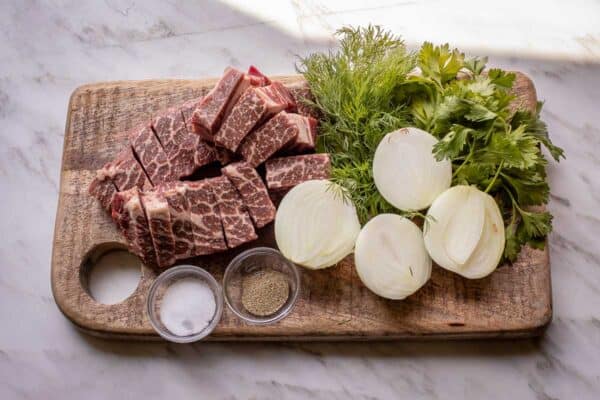
- 1 lb ground beef chuck (or ground 80/20 beef)
- 2 large onions, grated or very finely chopped
- 1/4 cup parsley, dill, or cilantro chopped or ground with the meat
- 1 tsp black pepper
- 1/4 cup water
- 1 1/2 tsp kosher salt
For frying
- 2-3 cups neutral oil ( light olive oil, avocado, vegetable oil) (enough to come 1 inch up sides of the frying pan)
Instructions
-
Make the filling: In a bowl, thoroughly mix 1 lb ground beef beef, 1 tsp ground pepper, and 1 ½ tsp kosher salt, chopped or ground onions and herbs. Slowly add 1/4 cup water and mix it in well to create a very soft filling. The water will add juiciness to the filling.
-
Shape the chebureki: Place about 1/4 cup of filling on one half of the uncooked tortilla spreading it into an even layer. Leave a 1/2 inch border for sealing. Fold the dough over the filling creating a half moon. Pat down to remove air pockets. Use a fork to go around the edges and seal firmly – this will help the filling stay inside when frying.
-
Preheat oil: To a large (10" round) heavy-bottomed skillet, add enough oil to come 1 inch up the sides. Preheat to about 350F over medium heat.
-
Fry 2 chebureki at a time, about 2 ½ – 3 minutes per side, turning when it's golden in color. Regulate the oil temperature to keep it between 350F to 375F to keep the Chebureki from burning before the center is cooked through. If the oil is too cold, the chebureki will absorb too much oil and become oily.
-
Transfer to a paper towel-lined plate to absorb extra oil or to a wire rack.
-
Serve immediately with sour cream, full-fat greek yogurt, tzatziki sauce, or as is.
Recipe Notes
Each cheburek absorbs about 1 teaspoon of oil when frying; this is reflected in the calorie count.

Thank you for following me on Instagram, Facebook & Pinterest!
Hashtag your photos #LetTheBakingBeginBlog so I can see your creations and for a chance to be featured!
Marina | Let the Baking Begin


Absolutely a staple in our household. I make these in big batches and freeze them without frying. Then pull them out into the fridge the day before to let them thaw and fry them as usual. Crispy, delicious and tastes like childhood!
Great recipe! Thank you darling!
I think peanut oil will be more fragrant when cooking. I like fried chicken meatballs.
The pictures look great, but I can’t find your tortilla recipe which makes this recipe useless. Everyone knows how to make a filling and it’s also very hard to get it wrong, the dough is always the tricky and difficult part so every chebureki recipe should focus mostly on dough with precise measurements and deep frying instructions.
Darling, she used raw tortillas. It says it under the ingredients AND she also provided a PICTURE of the package. Hope this helps!
Marina I just wanted to say thanks! This recipe is one of our family favorite, I like to make a big batch and then warm them in the air fryer the next day. They taste like they just came off the frying pan! I appreciate the time you put into making these recipes may God bless you and your family!
Thank you so much, Luba for your feedback! I appreciate it! May God bless you too!
Chebureki is not Russian nor is it Ukrainian. It is a traditional Crimean Tatar dish. Please stop the spread of false information. Name of the dish alone tells you it’s not Russian nor Ukrainian.
Hi Eldar, nowhere in the recipe does it say that these Chebureki are Russian or Ukrainian. It does mention that Chebureki is Russian and Ukrainian street food. But you’re right that the recipe itself has Crimean Tatar origins.
On this website, I share my family recipes and since I’m Ukrainian, I’m including details of what I know from my own personal experience.
Literally the first line of this web page says ‘Chebureki is a delicious Russian street food’. Unbelievable. Although I have to say – this has nothing to do with Crimean Tatar cuisine. Tortillas? Please.
Do the decent thing and change the name of whatever it is you’re cooking to anything but Chebureki. Crimean Tatar culture is dying and this kind of behaviour is part of the reason.
So I subjected my family to this last night. Sort of. It was a pastiche of this recipe and the one in our ancient Soviet cookbook. Ground lamb ( one pound ) , onion, garlic, salt, pepper, and a bit of brown rice.( 2 ounces ).
I did use the raw tortillas…what a timesaver! Didn’t want really huge chebureki, so I cut down the folded tortillas a bit. Painted the edges with egg and sealed them with a fork. Then I sprayed them lightly with olive oil and stuck them in the air fryer for 6 minutes at 350. Just two at a time.
I was worried that the filling might not be fully cooked so I stuck an instant read thermometer in a couple of them. Temp was 200 degrees internal.
The crust came out nice – not quite the traditional deep fried goodness, but very edible. It puffed way out – the layers of tortilla separated and air between them. A satisfying crunch with meaty goodness in the middle. Messy – when you got near the bottom, they would *squirt*.
It’s great to know that this comes out well in the air fryer! Thank you for sharing your experience, now if someone asks me if they can make it in the air fryer I’ll direct them to your comment 😀
I look forward to trying this, after I lose the weight I need to lose. The raw tortillas are a genius move. I’d like to try it in my air fryer.
I just looked up chebureki in my go-to resource for such things – my wife’s “Book of Tasty & Healthy Food” ( книга о вкусной и здоровой пище ). Those guys went for the gold – ground sheep flesh and sheep fat.
Might try it with ground lamb, for that real “Moscow street vendor” flavor.
Great plan, Jerryk!
Very good and easy enough for my husband to make. He
He did use some shredded cheddar cheese sprinkled on top of the filling before folding an sealing, (with an egg white beaten with a little water and brushed on the inside edges as “glue”). Very easy. Very yummy, he’ll make them for the kid’s sleep over; they’ll love it!
Hey Marina, it’s not a Russian dish it’s a Crimean Tatar dish and definitely not street food (at least for us??) please stop spreading wrong information
Hi Zeynep,
Sounds like they just didn’t sell Chebureki out on the streets where you’re from 🙂 We had babushkas sell these at markets very often.
As to the origins, you’re right it originated in Crimea but was consumed all throughout Eastern Europe, including Russia, Ukraine, Romania, Turkey, and Central Asia.
Thank you for your comment!
thank you marina for this tasty recipe….i love the taste, but mine seem to cracking at the seams..two tortillas are pretty dry so I would expect that they will crack and split into two…is there a way to fill or moisten it so it does not crack?
oh i know why!!..I used corn tortillas instead of flour tortillas 🙁
Oh no! Try using flour tortillas, they come out so good!
Hi Snowflakes,
it sounds like your tortillas are on the dry side to begin with. If you start with more fresh tortillas you shouldn’t have any cracking.
Hey Marina, I’ve made this and it was great ( although I over cooked some of them a tad)… but my wife said she thought it would be good with cheddar or Gouda cooked in.
How “unauthentic” would that be, out of curiosity?
-Jack
Hey Watera,
Adding cheddar or any kind of cheese would be super unauthentic, but who cares ? I think it would taste good, so give it a try!
I have a question. We too have done a fundraiser in our church with these. Yes, I made 350 of them also. I am wondering what your parents experience is. Do they need to be fried right before they are sold or can they be fried a day in advance and reheated in the oven to be sold? Which way did they do it and their reasons? My understanding is they need to be crunchy and if done in advance they will become soft. I am in disagreement over it with my own mom, so I need some input.
Hi Lily,
My parents always fry them in the church kitchen closer to the end of the service, so they retain their freshness and crispiness. This is not the kind of food that you can do in advance. Even 30 minutes after they are fried they are not as crispy as they are right after they’re fried, but next day they would not be good at all. Hope you and your mom can come to a common solution on this one 🙂 Good luck 🙂
Awesome recipe. I love the fact that there are no onions in the filling. One question though, on what temp. do I fry them?
Thanks Tania! You should fry them at 350F