[REFRESH] Homemade Bagel Recipe (New York Style) → merge into /homemade-bagel-recipe/
The difference between a real bagel and a bread roll with a hole in it comes down to three things: a stiff dough, a pot of boiling water, and malt. The first two give you the chew and the shine, and the malt is what makes it taste like a bagel instead of bread.
If you like this one, my soft pretzel dogs use the same boil-then-bake trick, and my no-knead bread is the low-effort loaf to make while these are resting overnight.
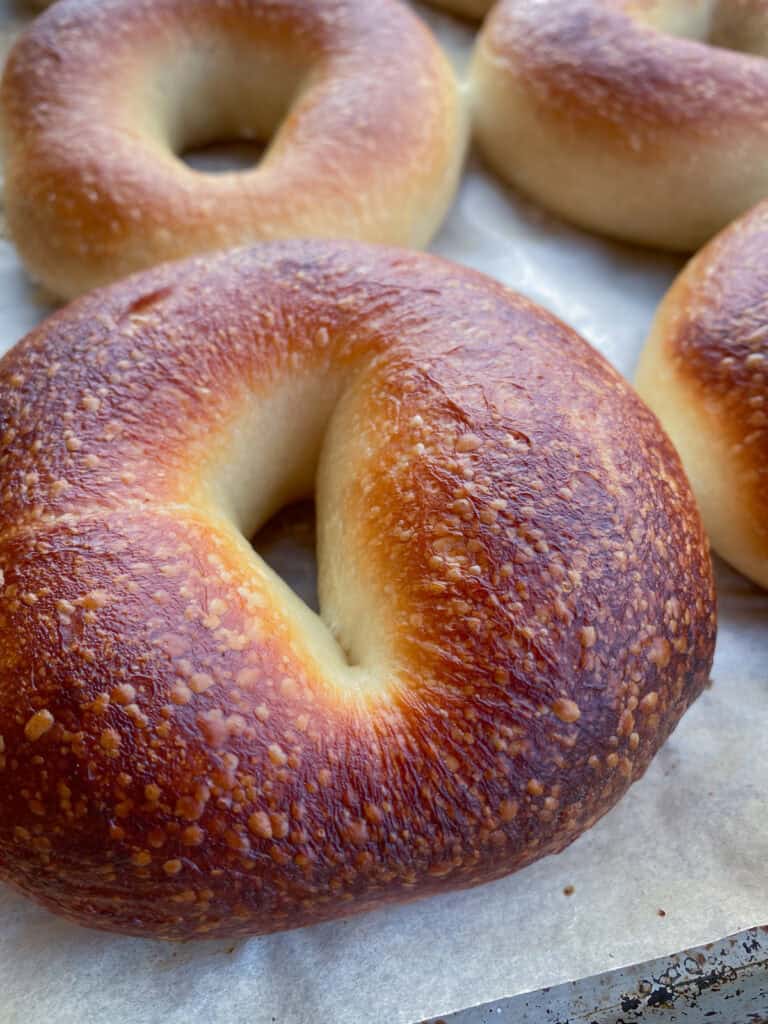
This homemade bagel recipe is the one I have made for years. Mix the dough one day and bake it the next, because the long cold rest in the fridge builds the flavor. There is no way to rush it, and no reason to want to.
What is a bagel, and what makes it different from bread?
Bagels came to New York with Jewish immigrants from Poland and stayed a neighborhood food for a long time before the rest of the country caught on. Everyone recognizes the ring shape, but what really makes a bagel a bagel is the chew.
A bagel is boiled before it is baked. Hot water cooks the starch on the dough’s outside into a thin skin. Bakers call that skin a pellicle, a fancy word for the sealed outer layer. That layer does two jobs: it traps moisture inside so the crumb stays chewy instead of drying out, and it shines when it hits the oven.
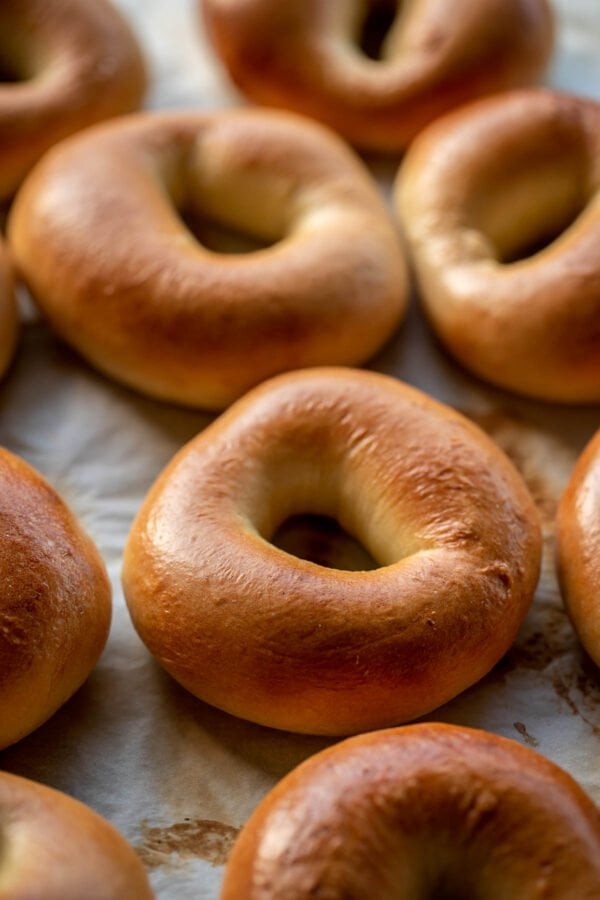
The other difference is malt. Malt is made from grain that is sprouted, dried, and ground. It gives a bagel that faintly sweet, toasty flavor that plain bread doesn’t have. Take the malt out, and you have a boiled roll.
Why you’ll love this recipe
This is a two-day recipe with about 40 minutes of actual work. Here is what you get for that.
- Real chew, not bready fluff. The dough is stiff on purpose, which is what makes a bagel pull instead of tear.
- Deli-size bagels. Divided into twelve, these land right where a New York shop portions them. Weigh the pieces if you want every one the same, or just eyeball it.
- Fresh bagels for breakfast without waking up early. All the real work happens the night before, while the long, slow fermentation builds the flavor as you sleep. In the morning you just boil and bake – about half an hour from fridge to warm bagels. Breakfast should not be something you wake up hours early for.
- Every topping works. Everything seasoning, sesame, poppy, salt, Asiago. Add them straight out of the water while the surface is still tacky.
- No special equipment. A big pot, a slotted spoon, a sheet pan. A mixer helps, but your hands work just as well.
What makes these different
A lot of bagel recipes soften the dough so it is easier to handle. Easier to handle, yes, but you lose the chew. Here is what I do differently:
- The dough is properly stiff. The water-to-flour ratio here sits right around 57 percent, which is the band professional bagel bakers actually work in. Wetter dough is easier to knead and gives you an open, bready crumb. This one fights back a little and rewards you with the tight chew.
- Diastatic malt powder goes in the dough. Almost every other recipe uses malt syrup, brown sugar, or nothing. Diastatic malt still has its active enzymes, and those enzymes keep feeding the yeast through the long cold rest and drive browning. More on the difference below.
- A full overnight in the fridge. Do the overnight rest and you get the best version of this bagel. Short on time? Skip it and you will still pull good bagels out of the oven – just know you are giving up the depth of flavor and the chew that only a long, cold ferment can build. The “Good, better, best” section below lays out the trade.
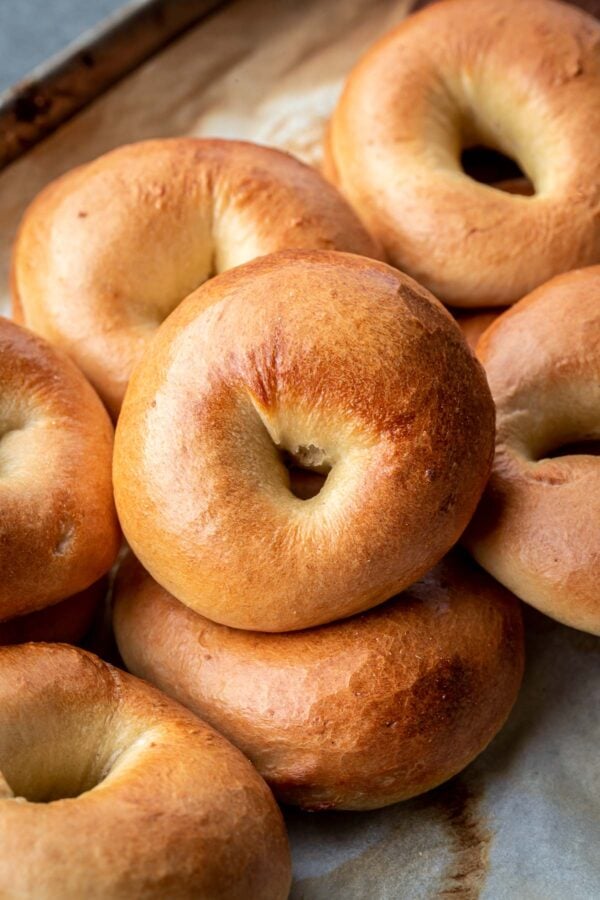
Ingredients for homemade bagels
Six things go into the dough and two into the boiling water. Here is what each one is doing and what you can swap. Amounts are in the recipe card at the bottom.
- Bread flour. The protein is what builds the chew. All-purpose works, but the bagels come out softer and more bread-like. High-gluten flour is closest to what a bagel shop uses.
- Water. Room temperature, not warm. A stiff dough heats up fast in the mixer, and starting cool keeps it from running ahead of your schedule.
- Instant dry yeast. Stir it into the water first, even though instant does not need proofing. This dough is stiff, so dissolving is the only way to spread it evenly. Active dry works too, with a longer rise. Platinum Superior yeast is what I keep on hand.
- Diastatic malt powder. This is what makes a bagel taste like a bagel. Sprouted barley with live enzymes that feed the yeast, so you get better rise, deeper browning and malty flavor. I use Anthony’s diastatic malt powder. Do not add extra. Too much turns the inside gummy.
- Kosher salt. Brands are not equal. A spoonful of Morton or fine sea salt weighs more than Diamond Crystal, so scale back or weigh it.
- Granulated sugar. A small amount, for balance and for browning.
- Malt syrup for the water bath. The thick dark one, not the powder in the dough. It gives the crust its amber gloss. Honey works, and brown sugar works with a little less browning.
How to make bagels, step by step
Start the day before you want to eat them. Day one is mix, knead, shape, and into the fridge. Day two is boil and bake. Below is the walkthrough. Exact amounts, times and temperatures are in the recipe card.
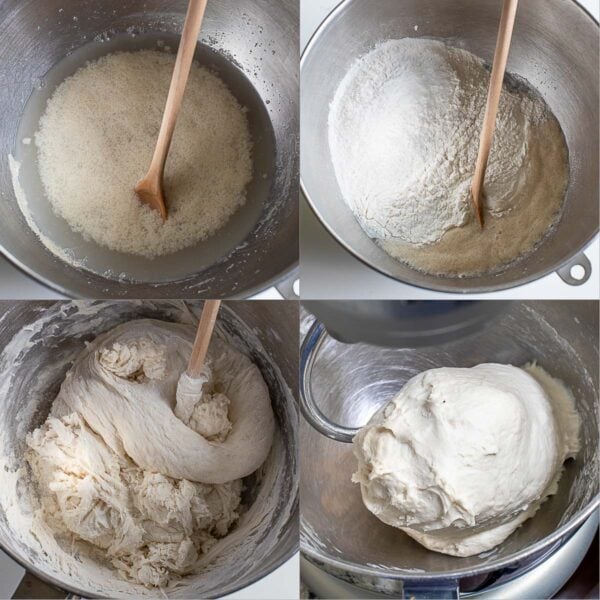
- Mix the dough.
- Stir the yeast into the water until it disperses.
- Add the flour, sugar, malt powder and salt, keeping the salt away from the yeast as you add it.
- Stir just until it comes together into a shaggy, dry-looking mess. It will not look like bread dough and it should not.
- Knead until smooth.
- There is no long knead here. This dough is thick, so it comes together fast.
- Work it in a stand mixer on low, then medium, or by hand on the counter.
- If your mixer starts to complain, stop and let the dough rest for five to ten minutes, then keep going. The rest lets the gluten relax and the machine gets an easier ride.
- Do not judge this dough by the windowpane test. It is too stiff to stretch thin without tearing. Look for a surface that has gone from rough to smooth and satiny, and dough that pushes back firmly when you poke it.
- Stop there. Kneading past that point makes bagels tough rather than chewy.

- Divide and shape.
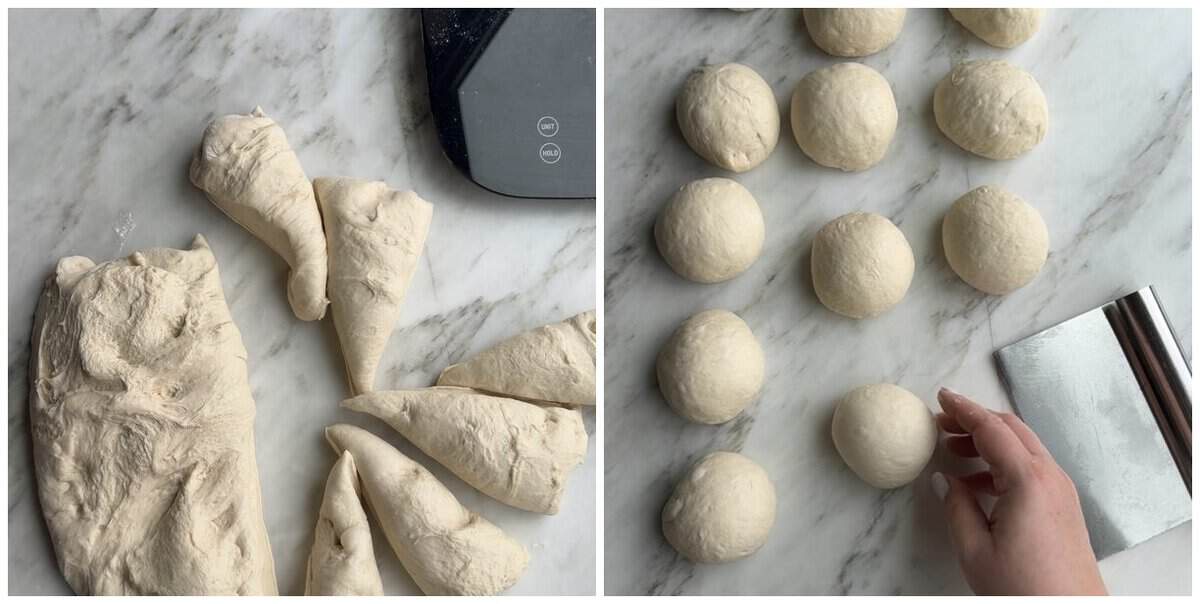
- Weigh the pieces if you want them all exactly the same size. The card gives you the gram target per bagel, and a digital kitchen scale makes it quick. No scale? Eyeballing works fine for this recipe.
- Roll each piece into a smooth, tight ball first, whichever shaping method you use next.

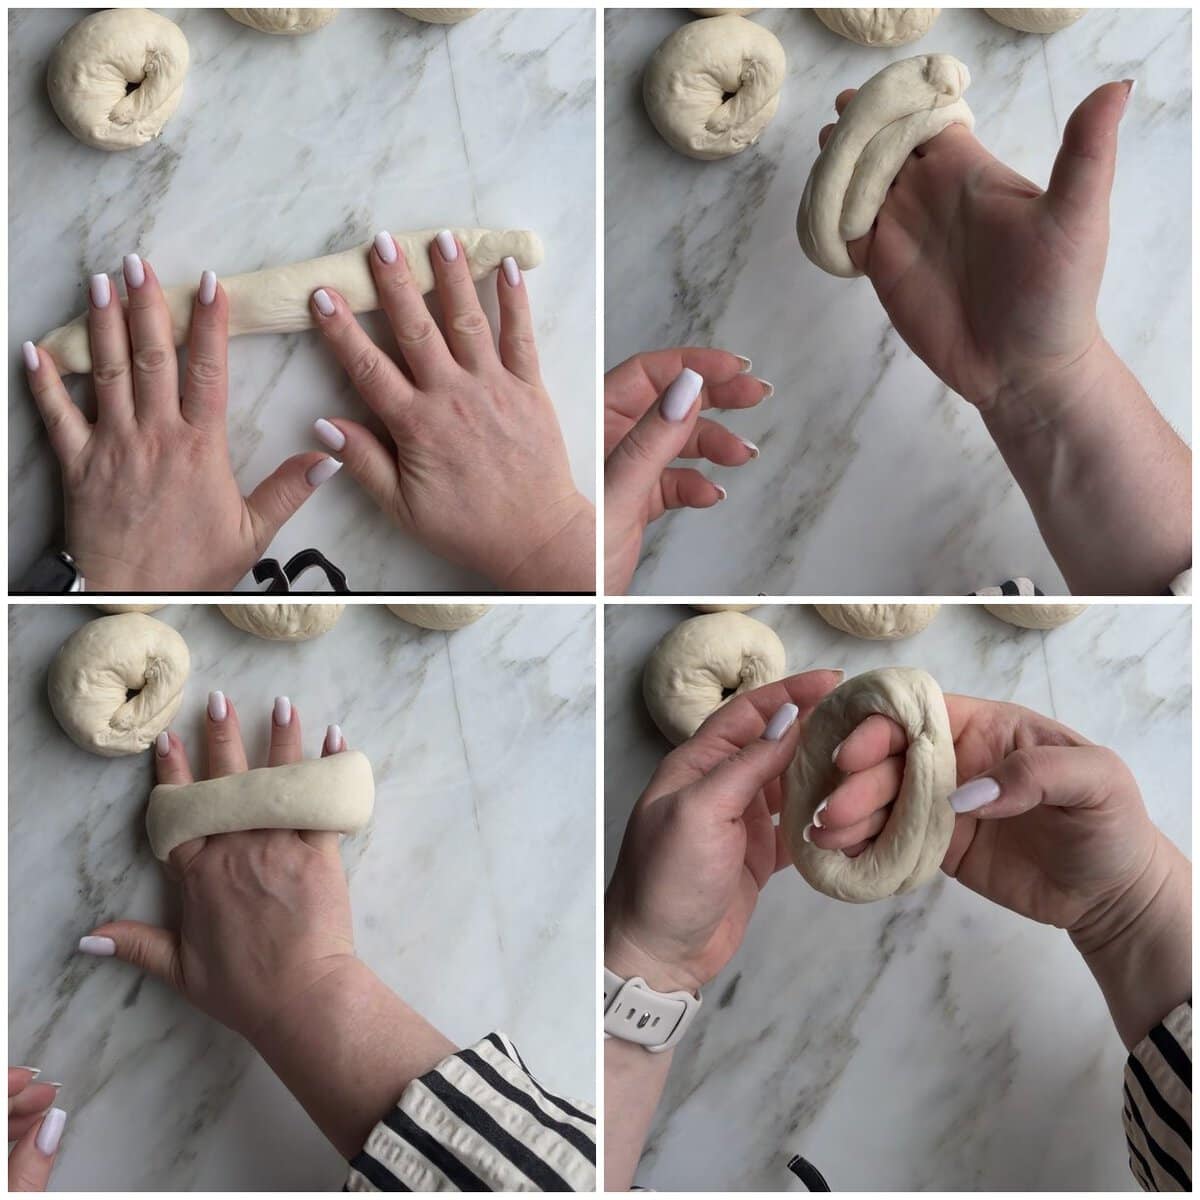
- Rope method: roll the ball into a log, wrap it around your hand, and overlap the ends generously. Then roll the overlap under your palm on the counter to weld the seam shut. Pinching alone will not hold, and the seam will open in the boiling water.

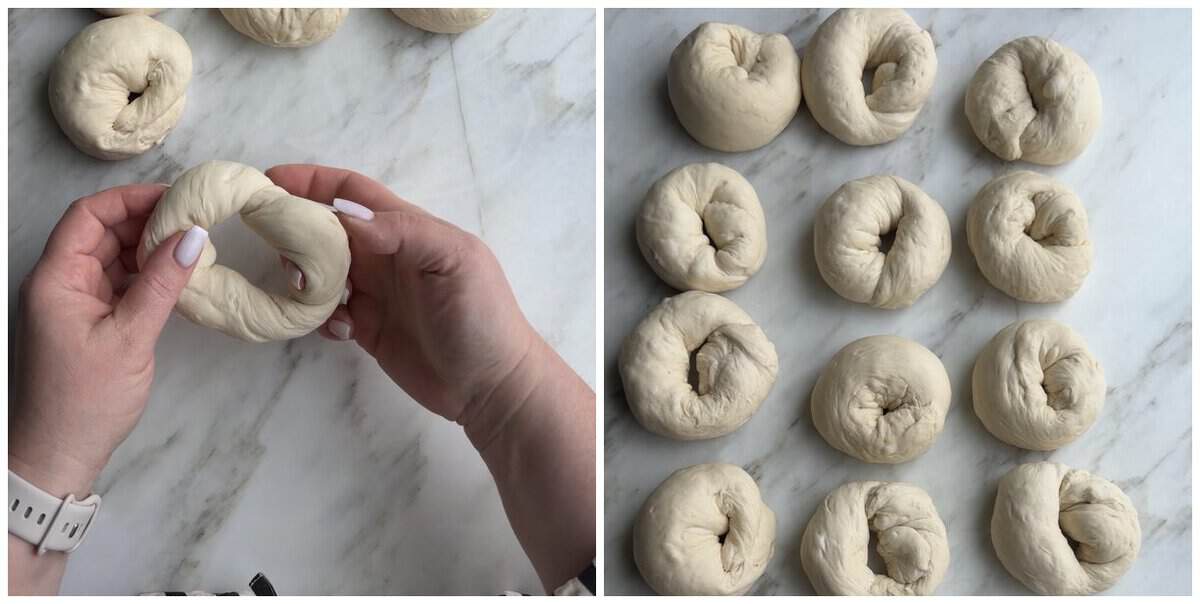
- Poke method: push your thumb through the middle of the ball, then spin the dough around your fingers to open the hole out. Faster, and the seam cannot fail because there isn’t one.
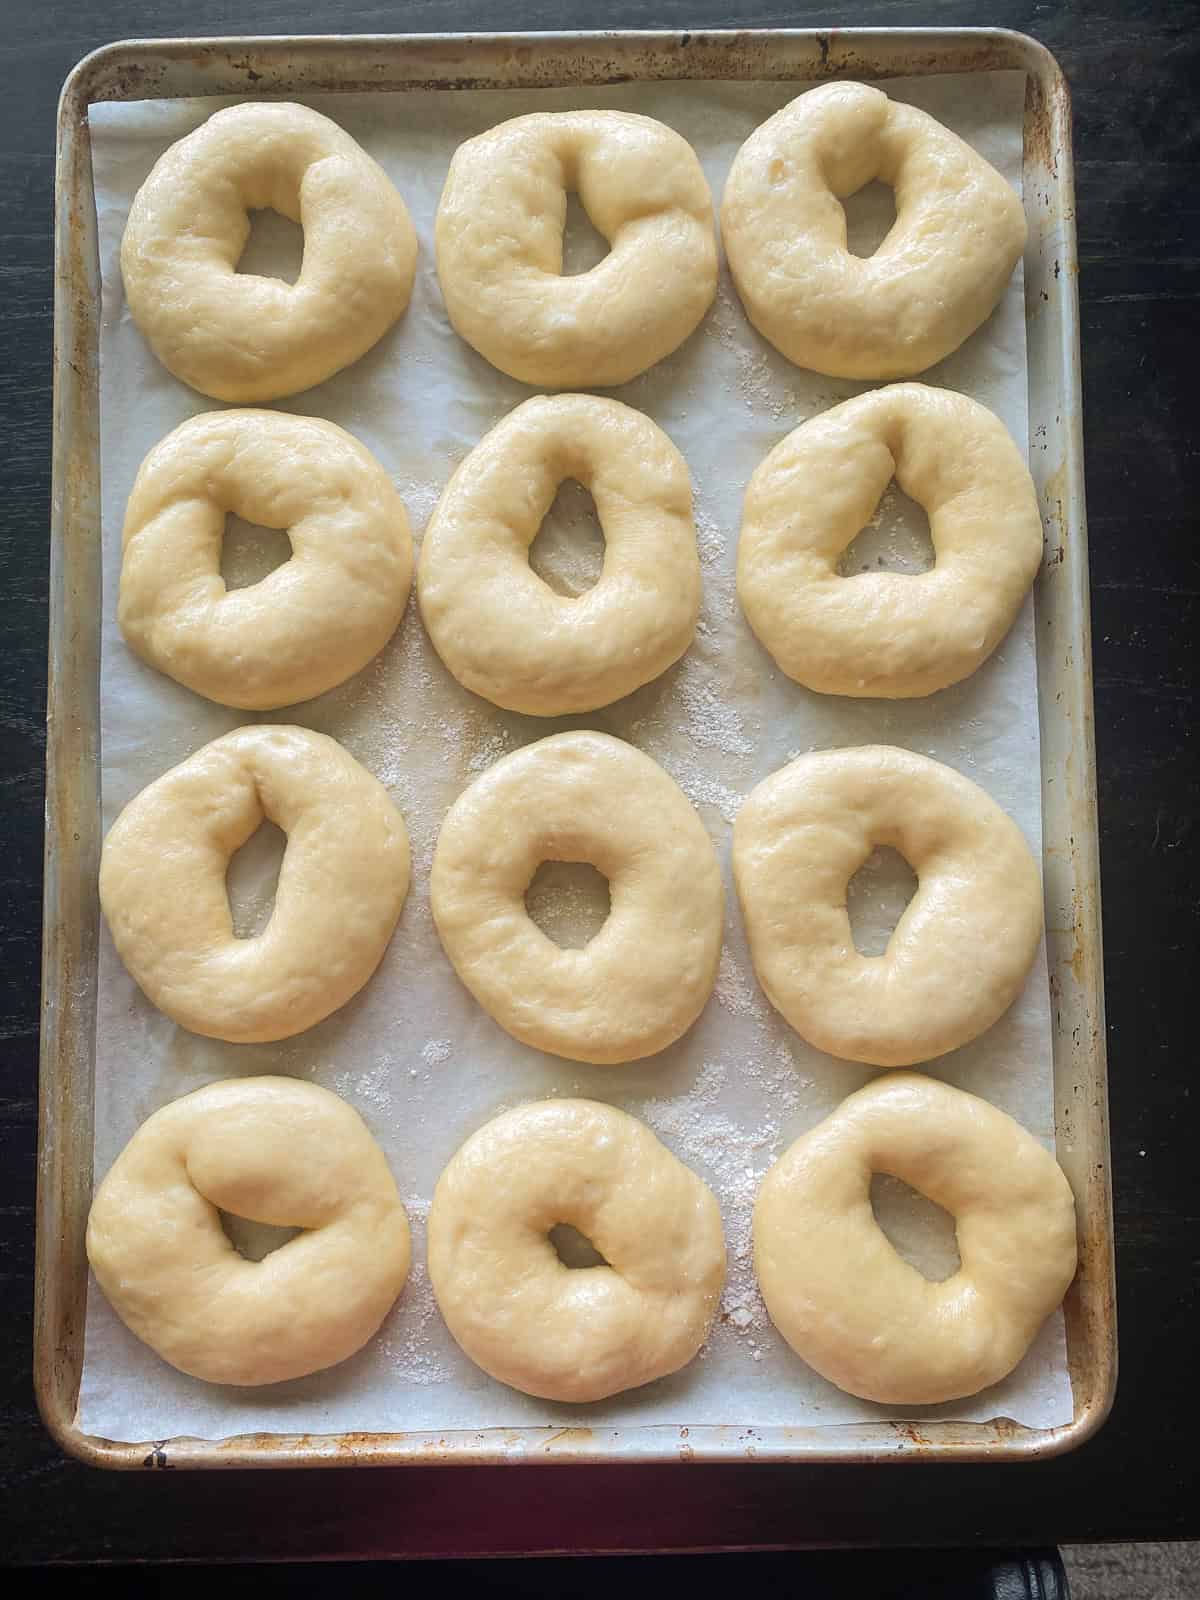
- Shape everything twice. Roll all twelve rings, then go back to the first one and roll each ring again – hand inside the hole, rolling the ring around its perimeter to open the hole and seal the seam. By the time you finish the first pass, the earliest bagels have relaxed, so the second pass opens the hole wider without the dough fighting back. The rings that get this second roll bake noticeably better than the ones that skip it. I tested this side by side in August 2026 – the single-pass bagels puffed closed, the twice-rolled ones baked into open, even rings.
- Make the hole bigger than looks right.
- Open each hole out to about two inches across. It will look like too much.
- It is not. The dough contracts in the boiling water and again as it springs in the oven, and a small hole closes up completely.
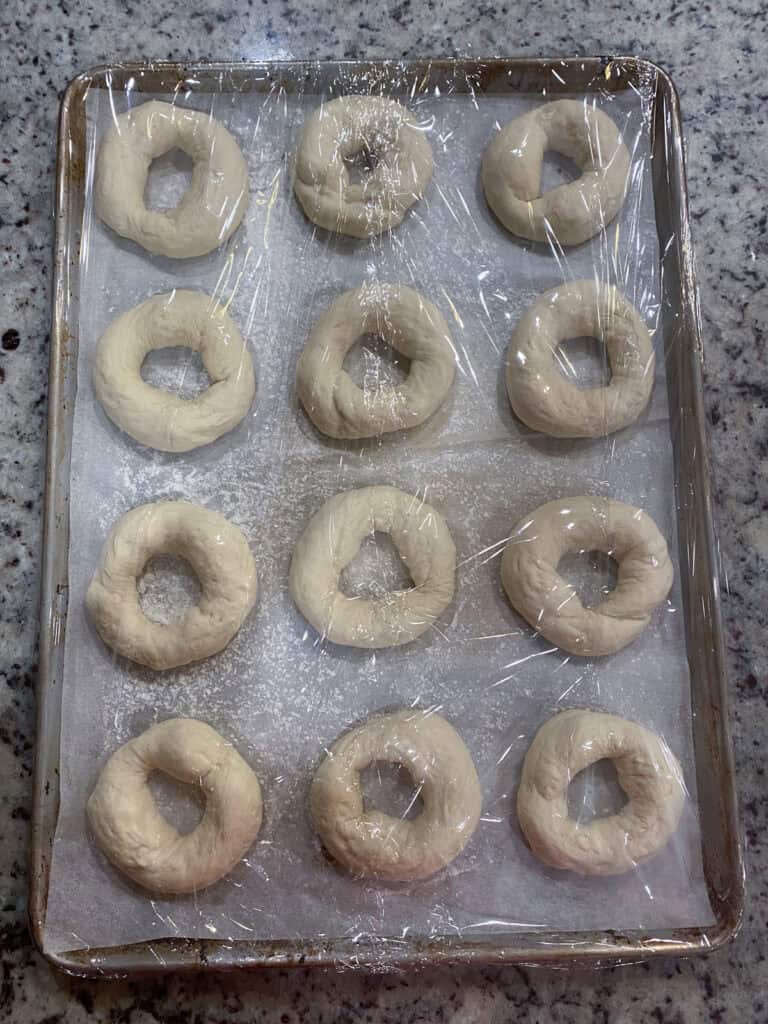
- Set the shaped bagels on a floured, parchment-lined sheet with space between them.
- Rise briefly, then chill overnight.
- Let them sit at room temperature until they have grown by about half. Bagels need far less rise than regular yeast dough, so this stage is short.
- Run the float test before they go in the fridge. Drop one bagel into a bowl of cool water. If it floats within about ten seconds, they are ready. If it sinks, it needs more time, so put it back on the sheet and test again in fifteen minutes.
- Cover them and move the whole sheet to the fridge overnight. Keep them covered. A dough surface that dries out blisters badly in the boil.
- Next morning, take them out and let them sit covered on the counter while the oven and the water come up to temperature.

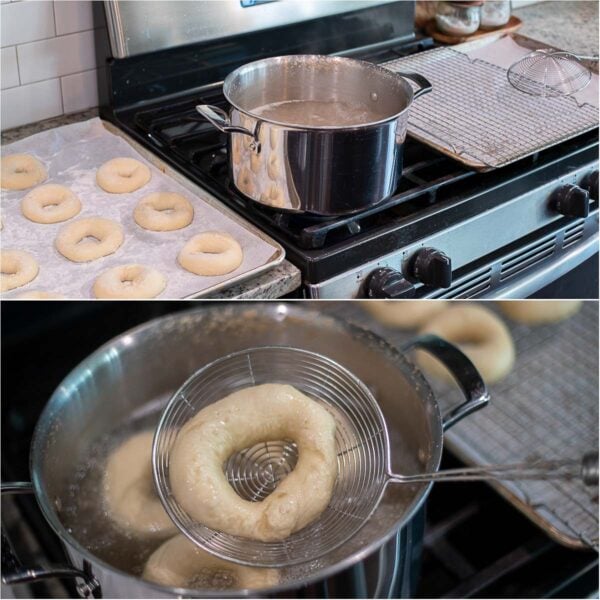
- Boil the bagels.
- Bring a wide pot of water to a boil and stir in the malt syrup or honey.
- Slide in two or three at a time and give them a gentle nudge so they do not stick to the bottom.
- Turn them halfway through so both sides get the same treatment, then lift them out with a slotted spoon onto a rack.
- Add your toppings right now, while the surface is still wet. Once it dries, nothing sticks.

💡 TIP: How long you boil is the single biggest lever you have. A short dip gives a thinner crust and a puffier bagel. Doubling the time gives you the thick, leathery, classic deli chew. Anything past a couple of minutes a side starts to go gummy just under the crust. There is no wrong answer, so try one batch each way and pick your side. - Bake immediately.
- Boiled bagels go straight into a hot oven. If they sit around on the rack, the damp surface slackens, and they come out wrinkled.
- Preheat the oven hotter than the baking temperature on purpose. Opening the door and loading a tray of cold, wet dough drops the real temperature fast, and the extra heat covers that loss.
- Rotate the sheet partway through so they color evenly.
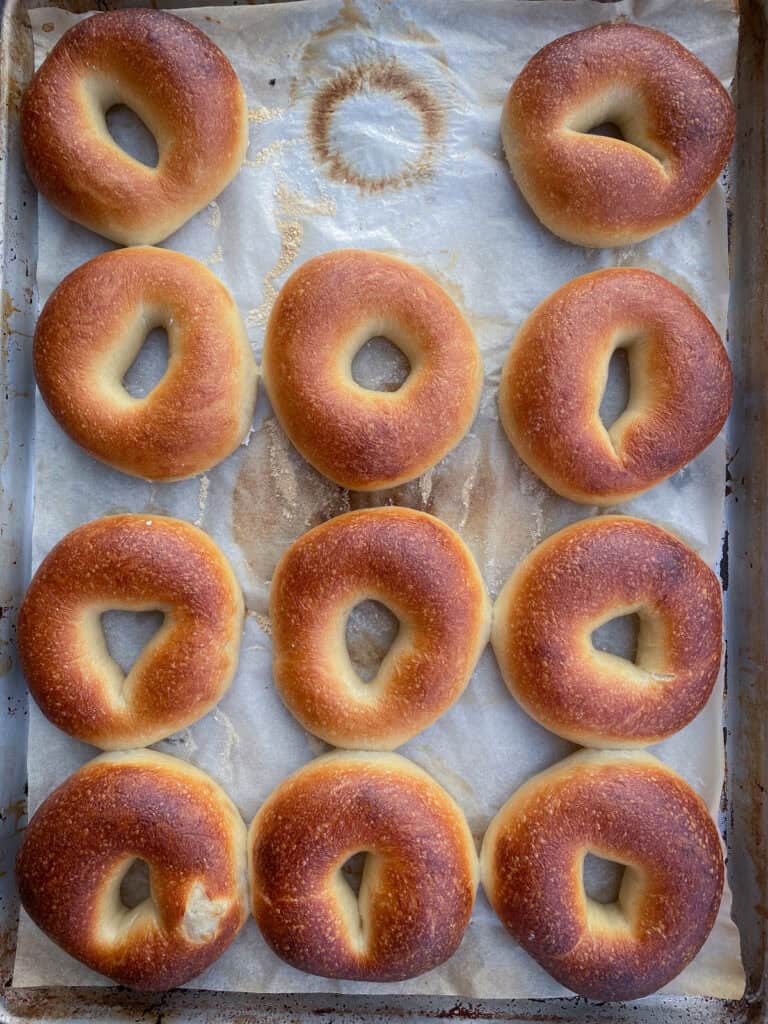
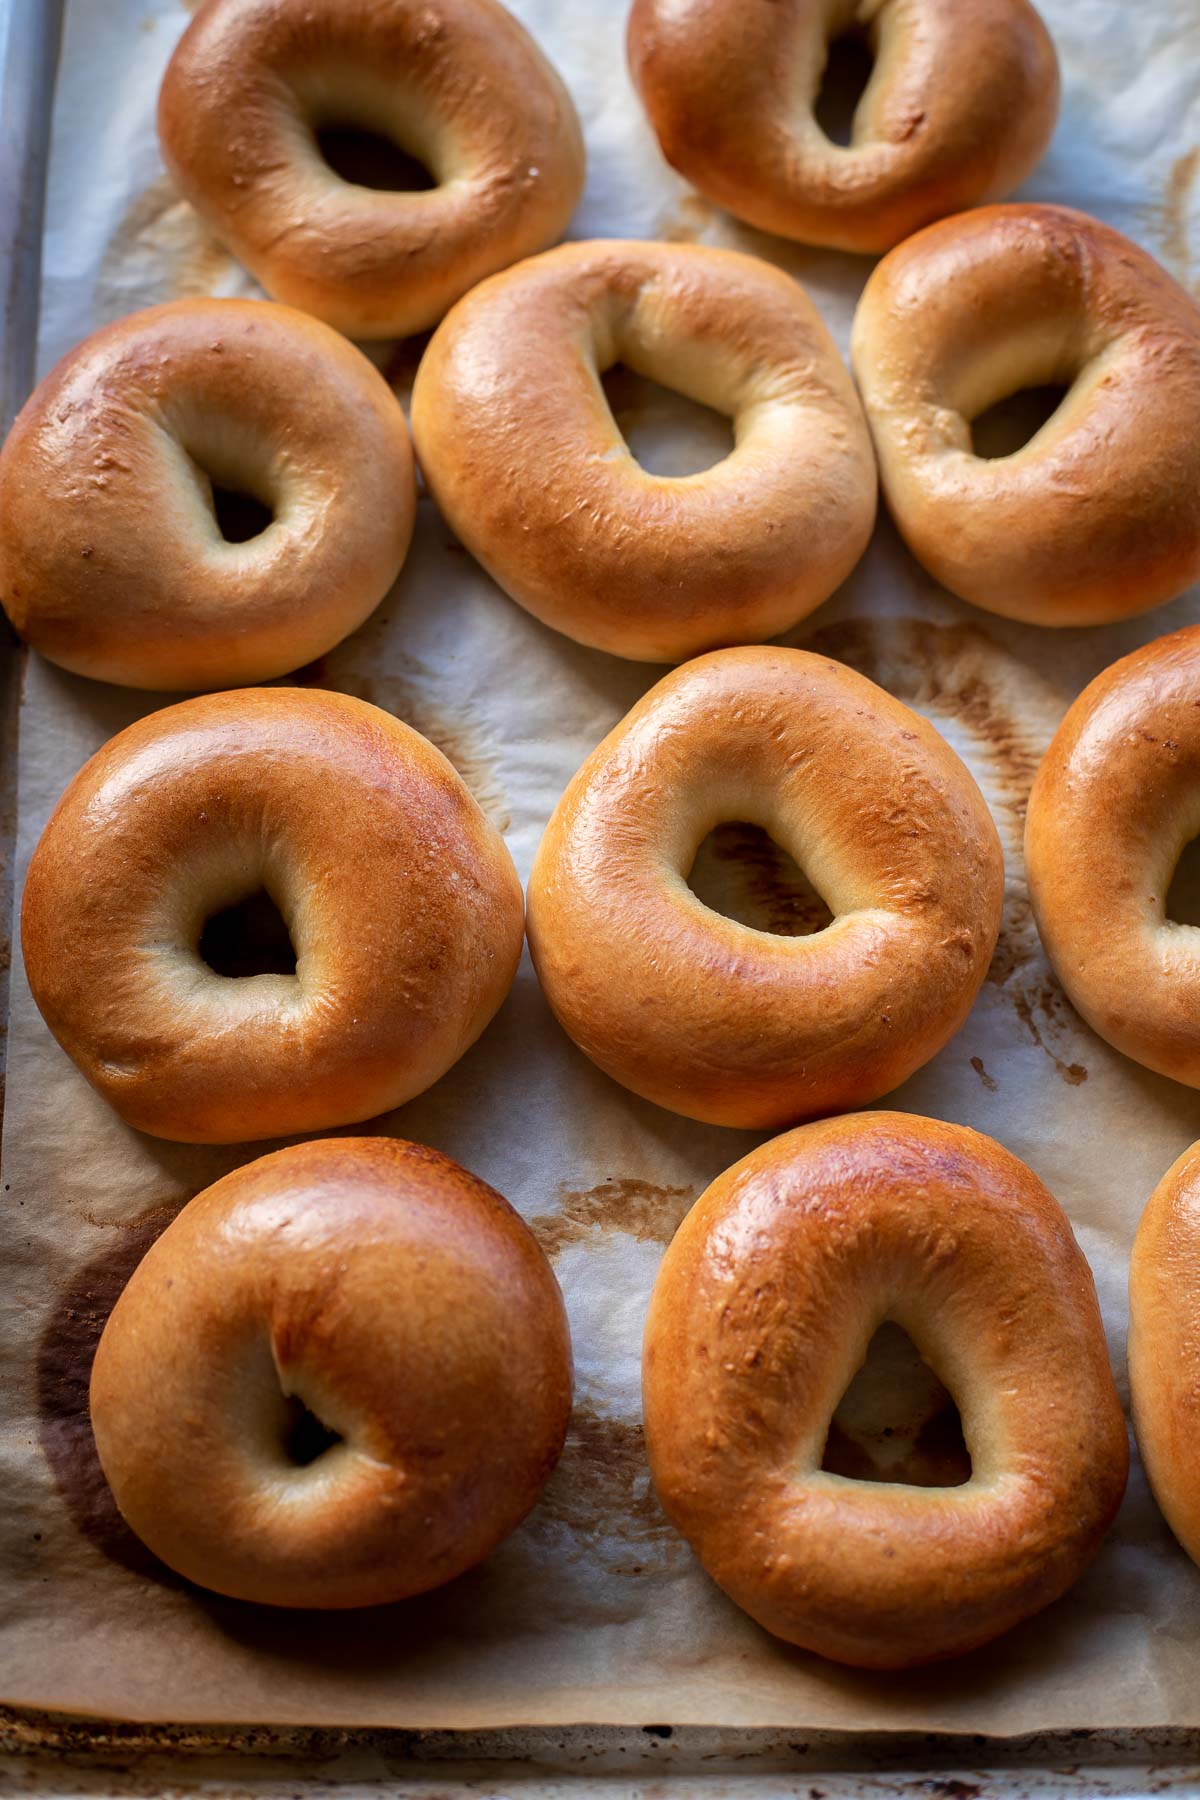
- Bake until deeply golden and still springy to the touch, not rock hard. If you want a number, the center reads about 200°F on an instant-read thermometer. Anything under 180°F is underbaked and will taste gummy.
- Cool completely before you cut.
- Move them to a rack so the bottoms do not steam themselves soggy.
- Give them at least twenty minutes.
- Slicing a hot bagel squashes the crumb and reads as gummy even when it baked perfectly. This is the easiest mistake to avoid and the most common one.
Good, better, best: how long to rest the dough
The overnight fridge rest is the standard method, and the recipe card is written around it. But you have options, and each one is a real trade.
- Good – same day, no fridge. Shape, let them rise a little longer on the counter, then boil and bake. Pros: bagels in about three hours instead of overnight. Cons: the flavor is flat and plain, the crust browns less, and they stale by that evening. This is still a good bagel. It is just not a memorable one.
- Better – overnight, roughly twelve hours. The method in the card. Pros: proper malty, faintly tangy bagel flavor, better browning, better keeping. Splits the work across two short sessions. Cons: you have to decide the day before, and the sheet pan takes up a shelf.
- Best – a full twenty-four hours. Same process, longer wait. Pros: the deepest flavor of the three, and the dried surface blisters in the oven. Cons: two days of planning, and this is the edge of the window. Push much past a day and the dough over-ripens, loses its spring, and comes out of the water shriveled.
Marina’s Pro Tips for
the Best Bagels
Most bagel problems come from about seven things. These are the ones worth knowing before you start.
- Weigh the flour instead of scooping it. A scooped cup can be off by a lot depending on how packed it is, and on a stiff dough like this that swing is the difference between a bagel and a brick. The card lists the gram weights.
- Keep the dough cool while you knead. Room temperature water, and if the dough feels warm coming off the mixer, let it cool before shaping. Warm dough ferments faster than the schedule expects, and by morning it has gone too far.
- The float test beats the clock. Yeast speed changes with your kitchen, your flour, and the yeast’s age. A bagel that floats is ready no matter what the timer says. One that sinks isn’t, no matter how long it’s been sitting.
- Check your oven with a thermometer. Home ovens routinely run twenty-five degrees off their dial, and pale bagels are very often just an oven that lied. This one purchase solves more baking problems than any other.
- Do not crowd the pot. Two or three bagels at a time. Any more and the water temperature crashes, they stick together, and the timing goes out the window.
- Toppings go on wet. Straight out of the boil, before the surface sets. The easiest way is to press the wet side down into a shallow tray of seeds rather than sprinkling from above.
- Keep a note of what you did. Date, room temperature, which flour, how long things took. Bread reacts to your specific kitchen more than almost anything else you bake, and after three batches those notes turn guesses into answers.
Ways to serve them
Slice horizontally, toast if you like, and build. These are the combinations I make most often in my kitchen.
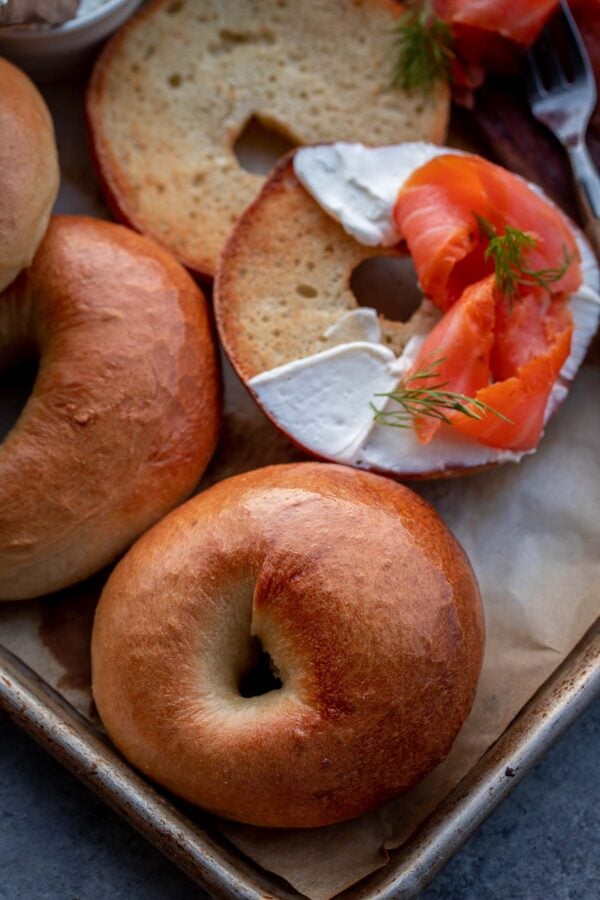
- Cream cheese. The default, and it earns it.
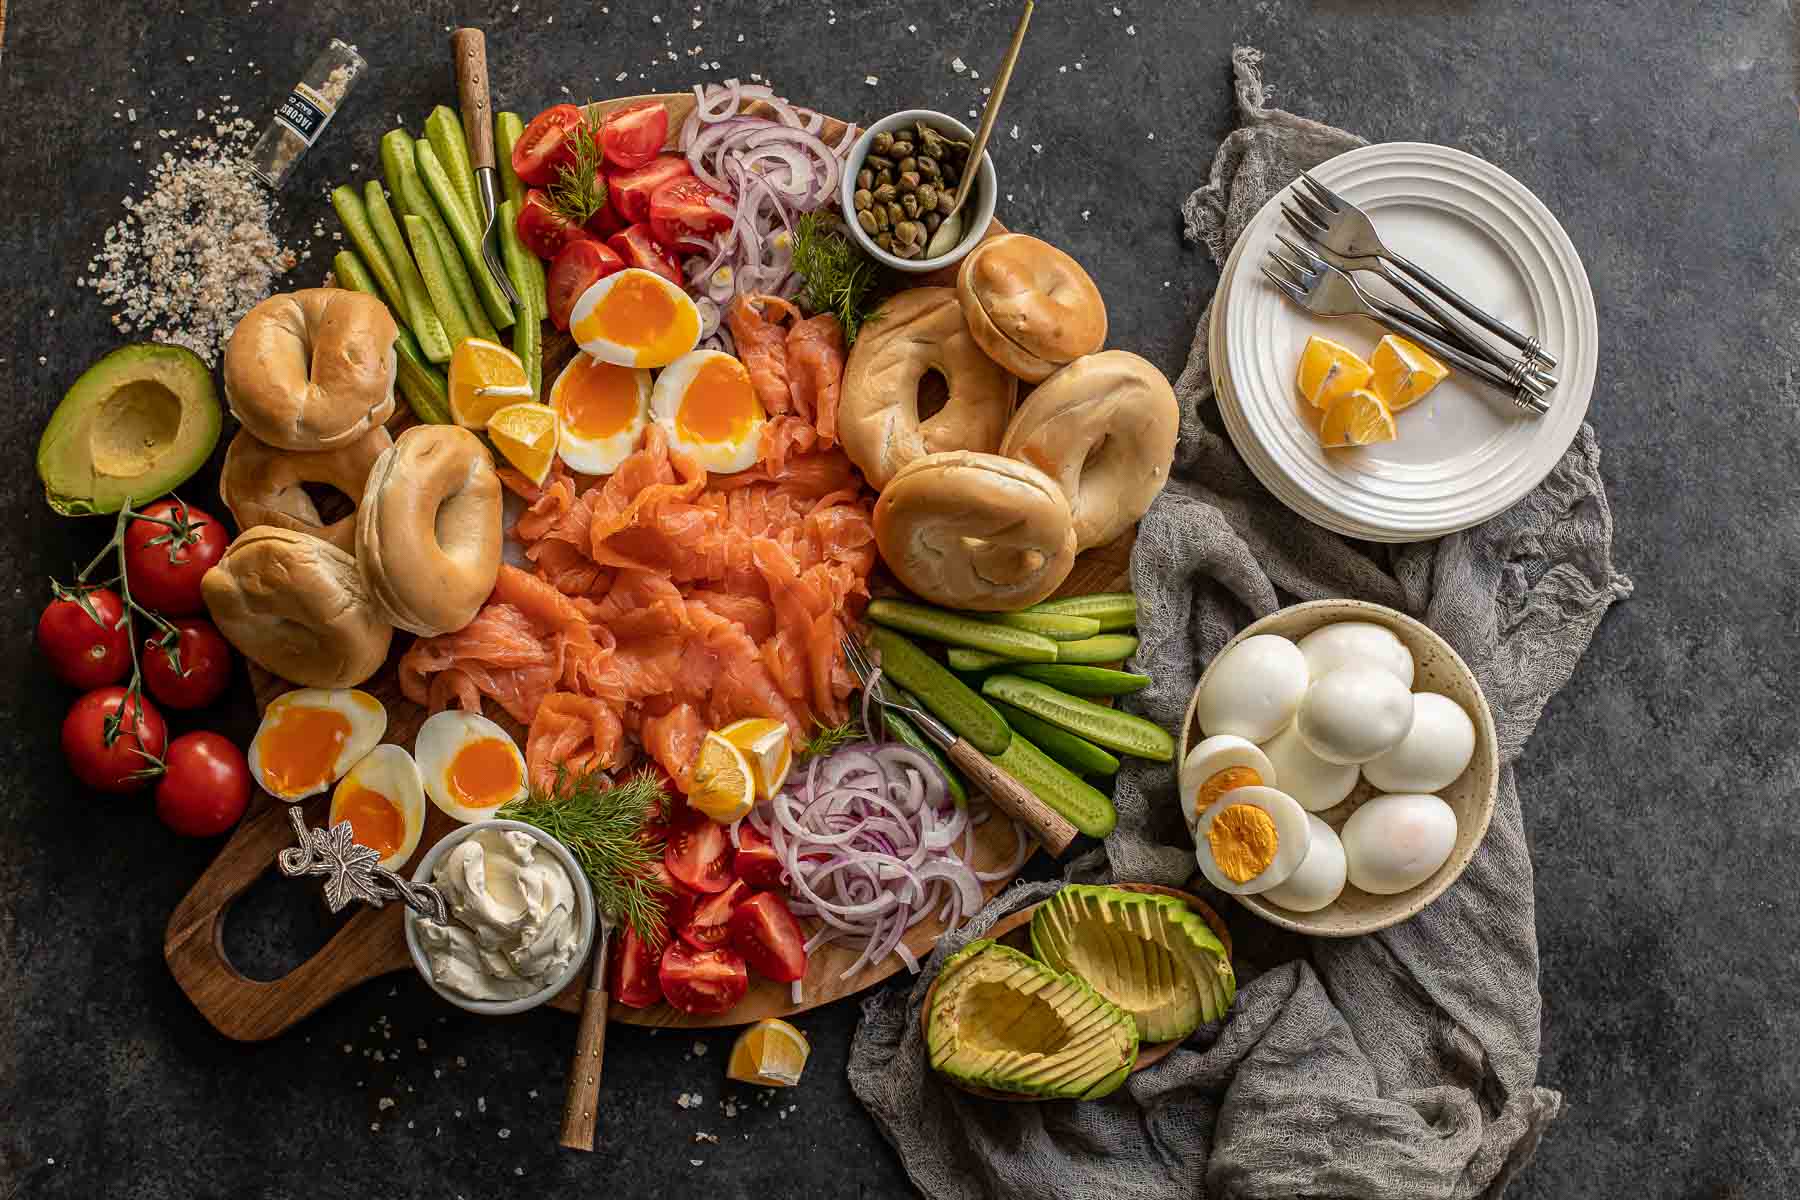
- Lox. Cream cheese, cold-smoked salmon, red onion, tomato, capers, and dill. If you want to smoke your own without a smoker, here is how I do it.

- Egg and cheese. With bacon, avocado, and microgreens, or all of the above.
- Pizza bagel. Marinara, pepperoni and mozzarella, run under the broiler until it bubbles.
- Deli. Pastrami and cheese, or corned beef with cheese and sauerkraut.
- Tuna or egg salad. With tomato and a lettuce leaf.
Making your own everything seasoning takes about a minute: white and black sesame seeds, poppy seeds, dried minced garlic, dried minced onion, and flaky salt. Mix a jar, and it keeps for months. The recipe card notes include a ratio if you want a starting point.
How to store homemade bagels
There is almost no fat in a bagel, which is exactly why they go stale faster than almost any other bread. Plan for that instead of fighting it.
- Same day: leave them uncut on the counter. They are at their absolute best in the first few hours out of the oven.
- Room temperature: a paper bag inside a plastic bag keeps the crust from going soft while the crumb stays moist. Two days is realistic.
- Do not refrigerate. The fridge is the fastest way to stale bread. Freeze instead.
- Freezer: slice them before they go in. A frozen whole bagel is impossible to cut, and a pre-sliced one goes straight from freezer to toaster. Wrap individually, then bag. Best within three months, safe for up to six.
- To reheat: toast the frozen halves straight from the freezer, no thawing. For a whole bagel, run it under the tap for a second and warm it in a 350°F oven for eight to ten minutes. It comes back close to fresh.
Make It Ahead
This is already a make-ahead recipe, since the dough sits in the fridge overnight between shaping and baking. See the good, better, best section above for how far you can stretch that rest.
You can also freeze the shaped, unboiled bagels. Freeze them solid on the sheet after their short rise, then bag them. Move what you want to the fridge the night before, let them come to room temperature in the morning, and boil and bake as written. This is how you get two fresh bagels on a Tuesday instead of twelve on a Sunday.
Homemade bagel recipe FAQ
Why are my bagels wrinkled and shriveled after boiling?
Almost always over-proofing. The dough rose too far, the gas structure gave out, and the stretched skin has nothing holding it up. Cut the counter rise short and keep the fridge rest to a day at most.
The other cause is letting them sit after the boil. A boiled bagel waiting on the rack goes slack. Get them into the oven right away.
Why are my bagels flat instead of round and puffy?
Two likely reasons. Not enough tension when you shaped them, so roll the balls tight and, if you use the rope method, weld that seam properly. Or the dough was over-proofed again, which spreads instead of springing.
If the fridge rest ran long or your kitchen was warm, suspect over-proofing first.
Why did the holes in my bagels close up?
The hole was too small to begin with. Dough contracts in the water and expands again in the oven, and both moves eat into the hole. Open it to about two inches, which will feel excessive, and it will be right by the time it comes out.
Under-proofed dough closes holes too, since it does more of its expanding in the oven.
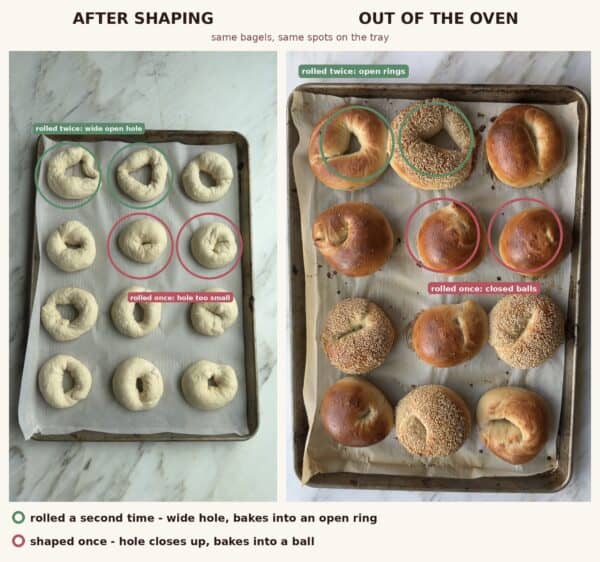
The fix that works: roll every ring a second time – see the shaping step above.
Why are my bagels pale and not browning?
Check three things in this order. Your actual oven temperature, using a separate oven thermometer, because dials lie. Whether anything sweet went into the boiling water, since malt syrup or honey does most of the browning. And whether you kneaded the dough enough.
Using all-purpose flour instead of bread flour also makes bagels paler.
Why do some bagels have blisters on the crust?
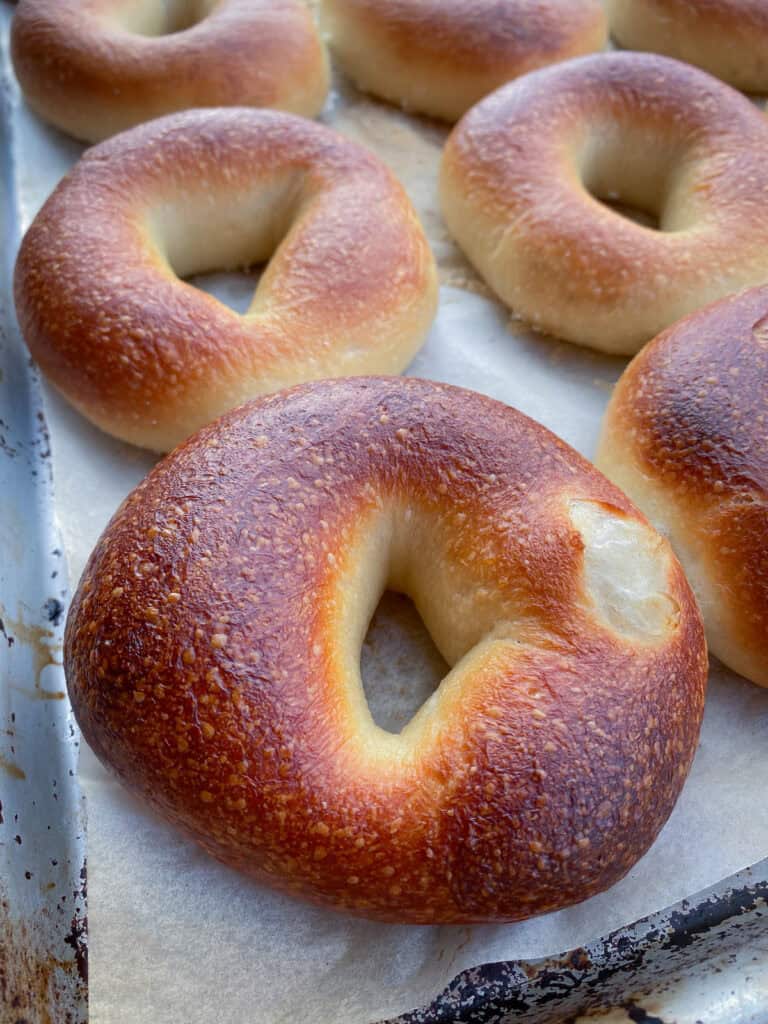
Those little bubbles are a good sign, not a flaw. They are the mark of a long cold ferment. Overnight in the fridge, the yeast keeps making tiny amounts of gas, and small pockets of it collect just under the skin while the cold dries the surface enough to hold them in place.
In the oven, those pockets balloon outward. The skin over each one is stretched thinner, so it browns faster than the crust around it – that is why blisters are always darker. A same-day bagel bakes up smooth because the gas never had time to pocket under the skin.
Fine blistering means you did it right. A few large bubbles mean the surface dried out too much in the fridge, so keep the tray covered during the rest.
Why is the inside of my bagel gummy?
Most often it is underbaked. Take one to about 200°F in the center and see if the problem goes away. Second most often, it was sliced too hot, which compresses the crumb and mimics gumminess exactly.
If neither fits, check that you did not add extra diastatic malt powder. Its enzymes keep breaking down starch for the whole cold rest, and too much of it really does make the crumb gummy.
Do I really have to boil bagels?
Yes, if you want a bagel. Boiling cooks the starch on the surface into a thin, sealed skin, which gives you the shine, the set crust, and the chew. It also stops the bagel from blooming open like a dinner roll in the oven.
Skip the boil and you have baked a nice bread roll with a hole in it, but it is not a bagel.
Can I use all-purpose flour instead of bread flour?
You can, and they will still be good. They will be softer, more open and more bread-like, because there is less protein to build the chewy network. If bread flour is an option, use it. If you can get high-gluten flour, better still.
What is the difference between diastatic and non-diastatic malt?
Diastatic malt powder still has live enzymes. Those enzymes turn flour starch into sugar, which feeds the yeast, deepens the crust color, and adds flavor. This recipe uses that in the dough.
Non-diastatic malt and malt syrup have had the enzymes cooked out. They add flavor and color only. Malt syrup is the traditional bagel product, and it is what goes in the boiling water here. Brown sugar can substitute for the syrup. It cannot substitute for the powder’s enzymes.
Are bagels vegan? Do bagels have eggs or dairy in them?
These bagels are vegan as written. Flour, water, yeast, salt, sugar, and malt, with malt syrup in the boiling water. No eggs, no butter, no milk.
Two things to watch if it matters. Some recipes brush an egg wash on before baking, and this one does not. And if you swap honey for malt syrup in the water bath, it is no longer vegan.
How many calories are in a homemade bagel?
About 260 calories each when the dough is divided into twelve, with the carbohydrate and protein numbers broken out in full in the recipe card.
That is close to a plain deli bagel and well under most coffee shop ones, which often run larger. Divide the dough into ten instead of twelve, and each bagel will be about a fifth larger.
How long do homemade bagels last?
Best in the first few hours, good for about two days at room temperature in a paper bag inside a plastic one, and months in the freezer if you slice before freezing.
They stale faster than sandwich bread because the dough has no fat to slow it down. Toasting brings a day-old bagel most of the way back.
Can I skip the overnight rest in the fridge?
Yes. Instead, let the shaped bagels rise longer on the counter, then boil and bake the same day. You will get a good bagel with a plainer flavor and a paler crust, and it will stale faster.
Don’t try to speed up the cold rest by leaving the tray out at room temperature. That just over-proofs the dough, and it ends in flat, wrinkled bagels.
Can I let the dough rise overnight in the bowl instead of shaping first?
Yes, and it is a good option when you would rather not give a whole fridge shelf to a sheet pan. Cut the yeast right down, though, to roughly an eighth of what the card calls for, or the dough races past its peak by morning and collapses.
Mix and knead as written, then leave the covered bowl at cool room temperature overnight. You want it doubled, maybe a little more, never tripled. In the morning, divide, shape, give the shaped bagels a short rise, and run the float test before you boil.
One trade to know about. Resting the shaped bagels overnight dries their surface, and that dry skin is what keeps them from wrinkling in the boiling water. A bowl rest does not do that. You get most of it back by leaving the shaped bagels uncovered in the fridge for about twenty minutes while your water comes to a boil.
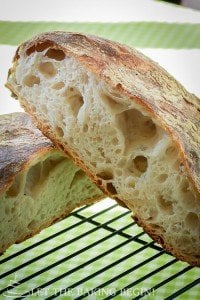
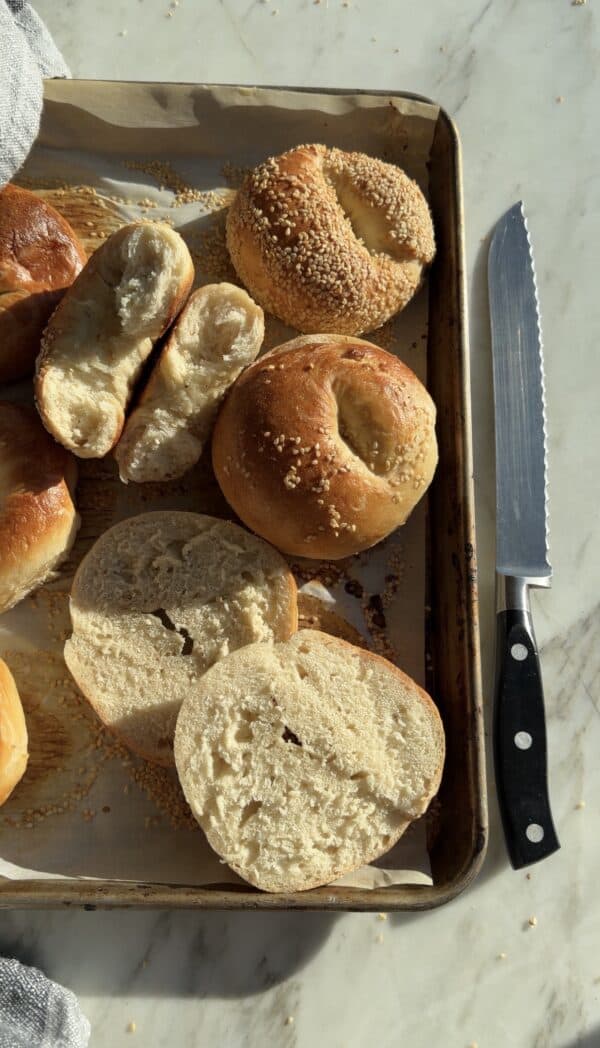
I tested this with a quarter teaspoon of yeast and the dough still quadrupled by morning. Here is the crumb from that batch – soft and open like a dinner roll, not the tight chew a bagel should have. That is why the eighth of a teaspoon matters.
More yeast baked goods to try
If bagels went well, these use the same skills and are all worth a weekend.
- Soft Pretzel Dogs – the other boil-then-bake recipe on this site, and the closest cousin to a bagel.
- Rustic Baguette – lean dough, crisp crust, no enrichment.
- No-Knead Bread – the opposite end of the effort scale, and still excellent.
- 4 Ingredient Artisan Bread Dough – one master dough that lives in the fridge for a week and turns into several different bakes.
- Sourdough Bread – if the long cold rest here was your favorite part, this is the next step.
- Basic Brioche – rich, soft, and buttery, the exact opposite of a bagel.
- Sweet Yeast Bread and Cheese Danish – for when you want the pastry side of yeast dough.
- Sugar Donuts – still the most popular yeast recipe on the site.
Browsing for something else? The full recipe index and the baked goods archive have everything in one place.
Made this recipe?
Please leave a ⭐⭐⭐⭐⭐ star rating and a comment below.
It helps other readers find it, and I love reading every single one.
Homemade Bagels Recipe
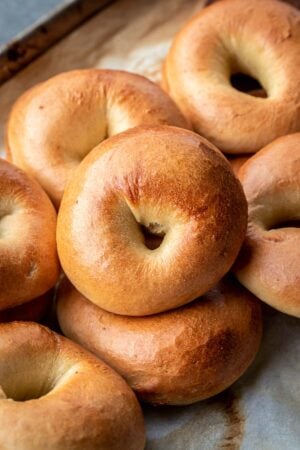
Homemade bagels are simple to make yet, I am here to make that process foolproof. Follow my comprehensive step by step bagel recipe guide to perfect bagels.
Ingredients
Homemade Bagel Dough
- 2 tsp Instant Dry Yeast (Note 1)
- 2 1/4 cup water room temperature
- 1 tbsp granulated sugar
- 1 Tbsp kosher salt
- 6 1/4 cups bread flour (1 cup = 150 g)
- 1 Tbsp diastatic malt powder (Note 2)
Bagel Bath
- 5 quarts water
- 3 Tbsp malt syrup (3 tbsp of malt syrup could be replaced with 1/4 cups honey)
Instructions
-
Start the process the night before or a day ahead of when you need the bagels, as the dough needs to be refrigerated overnight before baking (Note 8 - skipping overnight fermentation).
Mix and knead: In a bowl of a mixer or a large bowl stir 2 tsp instant dry yeast and 2 1/4 cups water. Then add 6 1/4 cups bread flour (weigh the flour for best results), 1 Tbsp sugar, 1 Tbsp kosher salt, and 1 Tbsp of diastatic malt powder and quickly mix with a spoon to bring the ingredients together into a shaggy dough.
Now knead the dough with a mixer or by hand:
Mixer: Fit the mixer with a hook and mix on slow speed for about 4 minutes (Note 3). Turn up the speed to medium and knead for another 5 minutes.
The dough will be stiff but elastic and smooth with well-developed gluten. If the mixer struggles to knead, knead for several minutes, then leave to rest for 5-10 minutes, then continue kneading for several minutes until smooth.
By hand: Alternatively, the dough can be kneaded by hand. Just continue to knead until the dough looks smooth with well-developed gluten.
-
Divide the dough into 10 to 12 equal pieces. Weighing with a kitchen scale is the best way to achieve equal pieces. Otherwise, make a log and divide the dough into 10-12 equal pieces. Roll each piece into a neat smooth ball, then roll the balls into rings starting with the first one you rolled into a ball and work sequentially.
1st way to shape a bagel: rope to ring
- roll all balls into 10-inch logs without flouring the working surface or introducing any flour. Shape the log into a ring by overlapping the ends. Then place 2-3 fingers over the area of the overlap and roll back and forth on the work table to seal the ends together and make them the same thickness as the rest of the ring. The rolled bagel should be 4-inches round with a 2-inch hole in the middle.
2nd way to shape a bagel: ball to ring
- Poke a hole in the middle of the shaped ball and stretch it out until you have a 1.5-2 inch hole and a 4-inch bagel.
-
Ferment/proof: set the shaped bagels on a parchment-lined 15" x 21" baking sheet dusted with flour, spacing them evenly. Leave the shaped bagels at room temp for 30 minutes (Note 4 & 5) to allow them to proof until about 1 1/2 times their original size. The bagels are not meant to be very soft and fluffy, so they need less of a rise time than regular yeast based, baked goods.
Cold retardation: Then, transfer to the fridge to continue proofing (cold retard), covered, for about 12 hours or overnight (Note 6 & 7). They should increase slightly more in volume, but not a lot (to skip the overnight proofing read Note 8).
-
Rest at room temp: After refrigerated fermentation, remove the bagels from the fridge and leave at room temperature, covered for 15 minutes to rest.
-
Meanwhile prep for boiling and baking:
Preheat the oven to 500°F with the rack in the middle.
Meanwhile, fill an 8-quart pot with about 5 quarts of water and add the malt syrup or the honey. Bring to a boil over medium heat.
Set a cooling rack over a baking pan to catch any dripping from the water.
-
Boil: add 2 - 3 bagels to the boiling water and give a gentle stir to prevent them from sticking. Simmer until they float to the top, about 30 seconds rotating them halfway through if they're not fully submerged. Do not boil for too long or the crust will be very thick (Note 9).
Transfer with a slotted spoon to the prepared rack to dry excess water. Add garnish if desired while the bagels are still slightly wet.
-
Bake: Transfer the boiled bagels back to the parchment-lined baking sheet, spacing them evenly and place in the center of the oven. Turn the heat down to 450F and bake for about 15 minutes or until the bagels are golden brown, but still soft and springy to touch. Turn the sheet halfway through baking for even cooking. Cool on a rack before serving.
-
Store thoroughly cooled bagels in a ziplock bag at room temperature or freeze thoroughly cooled and wrapped bagels for up to 6 months.
Recipe Notes
- Note 1. Instant or Active: Instant Dry Yeast can be replaced with Active dry yeast. To use active dry yeast combine the water and the yeast and leave to proof for about 10 minutes to form a foam cap, then proceed with the recipe.
- Note 2. Malt powder: do not omit the malt powder, it is what gives the bagels the signature bagel flavor and improves the dough's texture. Without it, the bagels will taste like bagel-shaped bread. But, if getting malt powder is not an option, replace it with brown sugar.
- Note 3. Dough Texture: The bagel dough is meant to be stiff, this is what gives bagels the chewy texture we like. If the bagel dough is too soft, add a bit more flour. If your dough is too thick mix in 1 tablespoon of water at a time until it softens.
- Note 4. Increased rise time - if using Active Dry Yeast the rise time will be longer, so increase the proofing time from 30 to about 50 minutes.
- Note 5. Yeast age: if the yeast is older the proofing time will be extended. Always gauge the proofing time by the increase in volume and not by the amount of time it takes to get there. The older the yeast, the longer it will take.
- Note 6. Cold fermentation: proper bagels are cold fermented to improve flavor, increase shelf life and give bagels a depth of flavor. Proof overnight for best results.
- Note 7. Inside texture: if you prefer the bagels to be on the firmer side only allow to proof until 50% bigger. For softer bagels allow to double in size before baking.
- Note 8. Omitting cold fermentation - just skip to step 5 and allow the bagels to continue proofing (for another 15-20 minutes) as you preheat the oven and prepare the water for boiling.
- Note 9. Boil the bagels: the hot water gelatinizes the exterior of the bagel which will create a shiny crust when the gelatinized exterior is expanded during baking. Boiling also helps to retain inside moisture for that perfect chewy crumb.
- Note 10. Everything bagel seasoning, the ratio: 1 part white sesame seeds, 1 part black sesame seeds, 1 part poppy seeds, 1 part dried minced garlic, 1 part dried minced onion, and 1/2 part flaky salt. Mix and keep in a jar - it stays good for months. Press the just-boiled bagel top-side down into a shallow plate of it while the surface is still wet.

Thank you for following me on Instagram, Facebook & Pinterest!
Hashtag your photos #LetTheBakingBeginBlog so I can see your creations and for a chance to be featured!
I first published this bagel recipe in 2021, and it is still the one I make when I want a real chewy bagel at home. I rewrote it in August 2026 with the gram weights and the per-bagel target added, a float test so you stop guessing when the dough is ready, a full troubleshooting FAQ for wrinkled, flat, pale and gummy bagels, and storage and freezing directions that match how bagels actually keep.
Marina | Let the Baking Begin