Homemade Dinner Rolls Recipe (Video)
Dinner rolls that are light, soft as a cloud, rich and buttery. This is my go-to dinner rolls recipe, and you can make them all in one day, or mix the dough, shape it, put it in the fridge and bake them the next day. It works with your schedule and your skill level, whether you’ve got all day or just an evening.
Once you’ve made these, try my hoagie rolls or homemade hamburger buns.
Why you’ll Love these Dinner Rolls
Here’s why I keep making these:
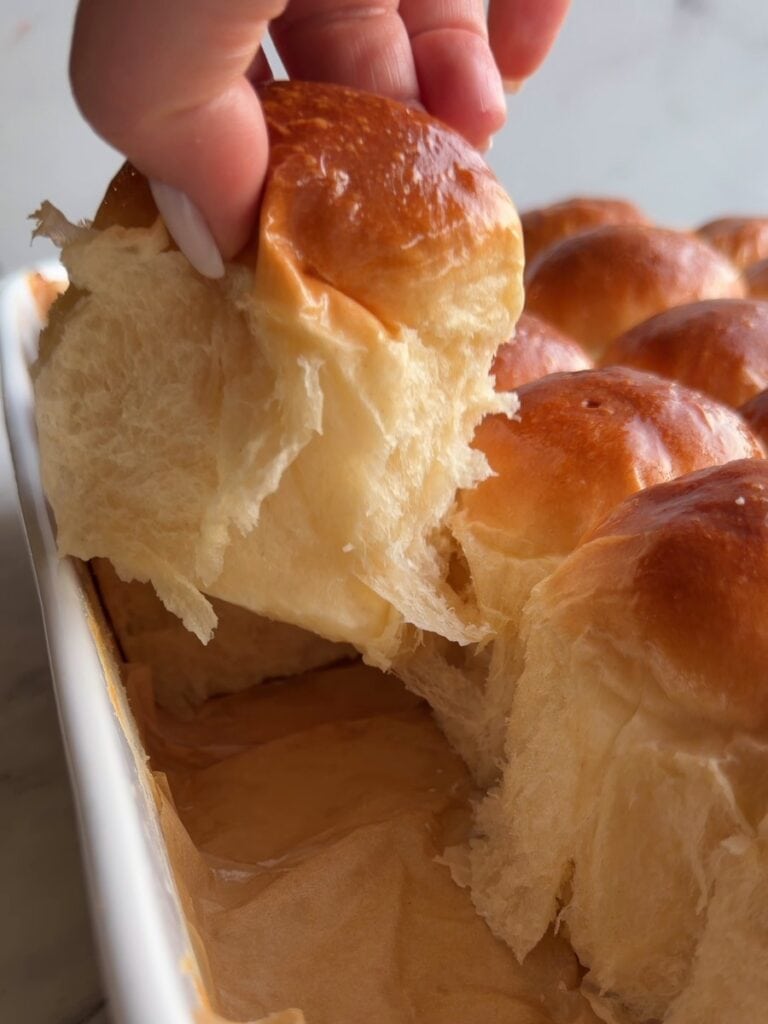
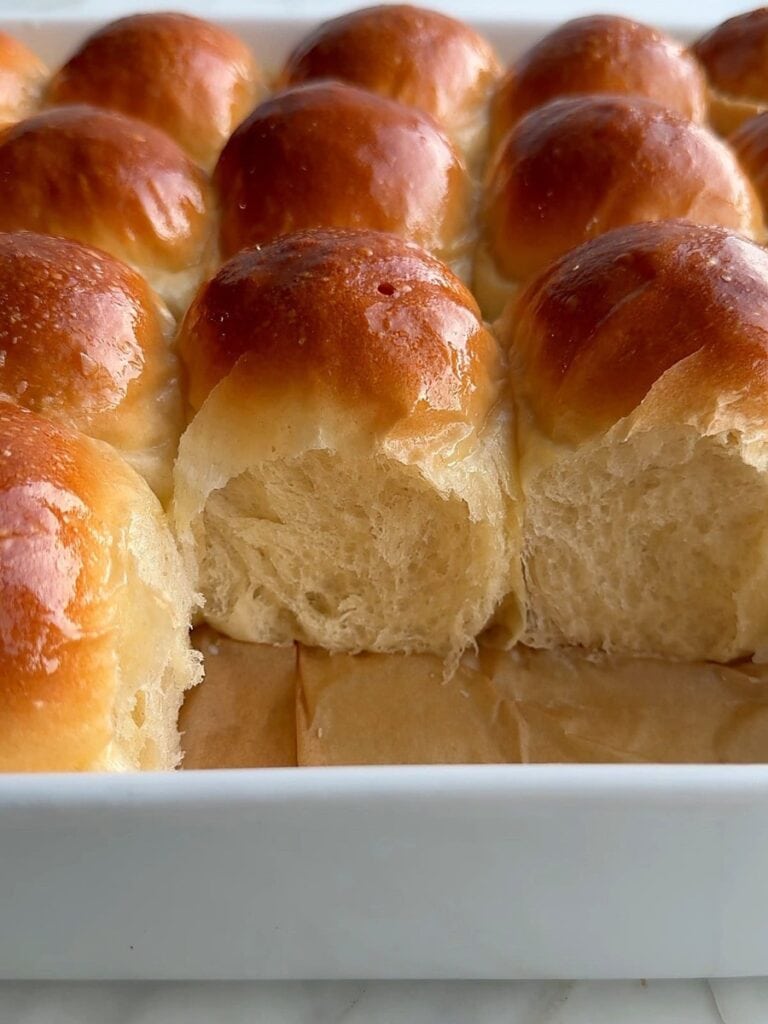
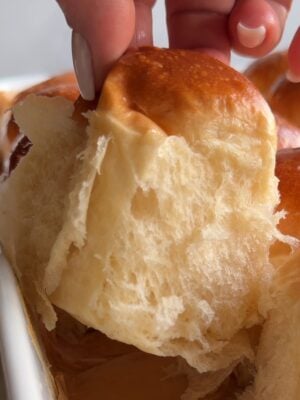
- Pulls apart in layers – you tear one off and it just keeps stretching, with butter on top and a little crunch of flaky salt.
- Soft corners too – the milk bath keeps the tops and bottoms soft, even on the corner rolls.
- Make ahead – shape them tonight, pop them in the fridge, and bake them the next day for the freshest, fluffiest buns to go with dinner, with no hands-on work the day of.
- Freeze for 2 months – keep them in the freezer until you need them, then bake to thaw and warm through, and nobody can tell they were in the freezer.
Why These Dinner Rolls Are So Soft
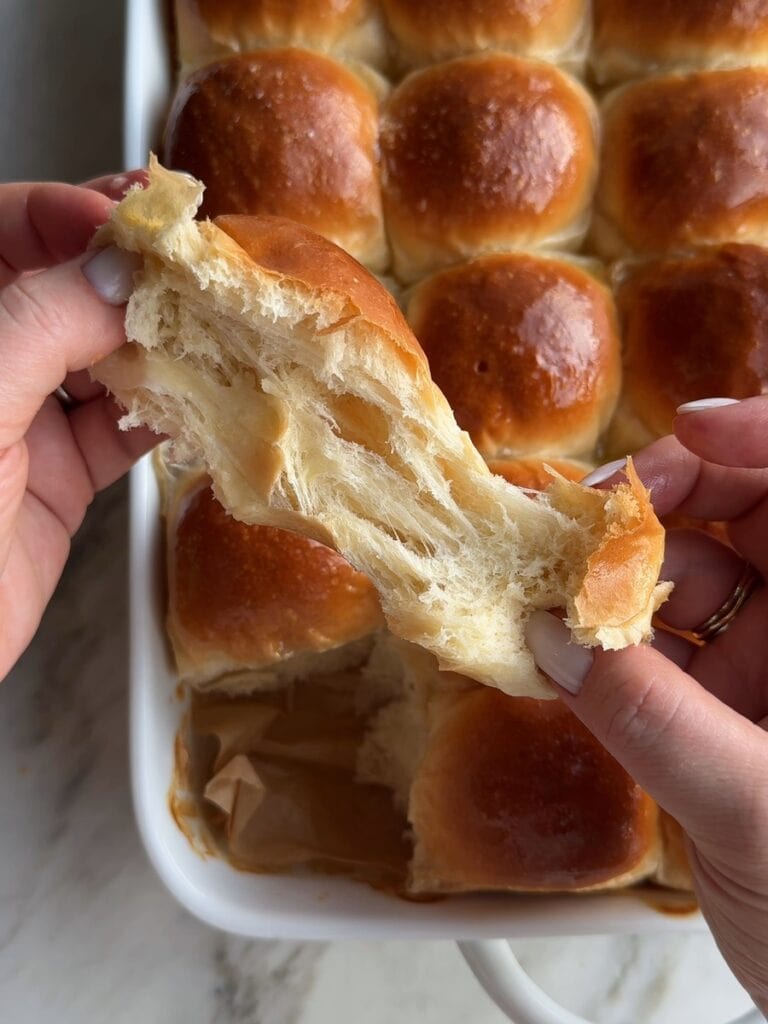
This is a rich dough. You’ve got milk, butter, honey, one egg and two extra yolks. The fat in them doesn’t evaporate in the oven the way water does. It stays in the crumb and keeps the rolls soft for days. You’ll see the one I’m tearing open at the end of the video was a 4-day-old roll – I’m not kidding! So you can bake them today and they’ll still taste fresh days later.
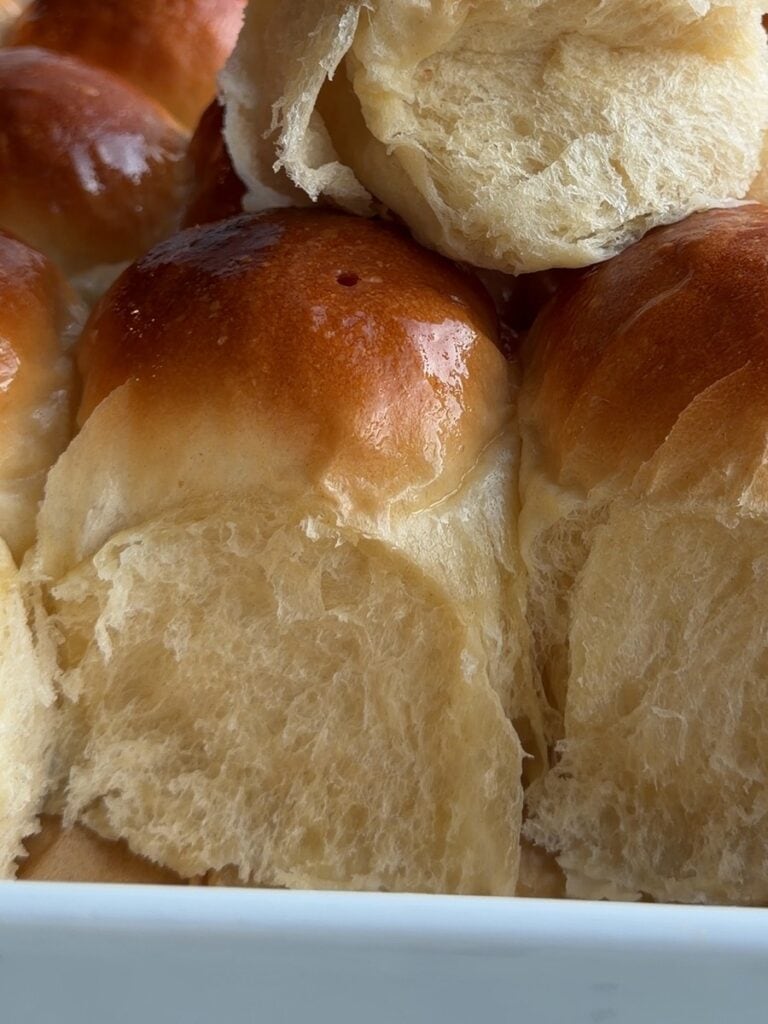
The milk bath is the other secret. After 10 minutes in the oven, you pour half a cup of milk right over the rolls, close the door and let them keep baking. It keeps them from drying out. It sounds weird if you’ve never done it, but trust me on this one: the tops stay soft and the rolls keep going up. The milk helps the tops brown, and the milk that runs down into the pan keeps the bottoms soft.
Ingredients for Dinner Rolls
Nothing fancy here. It’s stuff you probably already have, plus a little extra milk and butter for the end. Amounts are in the recipe card at the bottom.
Dinner Roll Dough
- Bread flour: it has more protein, so the gluten comes out stronger. Stronger gluten holds on to more of the air pockets the yeast makes, and that gives you a taller rise and a fluffier roll. If all-purpose is all you have, use it. You might just need to add a little more flour.
- Kosher salt: I use Morton kosher salt, and the amount on the card is for Morton, so if you have a different salt, go by grams, not spoons. If you’re using table salt, you’ll want to decrease the amount by about 1/4.
- Yeast: Platinum yeast is what I always grab because it rises nice and even for me, but any instant or active dry yeast is going to work here too.
- Whole milk: the fat in whole milk makes these softer and the tops get more brown. And if all you have is 2%, that’s fine. Use it.
- Honey: you only need a little bit. It sweetens the dough just a touch, and it feeds the yeast. Sugar will do the same thing if you’re out, but I think honey tastes better and the tops come out more golden.
- Egg and egg yolks: one whole egg and two more yolks. I buy the eggs with the really orange yolks, so mine come out pretty yellow inside. And don’t throw out the whites. Save them for meringue cookies or a cherry chocolate pavlova.
- Unsalted butter: I use unsalted, but if all you have is salted, just reduce the salt amount in the recipe.
Milk Bath and Butter Topping
- Milk: any milk you have; it just gets poured over the rolls in the oven.
- Butter: unsalted or salted, melted, for brushing them as soon as they come out.
- Flaky salt: I like the big crunchy flakes like Maldon, but kosher salt is fine too. And if you used salted butter, skip it.
- Honey, or garlic and fresh parsley (optional): only if you want to do the honey butter or the garlic herb butter on top.
How to Make Dinner Rolls
Step-by-step photos are under each step. So you’re going to proof the yeast, make the dough and knead it, let it rise two times, and then bake them with the milk bath.
How to Make the Dinner Roll Dough
Whatever your comfort level with dough is, this one can work for you. You can give it a quick mix by hand, or you can go all out and knead it for the full 20 minutes and get the tallest, fluffiest rolls. I stir it together by hand first and then let my stand mixer do the kneading.
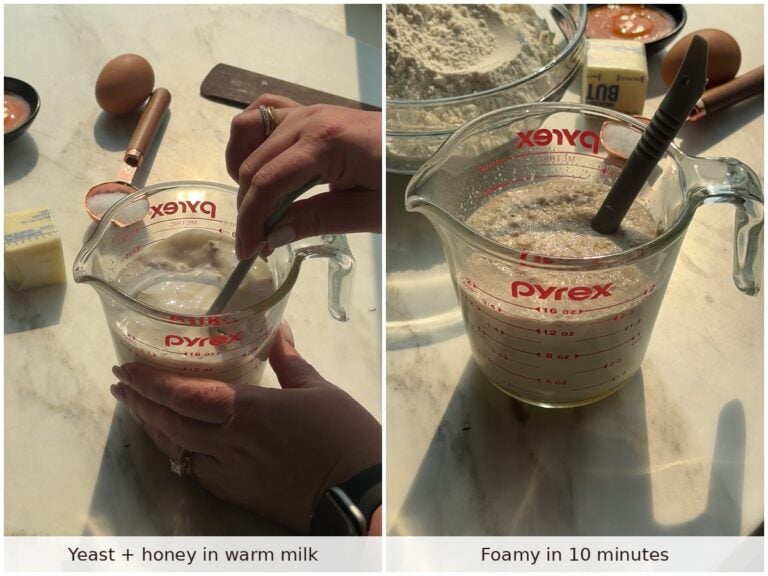
- Proof the yeast – warm up the milk until it feels like warm bath water, somewhere between 90°F and 100°F, and stir in the yeast and a spoonful of the honey. Then just leave it alone for about 10 minutes until it’s nice and foamy.
Not sure if it’s foamy enough?
A tall, fluffy foam means your yeast is good and you can keep going. Slightly foamy means it’s still alive. It’s just going to be slow, so give the dough more time. No foam at all means your yeast is dead. I’m sorry. Start over with a new packet, because otherwise the dough is not going to rise for you.Only have active dry yeast?
Yes, you proof it the exact same way. I use Platinum yeast, but active dry works just as well in this dough, and the 10-minute foam check tells you it’s alive before you waste your flour.
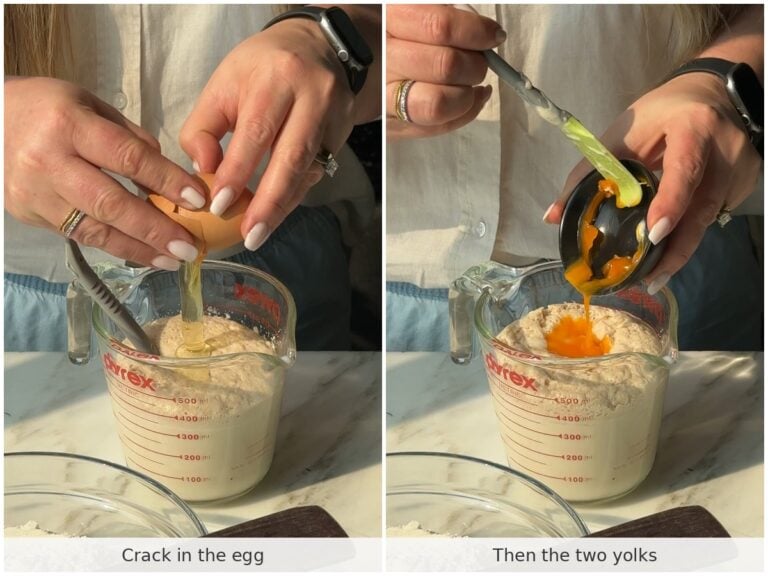
- Add the eggs – then you whisk in the rest of the honey, the egg and the two yolks.
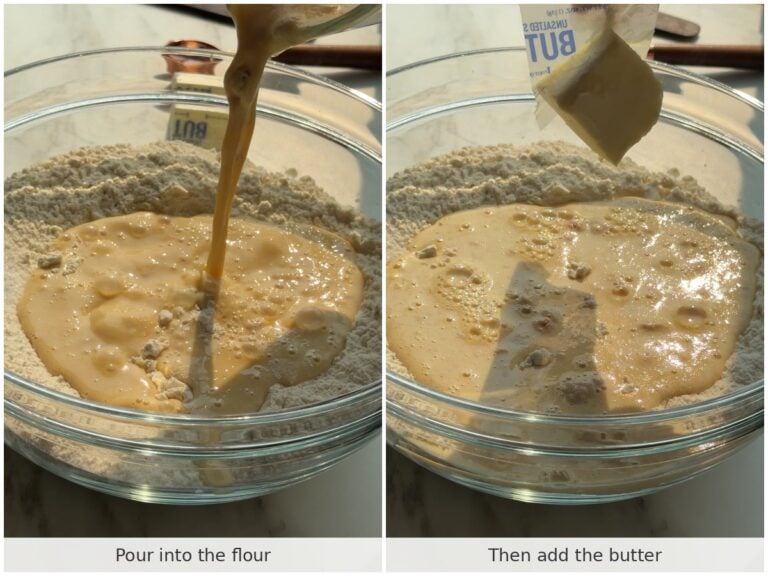
- Pour it into the flour – whisk the flour and salt in a big bowl and pour in the milk mixture. Then add the room temperature butter.
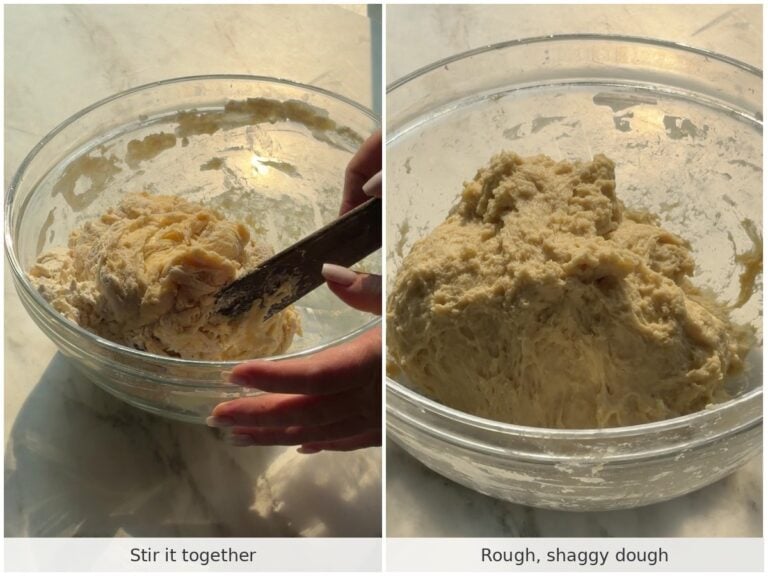
- Mix the dough – stir it until you get a shaggy, messy-looking dough. It’s supposed to look like that, don’t worry.
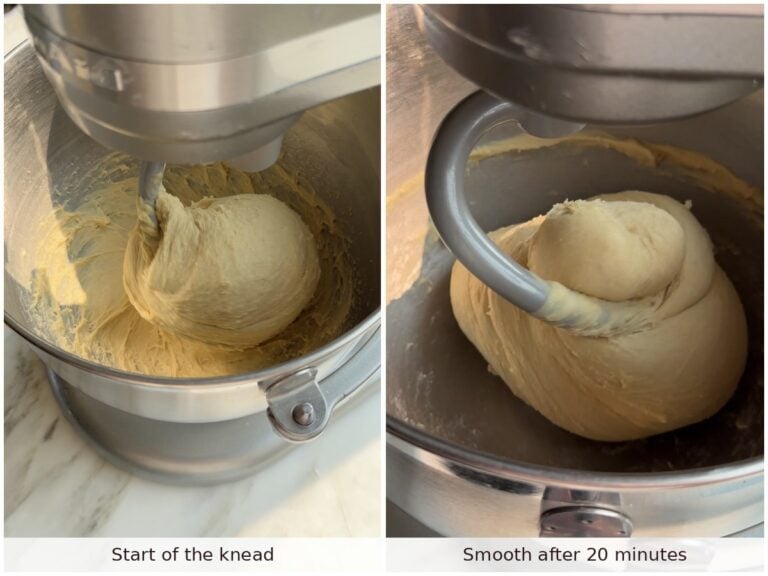
- Knead the dough – Mixer: move the dough to a stand mixer with the dough hook, speed 2, and knead it for 20 minutes OR until it stops sticking to the sides of the bowl. The dough looks smooth and elastic, and a little piece stretches into a thin, clear sheet without tearing.
What’s the windowpane test?
Pinch off a little piece of dough and gently stretch it between your fingers, turning it as you go. If it stretches so thin you can see light through it, like a little window, and it doesn’t tear, the gluten is ready. If it tears right away, give it 2 more minutes and try again.By hand: if you don’t have a mixer or don’t feel like using one, knead it on the counter until it comes together, then go straight to the rise. They’ll still be good, just not as fluffy as the mixer ones.
The dough will feel very sticky for a while. So mix it thoroughly for a couple of minutes, or keep going until it feels tacky to the touch.
Tacky means it grabs your finger for a second when you touch it, then lets go clean, without leaving dough stuck to your skin.
Either way, it should feel soft and tacky. If it sticks to your fingers like glue, add flour 1 tablespoon at a time.
Why mix until it stops sticking?
Once the dough stops sticking to the sides of the bowl, the gluten is ready. If you continue mixing after that, you will overwork the gluten, and it’s going to start ripping, and you might end up with a denser dough. So keep mixing until it stops sticking to the bowl, and then stop.How to make the dinner roll dough in a bread machine
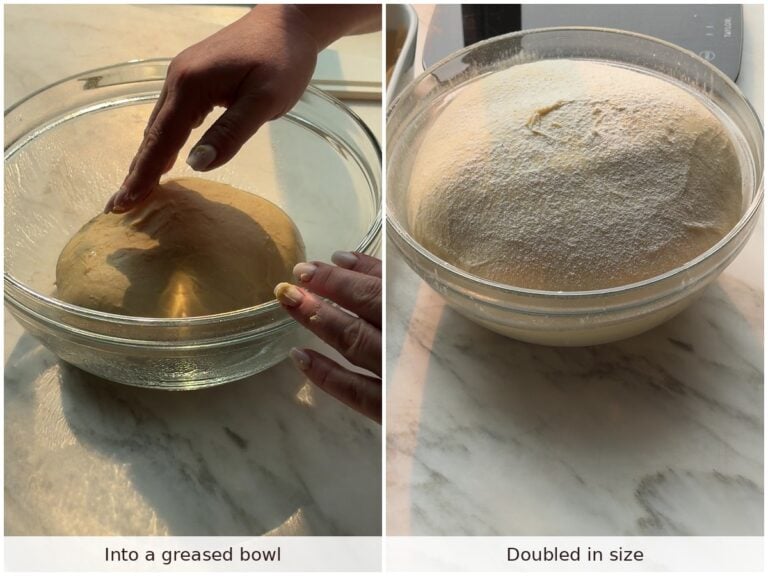
The milk mixture goes in the pan first, then the flour and salt, and the yeast last, right on top. Run the dough cycle (it takes about 1½ hours), and the machine does the kneading and the first rise for you. After that, you divide, shape and bake the same way, milk bath and all. - Let it rise – make the dough into a ball, put it in a greased bowl, cover it and let it sit somewhere warm until it doubles. That takes about 1½ to 2 hours.
Kitchen too cold?
I turn my oven on to 350°F for just 30 to 50 seconds, then turn it off and leave the light on. It stays around 75°F to 78°F in there, and the dough loves it.Did it rise too much?
Check it against these:
- A little past double – no problem. Punch it down gently and keep going.
- Tripled, or the top sank – the yeast ran out of food. Punch it down anyway. They’ll still bake, just a little flatter.
- Smells sour or boozy – it went way too long. Punch it down, keep the second rise short and keep an eye on the dough.
Easy Dinner Rolls Recipe (No Mixer, No Kneading)
Short on time, or just don’t feel like kneading? Here’s the easy version. Put all of the ingredients in one big bowl: the warm milk, yeast, honey, egg, yolks, flour, salt and soft butter. Stir with a spoon until you don’t see any dry flour.
That’s it. Cover the bowl and let it rise until doubled, then shape and bake the rolls the same way as below.
They still come out soft. They just won’t be as tall and fluffy as the kneaded ones, because the gluten doesn’t get worked as much.
How to Shape the Dinner Rolls
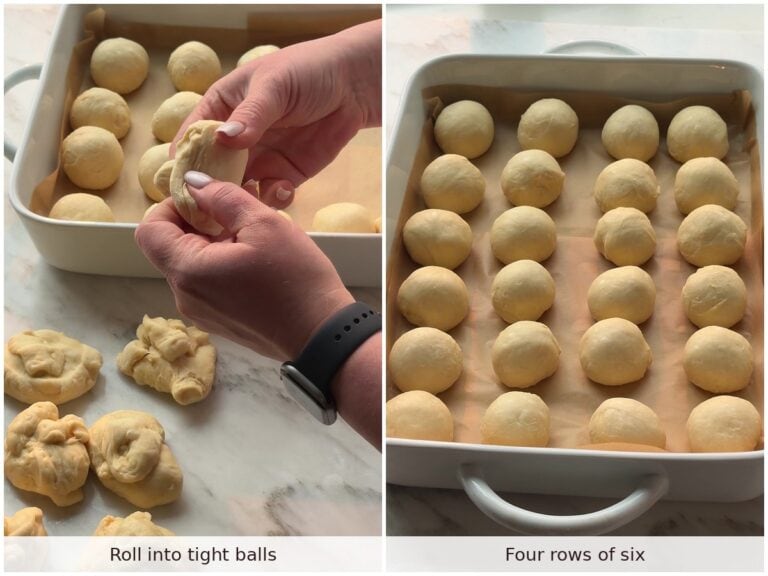
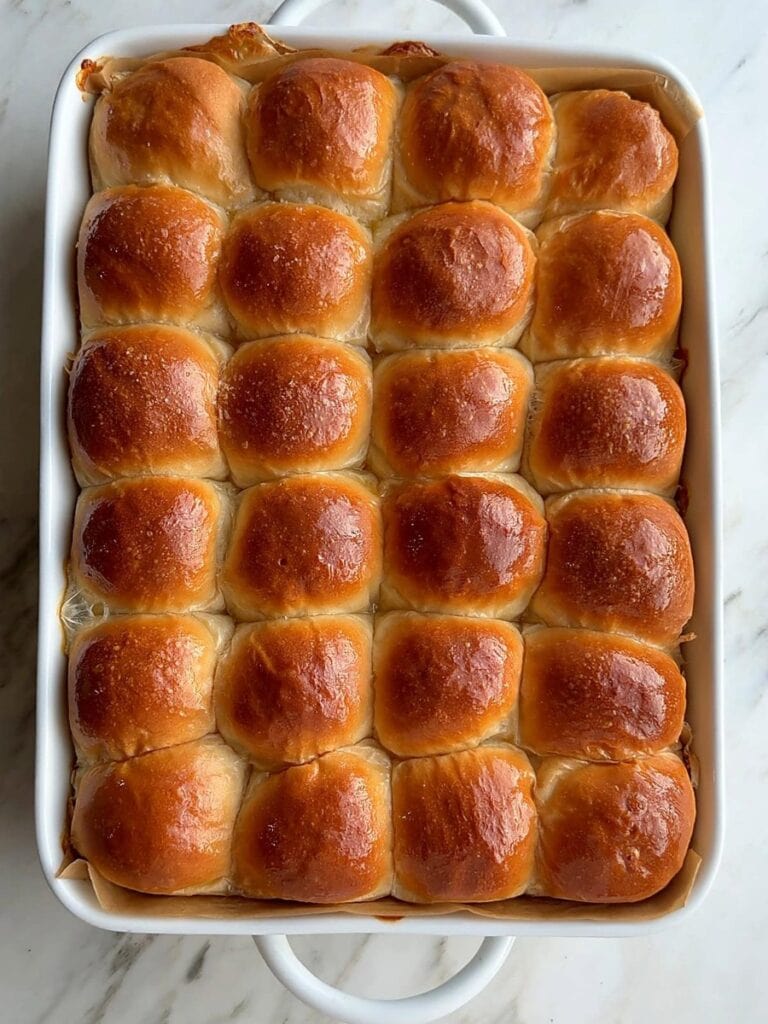
This dough makes 24 rolls (about 50 grams each), just enough to fill one 9×13-inch pan, four rows of six.
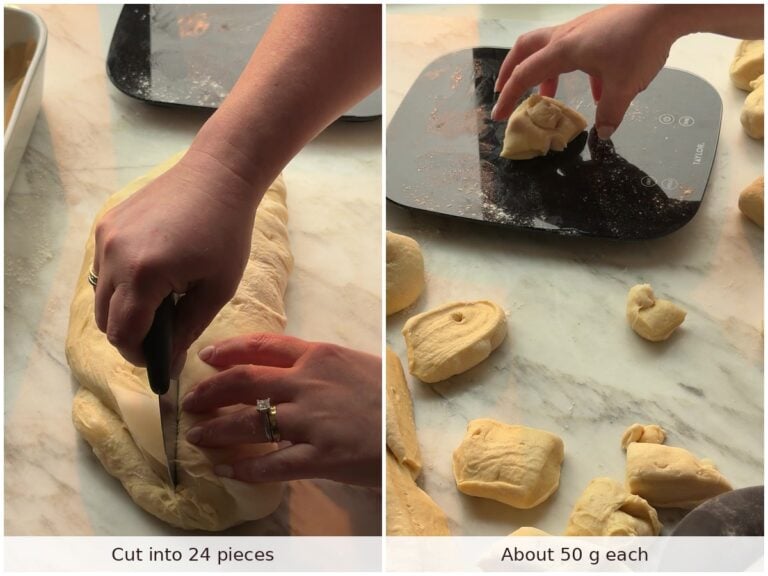
- Divide the dough – punch the dough down gently and cut it into 24 pieces with a knife or a bench scraper, about 50 grams each if you want your dinner rolls to all be exactly the same size. Use a kitchen scale if you love precision. It’s the easiest way to get every roll the same size.
No scale?
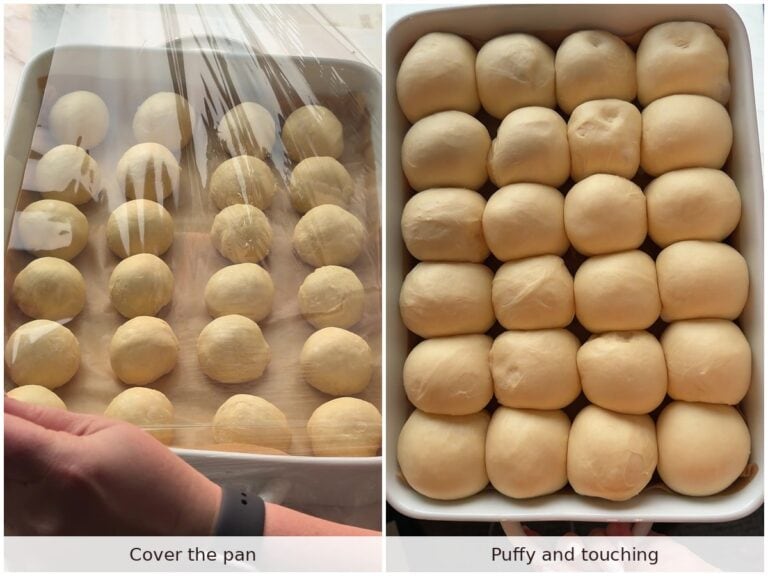
Roll the dough into a log and cut it in half. Cut each half in half, then each of those in half again, and now you have 8. Cut each of those into 3 and there’s your 24, pretty close in size. - Shape the rolls – next, roll each piece into a tight ball and arrange them in a 9×13-inch pan lined with parchment paper, four rows of six.
Can’t get them smooth?
Fold the edges into the middle and pinch them. Then roll it between your hands, or on the counter (no flour) under your cupped hand, until the top gets smooth. Seam side goes down. - Let them rise again – cover the pan with plastic wrap to keep them from drying out, and let the rolls proof until puffy and touching, about 1 hour. If yours take longer than mine, do not rush the process. Letting them proof to full volume will reward you with fluffier and lighter rolls.
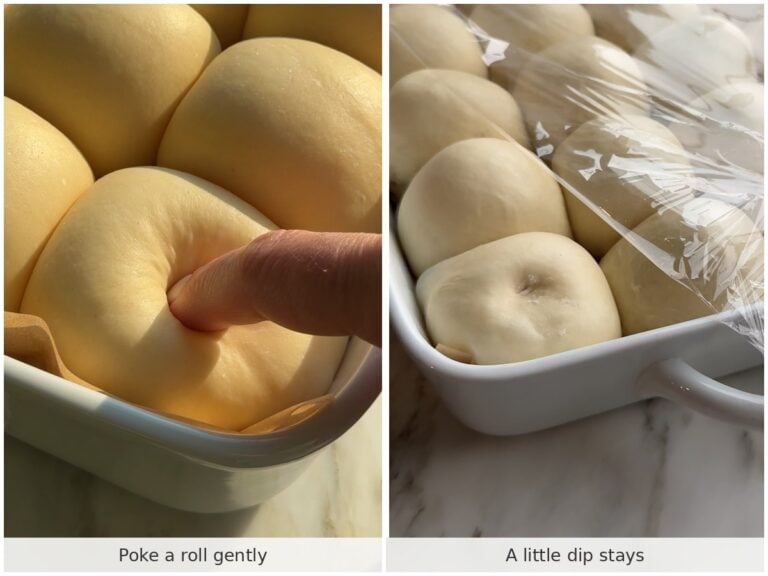
- Do the poke test – dip a fingertip in flour and gently poke the side of a roll. If the dent comes back slowly and a little dip stays, they’re ready to bake.
What if the dent pops back or stays?
- Under-proofed – the dent pops right back. Give them 10 more minutes.
- Proofed – the dent comes back slowly and a little dip stays. Bake them.
- Over-proofed – the dent stays. Bake them right now. They’ll be a bit flatter but still good.
How to Bake the Dinner Rolls
Have your milk ready next to the oven. You’re going to need it 10 minutes in.
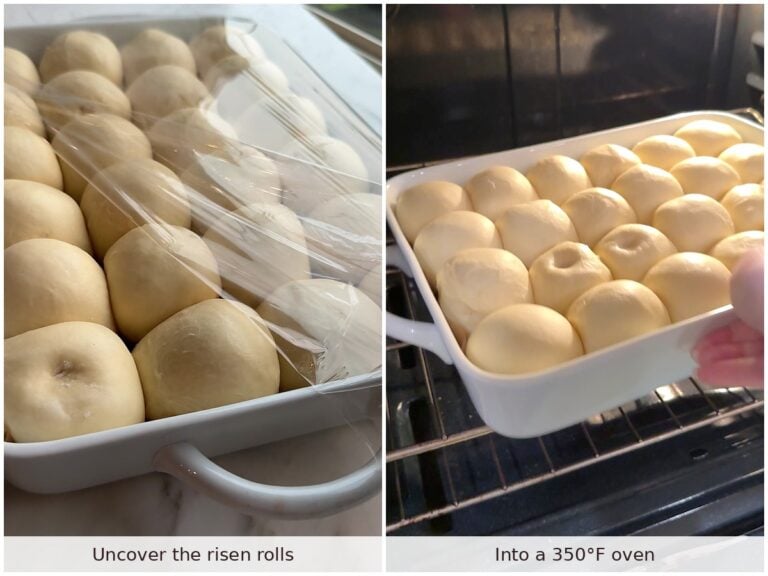
- Heat the oven – about 15 minutes before the second rise is done, preheat the oven to 350°F.
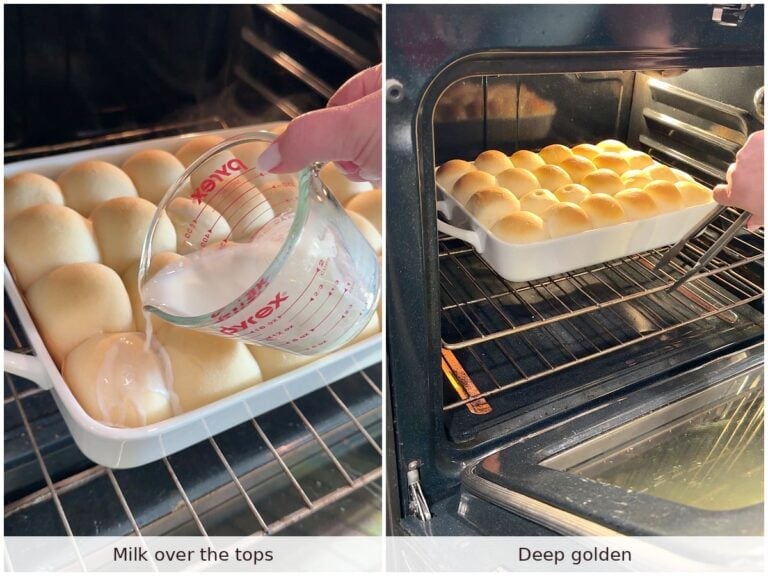
- Bake with a milk bath – bake for 10 minutes, then pour the milk over the tops and bake another 20 to 25 minutes, or until the tops are evenly deep golden and the middle roll reads 190°F, OR a toothpick in the middle comes out clean. Keep the oven closed before the milk pour. The rush of cool air can stall the rise or even sink it.
Why the milk?
So the tops stay soft and the rolls can keep going up in the oven. They brown more evenly, too, and the milk that goes down into the pan keeps the bottoms soft.Not sure they’re done?
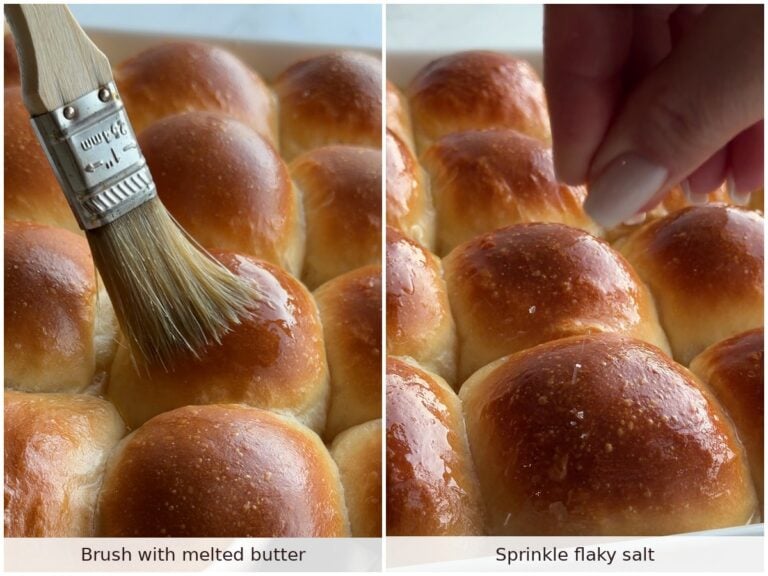
The tops get deep golden and your whole kitchen smells like bread. If you want to be sure, use an instant-read thermometer. When the middle roll is 190°F, they’re done. - Brush with butter – brush the hot rolls with melted butter. When they’re warm out of the oven, you’ll be fighting every fiber of your being not to eat the whole pan! Pick one:
Classic: unsalted butter with a sprinkle of flaky salt, or just salted butter.
Honey butter: stir a little honey into the melted butter.
Garlic herb butter: stir pressed garlic and chopped fresh parsley into the butter.
Marina’s Pro Tips for theBest Dinner Rolls

If you only remember four things, it’s these.
- Proof the yeast first. Give it 10 minutes and you’ll know it’s alive before you waste a whole bowl of flour on it.
- Knead low and long. Speed 2, the whole 20 minutes. Low speed so the dough doesn’t get warm and the gluten doesn’t tear during the mix.
- Don’t skip the milk bath. Pour it right over the tops. I know it looks like a lot.
- Bake to 190°F. I go by the thermometer more than the timer, because if you go too far past that, they get dry.
How to Serve Dinner Rolls
I love them warm with butter, with soup, a holiday roast or a big bowl of whipped mashed potatoes. They go with everything: my Christmas dinner menu, your Thanksgiving table, a regular weeknight, or sliders. Leftovers make great little sandwiches the next day. Just know that once you make them, you’ll want to eat them straight out of the pan. Forget dinner. They ARE the dinner.
How to Make Dinner Rolls Ahead
Night before, in the fridge: let the dough rise until doubled, then shape the rolls in the pan and leave them at room temperature for 30 minutes. Spray the tops with nonstick spray, cover with plastic wrap and put them in the fridge.
The next day: if they’ve doubled in size, bake them in an oven preheated to 350°F, milk bath and all. If not, leave them at room temperature until they double. Give them a few hours; they need to warm up before they start rising again.
Then do the poke test: dip a fingertip in flour and gently poke the side of a roll. If the dent comes back slowly and a little dip stays, they’re ready to bake.
Slow rise on the counter: for this one, you use just ¼ tsp yeast (Note 11). Knead the dough in the evening and leave it overnight in a cool room, 67°F to 69°F, for about 14 hours. In the morning, you shape them, let them rise until about double and bake.
Bake ahead: bake them, let them cool completely, freeze them, and warm them up right before dinner.
How to Store Dinner Rolls
Room temperature: up to 2 days in an airtight container or a zip-top bag.
Fridge: wrap them up well, or put them in a zip-top bag, and they’ll keep for up to a week.
Freezer: once they’re cool, freeze them in an airtight bag for up to 2 months, then thaw them on the counter.
To reheat: cover them with foil and warm them at 350°F for 5 to 7 minutes, or pop one roll in the microwave for 10 to 15 seconds.
If your rolls came out dense or the dough felt way too sticky, start here.
Dinner Rolls FAQ
Why are my Dinner Rolls dense?
Most of the time it’s not enough kneading or not enough rising. Knead the whole 20 minutes OR until it stretches thin, and let it fully double before you shape it.
If your kitchen is cold or your yeast isn’t the freshest, it’s all going to take longer, so just give it the time. Go by how big the dough gets, not the clock.
Too much flour will make them dense too, so weighing your flour is the best way to get consistent results.
Why is my Dinner Roll dough so sticky?
A little sticky is right. It gets firmer as it rises. But if it sticks to your fingers like glue, you probably need more flour. I go by 150 grams per cup, and I fluff the flour, gently scoop it and level it. Weigh it on a kitchen scale if you can, or add flour 1 tablespoon at a time until the dough stops sticking.
Can I use sugar instead of honey in Dinner Rolls?
Yes, they do the same thing in the dough. I like honey better for the flavor, and the tops get more golden, but sugar is totally fine.
How do I make a double batch of Dinner Rolls?
Change the servings in the recipe card to 48, and it doubles everything for you, yeast too. Then you bake them in two 9×13-inch pans.
More Homemade Rolls and Breads to Try
If you love these, here are a few more soft breads and buns to try.

Watch Marina Make These Dinner Rolls
Made this recipe?
Please leave a ⭐⭐⭐⭐⭐ star rating and a comment below.
It helps other readers find it, and I love reading every single one.
Homemade Dinner Rolls Recipe (Video)
Ingredients
Dinner Roll Dough
- 4 cups (600 g) bread flour or all-purpose, 1 cup = 150 g (Note 1)
- 2 tsp (10 g) kosher salt Morton
- 4½ tsp (14 g) instant yeast or active dry, like Platinum (2 packets)
- 1⅓ cups (320 ml) whole milk warm (90°F to 100°F, like warm bath water)
- ¼ cup (85 g) honey or granulated sugar
- 1 large (50 g) egg room temperature
- 2 large (36 g) egg yolks room temperature
- 4 Tbsp (57 g) unsalted butter room temperature, softened
Milk Bath and Topping
- ½ cup (120 ml) whole milk for the milk bath
- 2 Tbsp (28 g) butter unsalted or salted, melted, for brushing
- flaky salt for sprinkling, skip with salted butter
- 1 Tbsp (21 g) honey optional, for honey butter
- 1 small garlic clove optional, pressed, for garlic herb butter
- 1 Tbsp fresh parsley optional, finely chopped, for garlic herb butter
Instructions
Make the Dough
-
Proof the yeast. Warm 1⅓ cups whole milk to 90°F to 100°F, like warm bath water. Stir in 4½ tsp instant yeast and 1 tsp of the honey, and let it sit about 10 minutes, or until it foams up. A tall, fluffy foam means strong yeast (Note 2).
-
Add the eggs. Whisk in the rest of the honey, 1 large egg and 2 large egg yolks.
-
Mix the dough. Whisk 4 cups bread flour and 2 tsp kosher salt in a large bowl. Pour in the milk mixture, then add the 4 Tbsp unsalted butter (use room temperature butter, Note 3). Stir into a rough, shaggy dough.
-
Knead.
In a stand mixer: knead with the dough hook on low (speed 2) for 20 minutes OR until the dough stops sticking to the sides of the bowl and looks smooth and elastic. Don’t mix past that point, or your dinner rolls will come out dense and tough from overworked gluten (Note 4).
Quick, by hand: knead on the counter for 2 to 3 minutes.
Either way, it should feel soft and a little tacky (Note 5). -
First rise. Shape into a ball, set it in a greased bowl, cover, and let it rise somewhere warm until doubled, 1½ to 2 hours (Note 6). If it more than doubles, punch it down and keep going (Note 7).
Shape and Bake
-
Divide. Punch the dough down gently and cut it into 24 pieces, about 50 g each if you want them all exactly the same size. Use a kitchen scale if you love precision (Note 8).
-
Shape. Roll each piece into a tight, smooth ball. Set them in a 9×13-inch pan lined with parchment paper, 4 rows of 6.
-
Second rise. Cover with plastic wrap and let rise until puffy and touching, about 1 hour. Heat the oven to 350°F about 15 minutes before the rise is done (Note 9).
-
Bake with a milk bath. Bake 10 minutes, then pour ½ cup whole milk over the tops. Bake 20 to 25 minutes more, until deep golden and 190°F in the center roll, OR until a toothpick in the center comes out clean. Keep the oven closed before the milk pour.
-
Brush with butter. Brush the hot rolls with 2 Tbsp butter. Pick your finish (Note 10):
Classic: sprinkle with flaky salt, or use salted butter and skip it.
Honey butter: stir 1 Tbsp honey into the butter.
Garlic herb butter: stir 1 small garlic clove and 1 Tbsp fresh parsley into the butter.
Recipe Notes
- Note 1 - Measuring flour: 1 cup = 150 g. Weigh it if you can. All-purpose works too. You might just need to add a little more flour.
- Note 2 - Yeast check at 10 minutes: a tall, fluffy foam means strong yeast. Slightly foamy means it is active, but the rise may be slow, so plan on extra time. No foam at all means the yeast is dead or very old. Start over with a fresh packet.
- Note 3 - Room temperature butter: take it out of the fridge when you take out the eggs, so it’s soft enough to mix into the dough.
- Note 4 - Mixer or by hand: in the mixer, keep kneading until the dough stops sticking to the sides of the bowl, then stop. If you keep mixing after that, you overwork the gluten, it starts ripping, and you can end up with a denser dough. By hand, stir the dough together, knead it on the counter for just 2 to 3 minutes and go straight to the first rise. The mixer gives the softest, fluffiest rolls, but this dough works either way, so pick what fits your day.
- Note 5 - Tacky, not sticky: tacky means the dough grabs your finger for a second when you touch it, then lets go clean, without leaving dough stuck to your skin. That’s what you want, and it firms up more as it rises. If it sticks to your fingers like glue, add flour 1 Tbsp at a time.
- Note 6 - Warm spot: turn the oven to 350°F for 30 to 50 seconds, turn it off and switch the light on. It holds about 75°F to 78°F.
- Note 7 - Over-risen dough: a little past double is fine. Tripled or sunk still bakes, just flatter. A sour or boozy smell means it went far too long, so keep the second rise short.
- Note 8 - No scale: roll the dough into a log, halve it three times for 8 pieces, then cut each into 3.
- Note 9 - Poke test: press a floured fingertip into a roll. Springs right back: 10 more minutes. Fills in slowly: bake. Stays dented: bake right away.
- Note 10 - Butter toppings: Classic: unsalted butter and a sprinkle of flaky salt, or salted butter and no flaky salt. Honey butter: stir 1 Tbsp honey into the 2 Tbsp melted butter. Garlic herb butter: stir 1 small pressed garlic clove and 1 Tbsp finely chopped fresh parsley into the melted butter.
- Note 11 - Slow overnight rise: use ¼ tsp yeast instead of the full amount. Knead in the evening and let the dough rise overnight in a cool room, 67°F to 69°F, about 14 hours. Shape in the morning, rise about 1 hour, and bake.
- Note 12 - Night before, in the fridge: shape, let rise 30 minutes, spray with nonstick spray, cover and refrigerate. In the morning, let them double on the counter, then bake as written.
- Note 13 - Bread machine: milk mixture first, then flour and salt, yeast last. Run the dough cycle (about 1½ hours), then shape, rise and bake as written.
- Note 14 - Storage: airtight at room temperature up to 2 days, fridge up to a week, freezer up to 2 months. Reheat covered with foil at 350°F for 5 to 7 minutes, or 10 to 15 seconds in the microwave.
- Note 15 - Double batch: set the servings to 48. Everything doubles, yeast included. Bake in two 9×13-inch pans.

Thank you for following me on Instagram, Facebook & Pinterest!
Hashtag your photos #LetTheBakingBeginBlog so I can see your creations and for a chance to be featured!
Marina | Let the Baking Begin